Creating viewings in Renti allows you to host a viewing for a property with full flexibility of the number of people you wish to attend, how you can communicate viewing updates, and many more options.
This tutorial will guide you through the process of creating a viewing.
Resources
- Renti Help Centre contains further resources on viewings to allow you to get up to this point.
- A video tutorial of the information in this tutorial is linked below if needed.
- Advertise your chosen property through your agency's normal process and you will see your property appear - click on it.
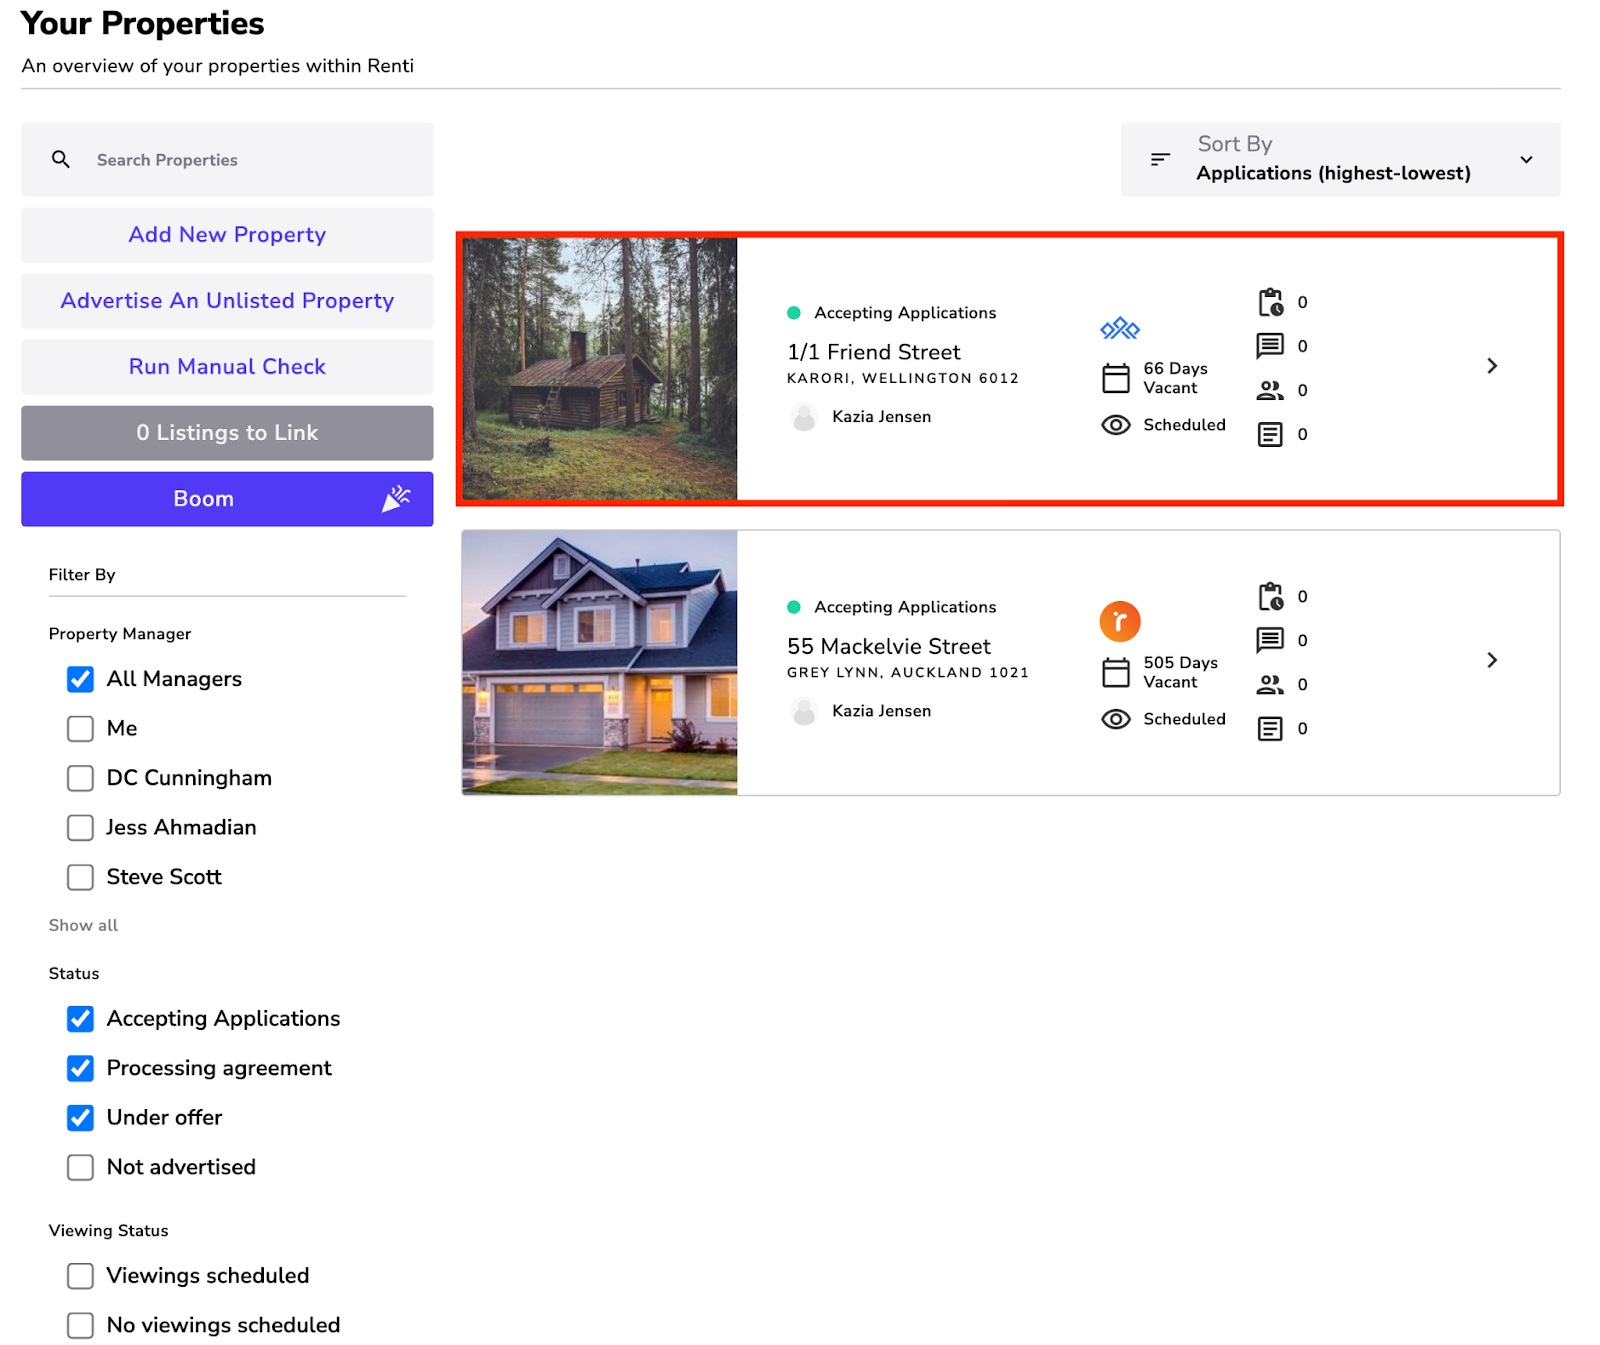
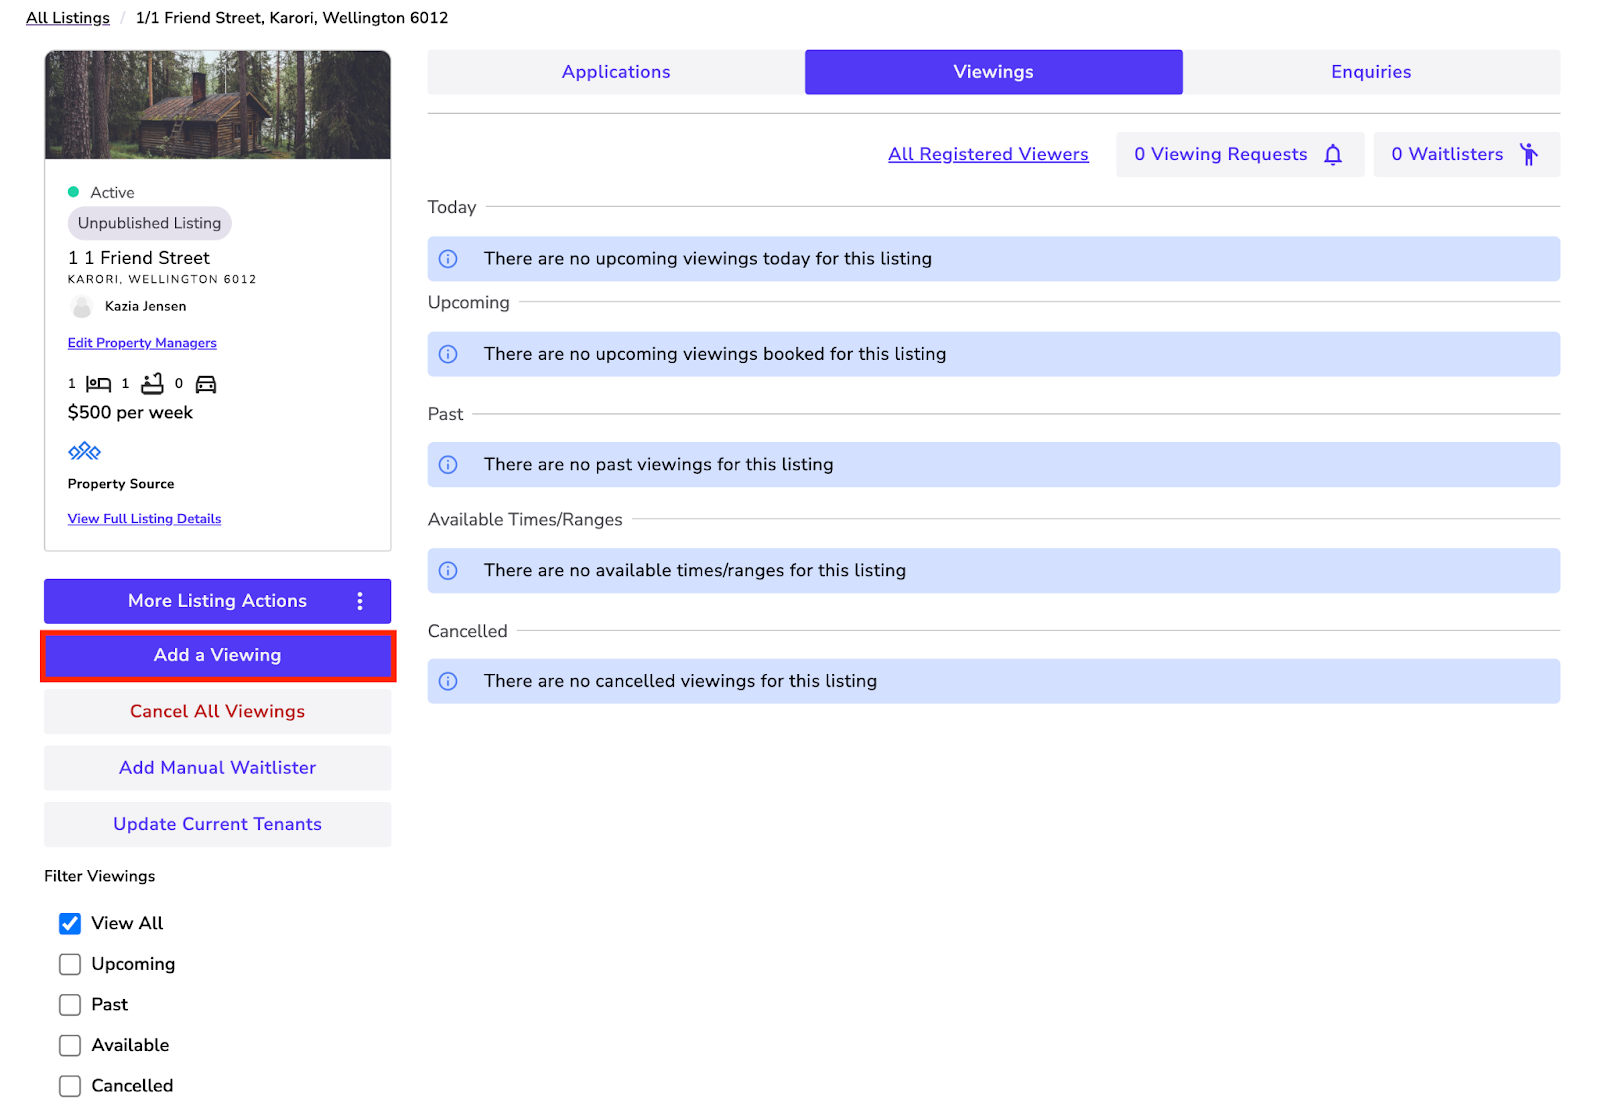
- Click on the ‘Viewings' tab.
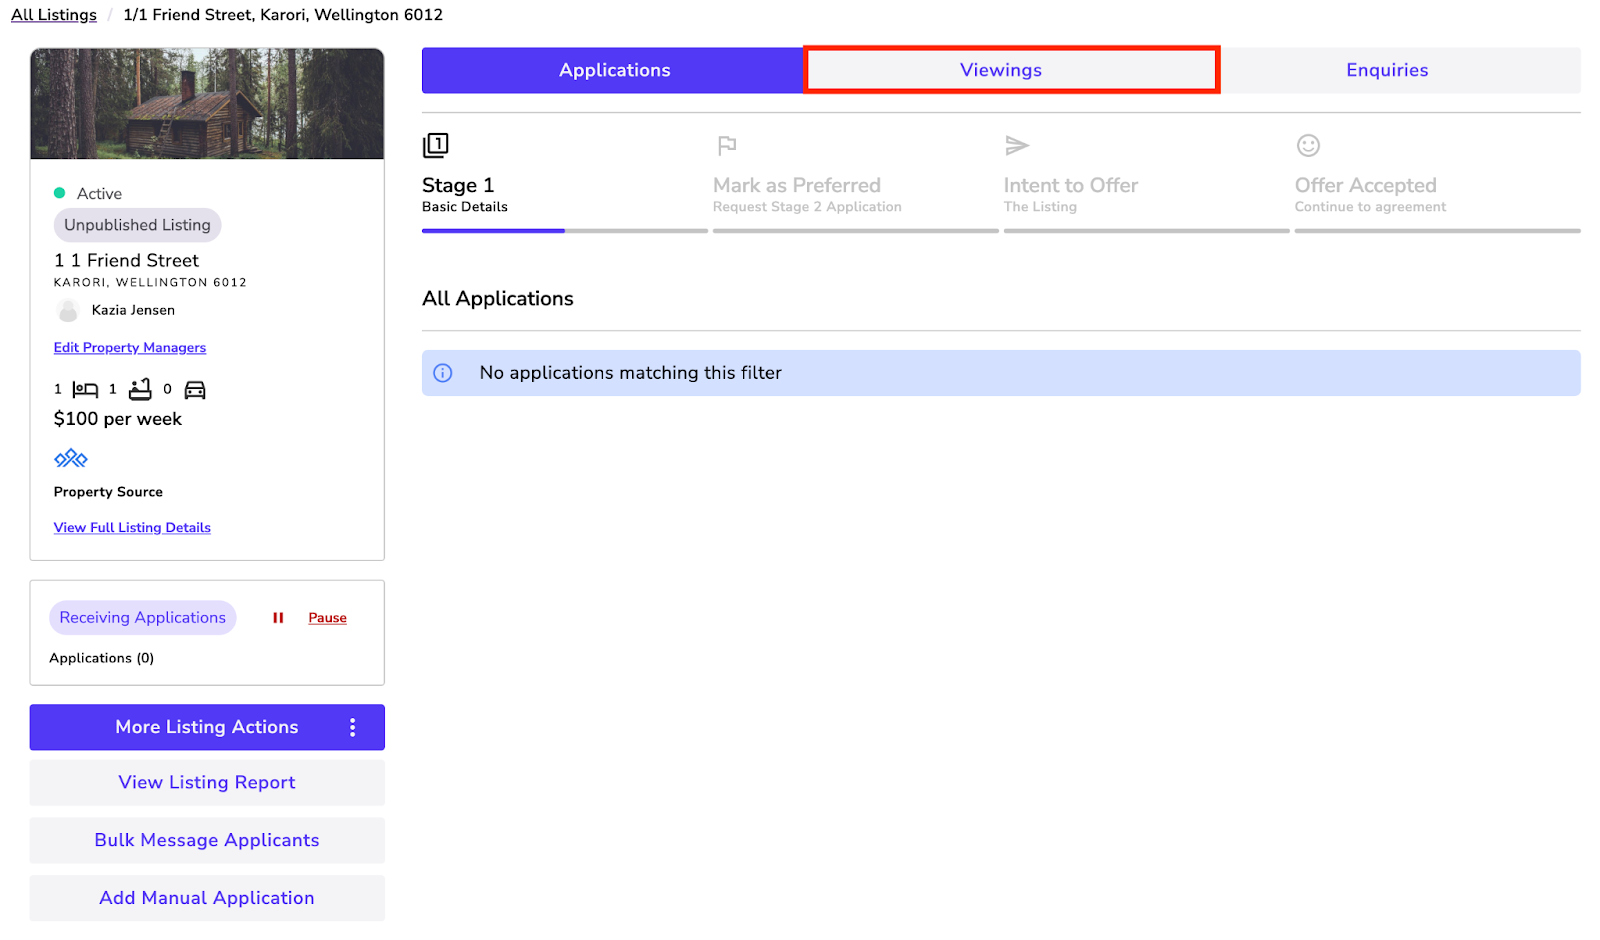
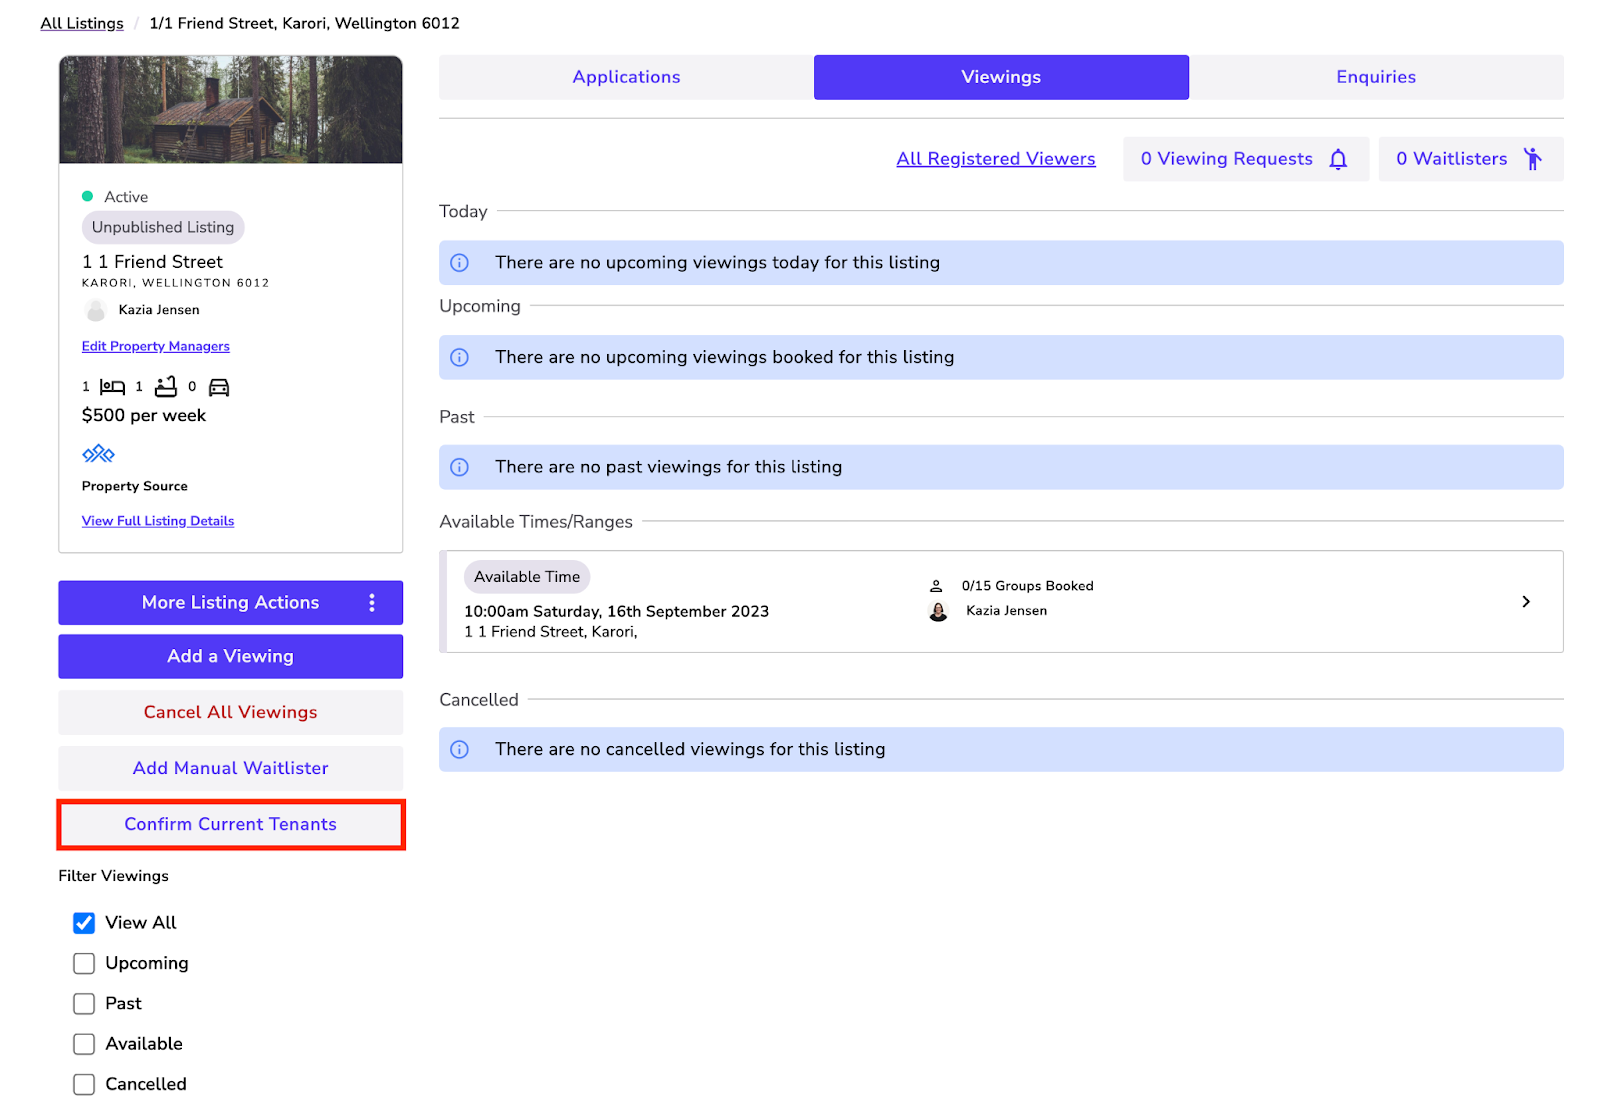
You can confirm the current tenants before creating viewings to notify them of new and upcoming viewings.
- Click on the ‘Confirm Current Tenants' button.
- Enter your current tenants' contact details.
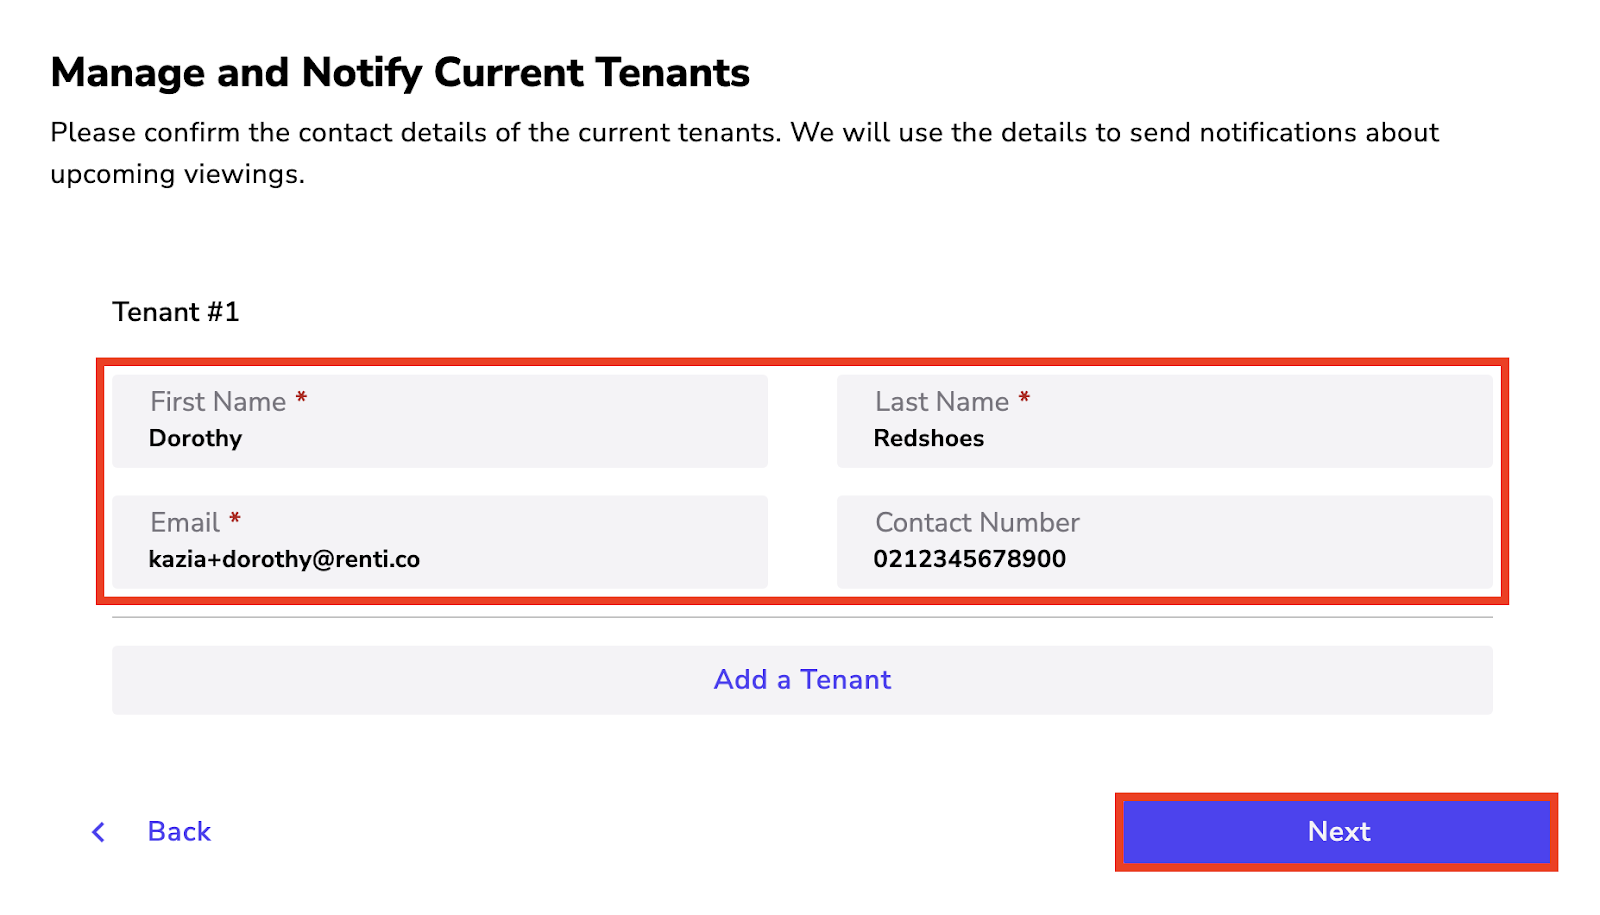
- Click the ‘Add a Tenant' button to add more people, if needed.
- Click the ‘Next' button when you are done.
- The button will now change to ‘Update Current Tenants'.
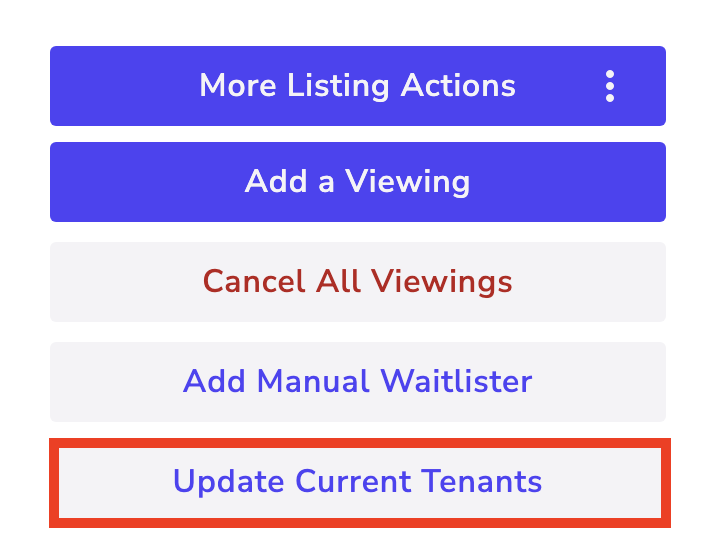
- In the Viewings section, click on the ‘Add a Viewing' button.
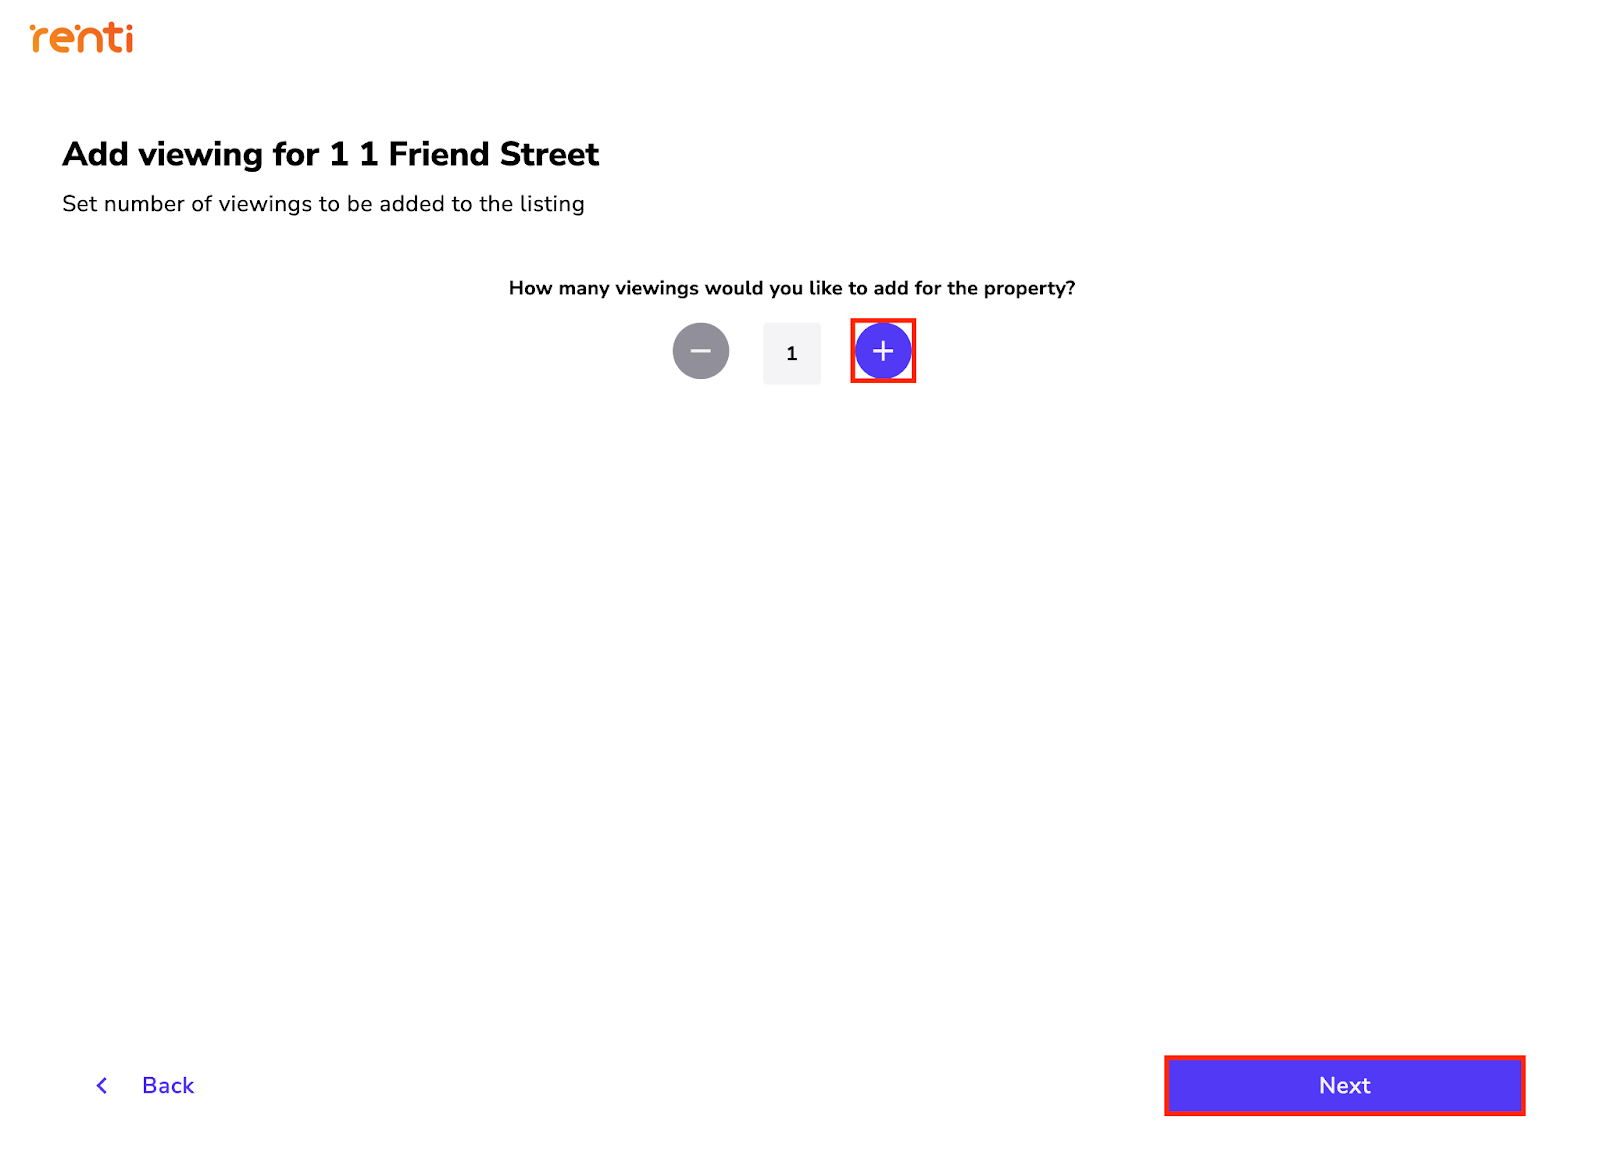
- Select the number of viewings you want to create by using the
 and
and  to add the buttons.
 - Click the ‘Next' button when you are done.
- Select what type of viewing you would like to create.
- 🕝Set a specific time - This will create one viewing for the time specified.
- 📆Set an open time range - This will create an available time range where you can specify the start and the end time that you are available. When the first viewer books in, they can choose whichever time suits them within the specified time range. Any viewers that book in afterwards can only see times to book in just before and after the already fully booked viewing time.
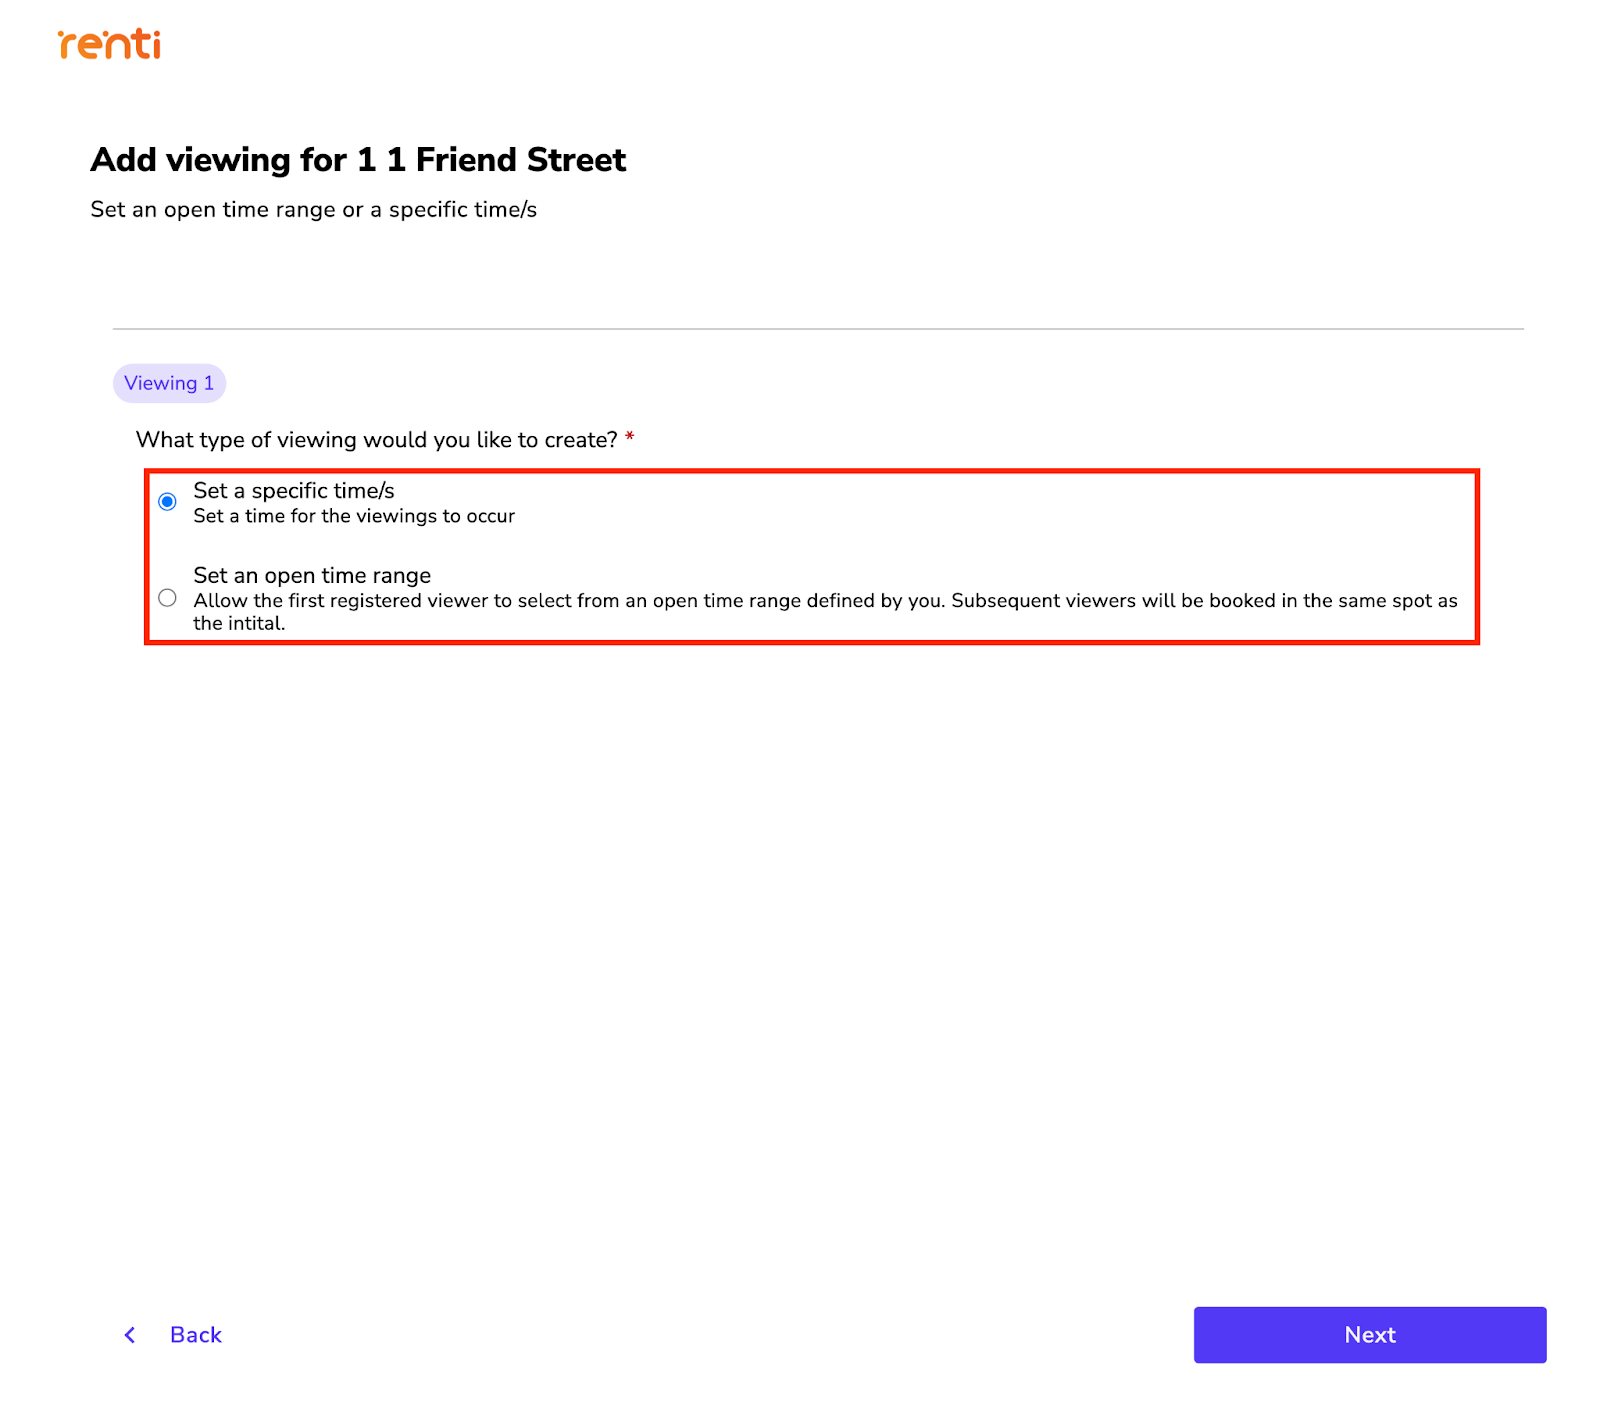
- Click the ‘Next' button.
- For each viewing you want to create, you will need to complete the following information:
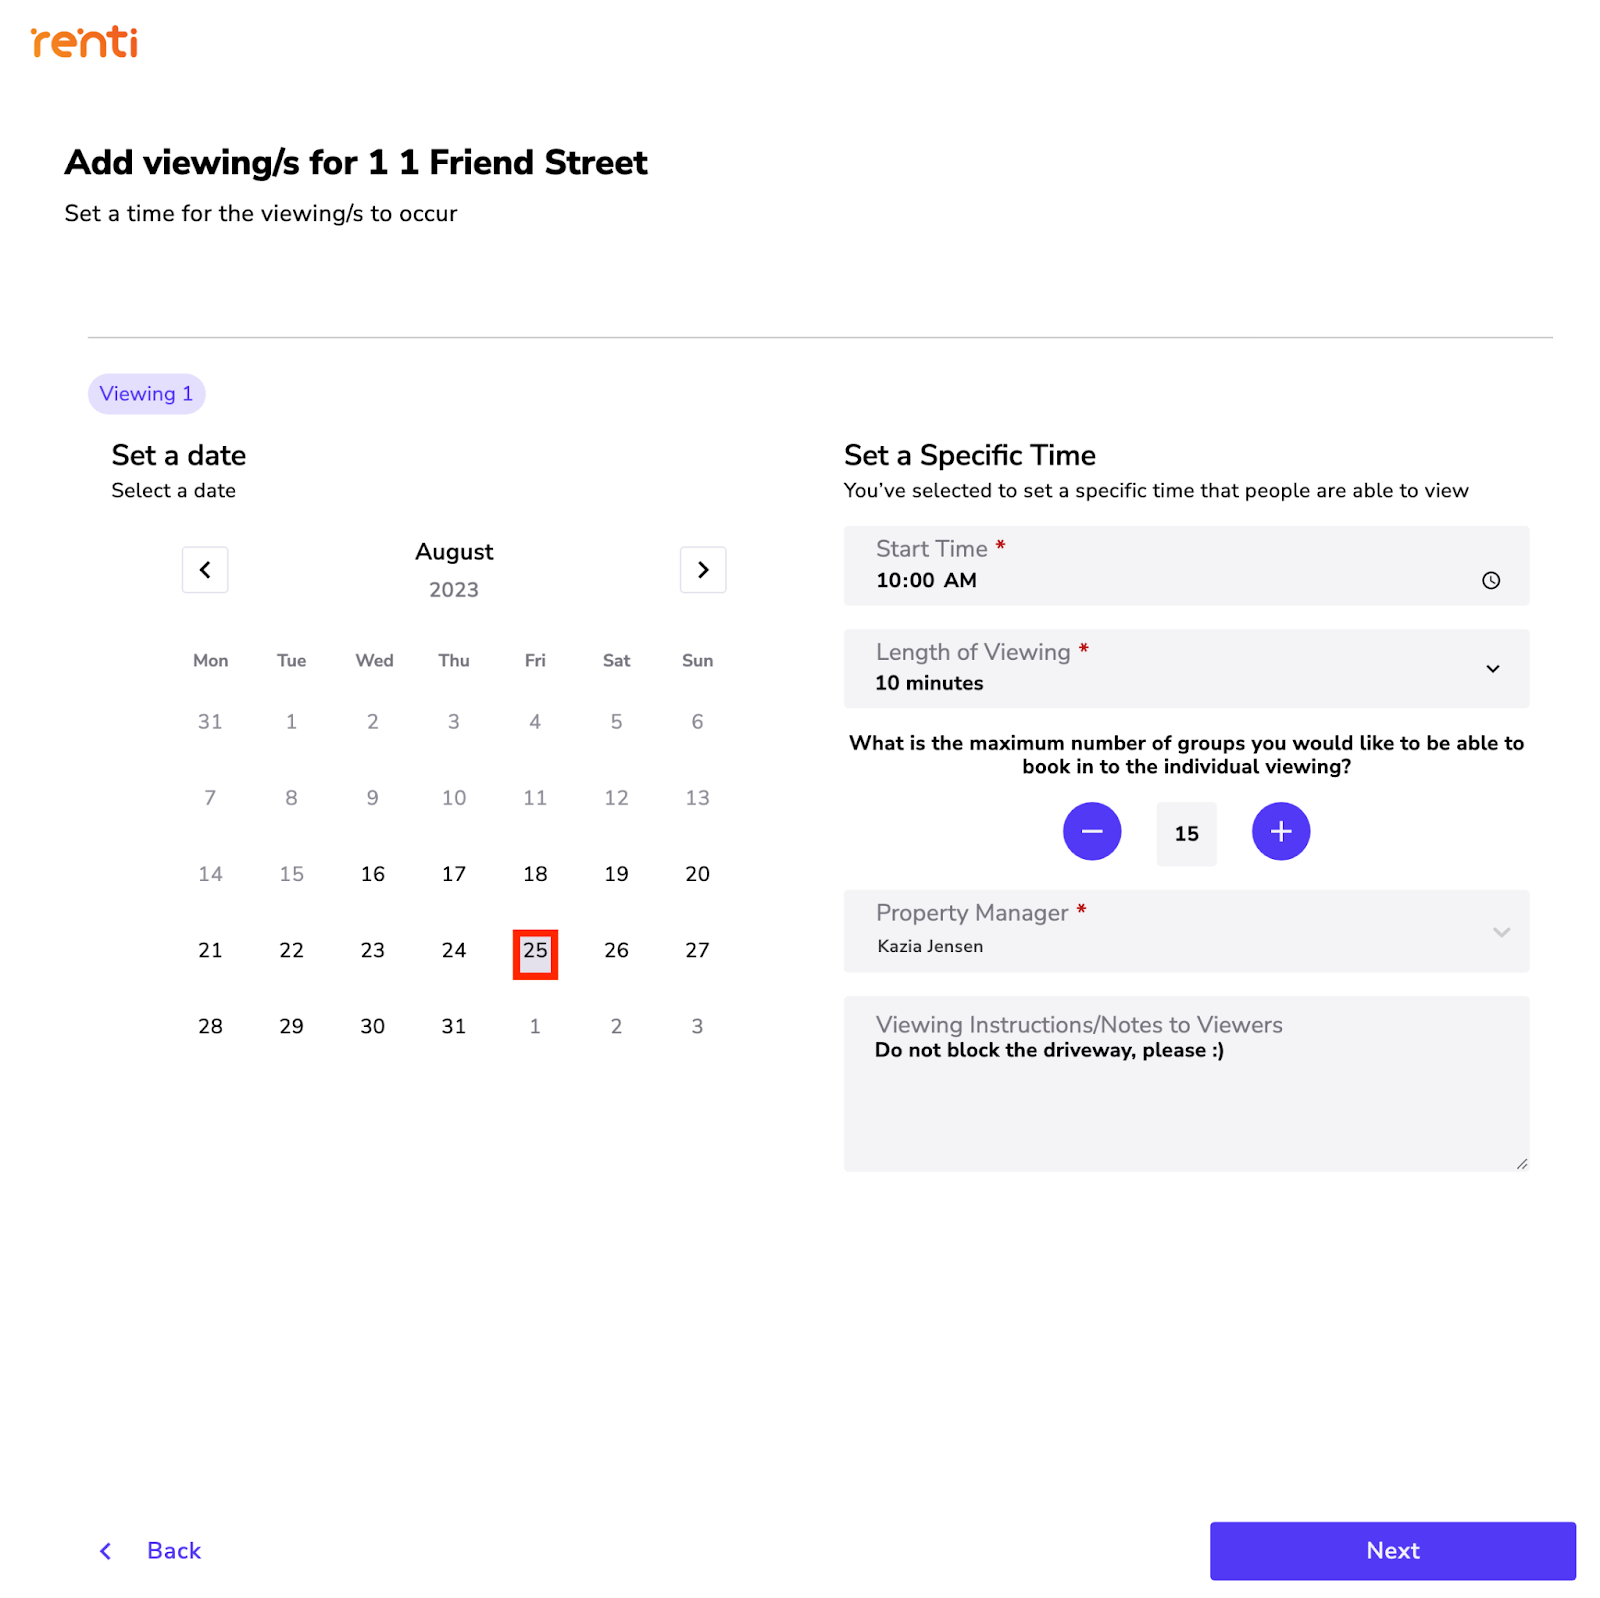
- Select a date for the viewing by clicking on the specific date on the calendar.
- Enter the start time for the viewing.
- Specify the length of the viewing, you have the option to modify this by using the dropdown menu.
- Set the maximum number of viewing groups allowed, you can modify this by using the and buttons.
- The property manager for the viewing will automatically be filled with the user who is creating the viewing, you can modify this by using the dropdown menu.
- Add any viewing notes you want to be sent to the viewers upon booking; this can be left blank.
- Click the ‘Next' button when you are finished.
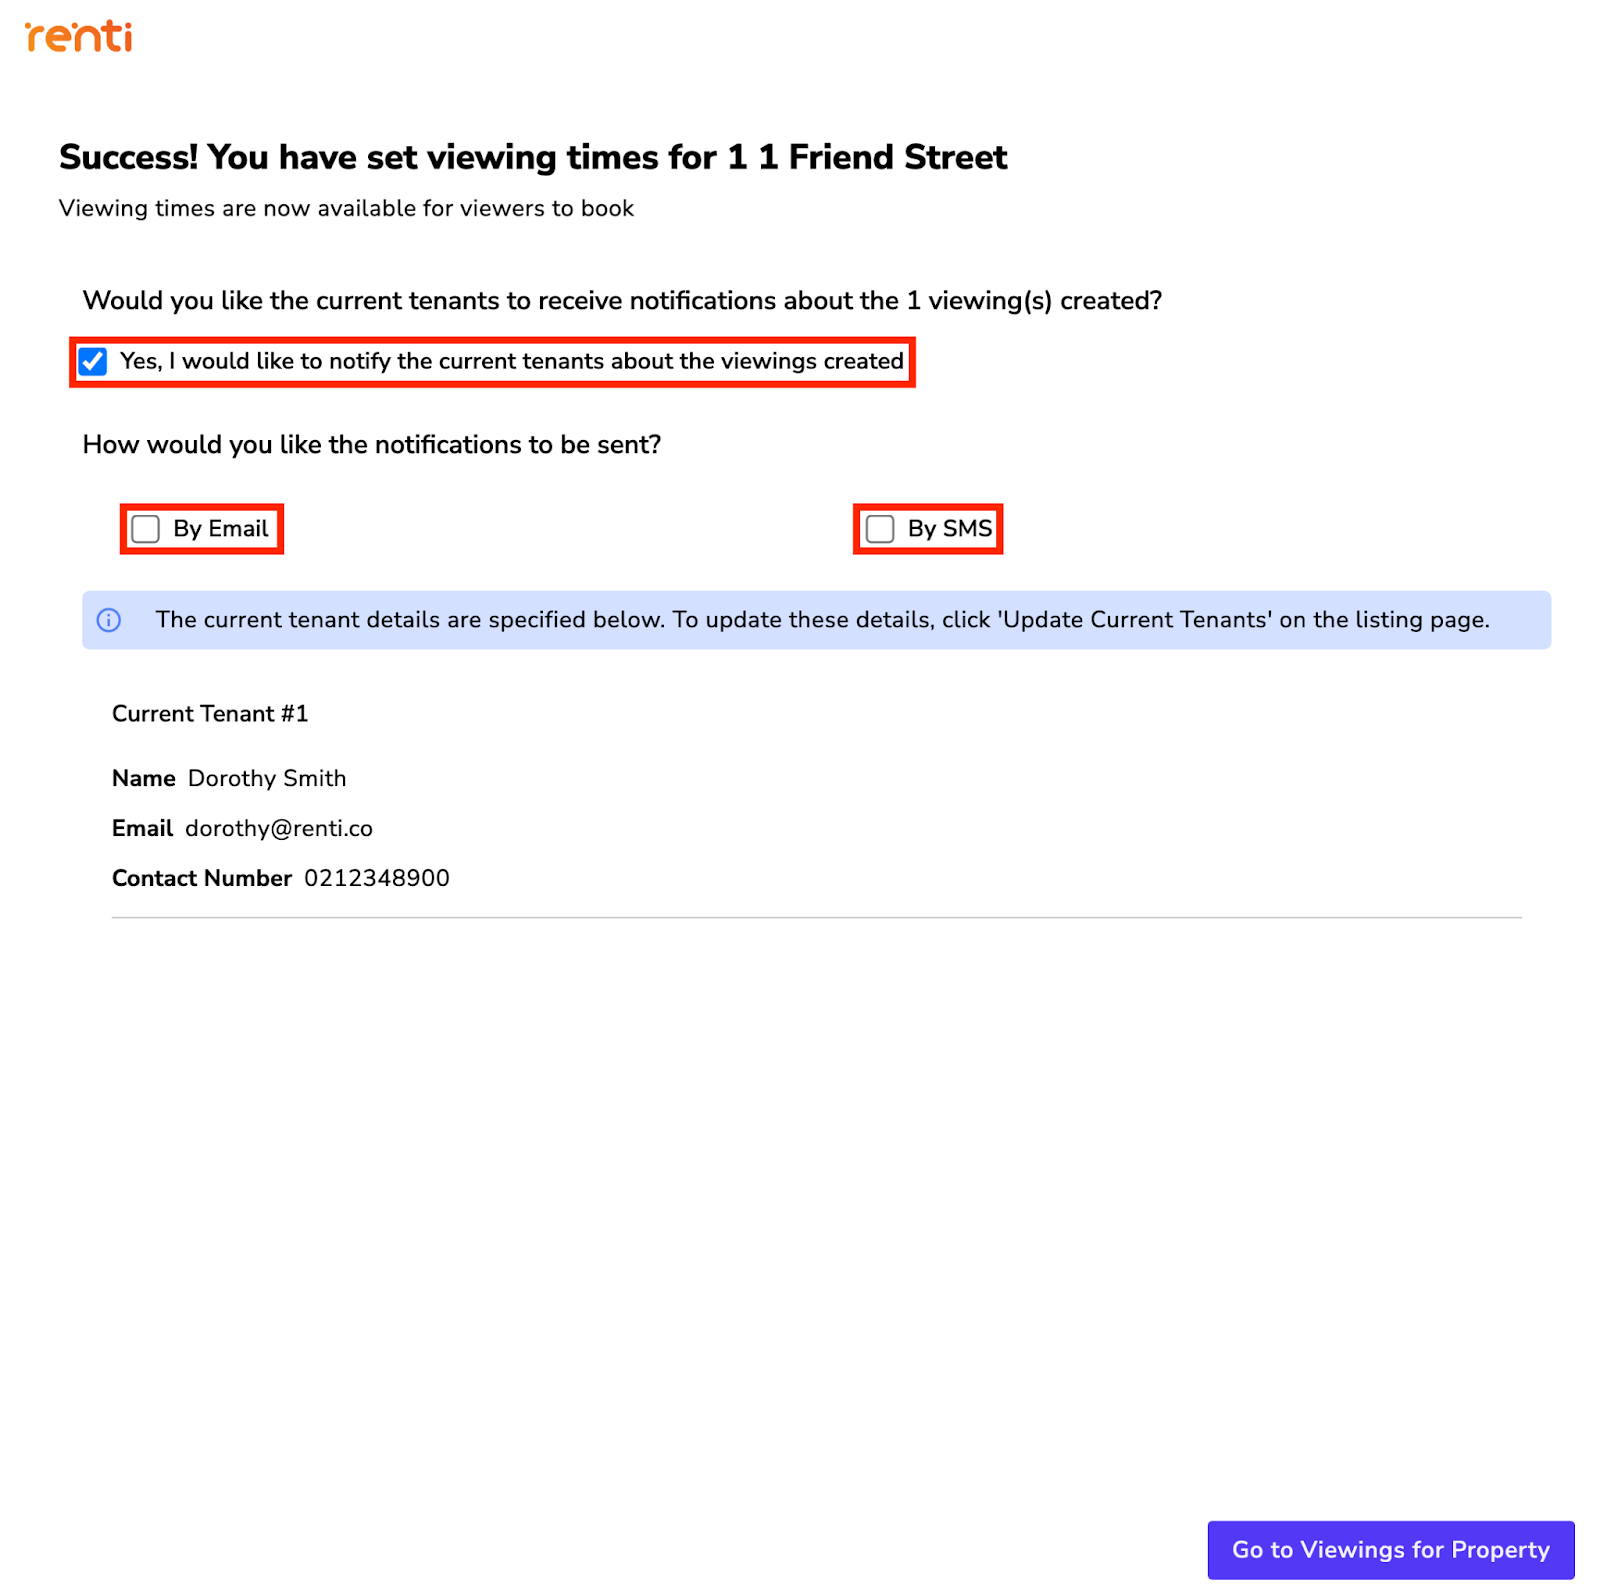
If you have confirmed the current tenant details, on the final page of creating your viewing, you can notify them about the new viewing:
- Tick ‘Yes', if you would like to notify them, otherwise, leave it unticked.
- Select what form of communication you would like to use - Email and/or SMS.
Click ‘Go to Viewings for Property' once done.
The newly created viewing will be shown on your listing on the viewings page. There are different statuses that the viewing can be:
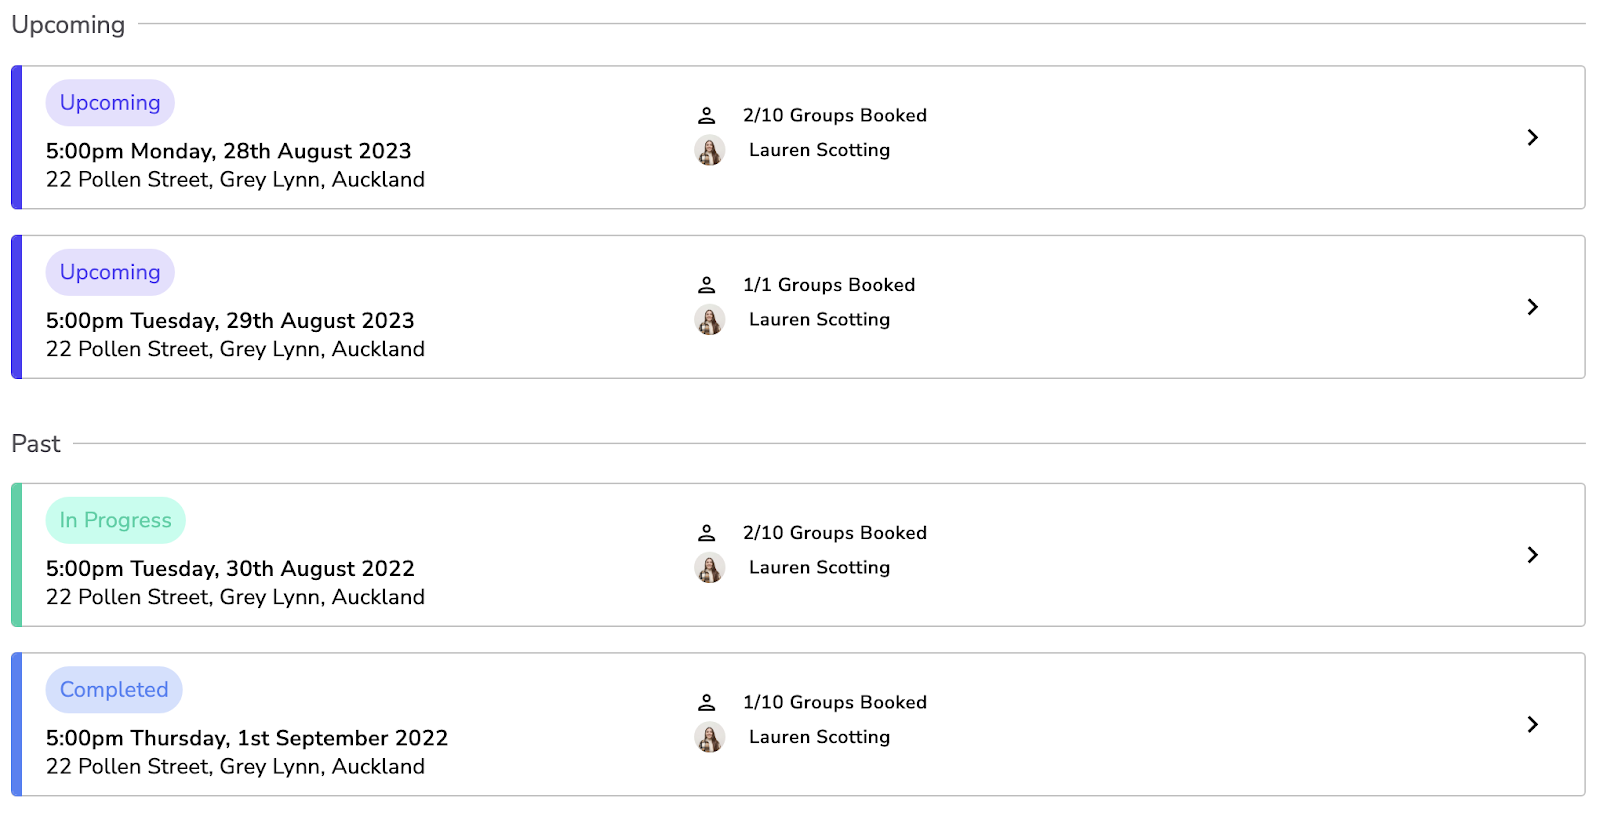
- ⬜Available Time/Range - When the viewing is first created, it will appear under this status as a placeholder.
- 🟪Upcoming - As soon as someone has booked into the viewing, the viewing will move and appear under this status
- 🟩In Progress - This is when the viewing has been started.
- 🟦Completed - This is when the viewing has ended and completed.
- 🟥Cancelled - This is when the viewing has been cancelled.