Creating a Tenancy Agreement in Renti is easy. Much of the information is automatically filled in. This helps you avoid double-handling of work and saves time.
This tutorial will guide you through the process of creating a Tenancy Agreement.
Resources
- Renti Help Centre contains further resources to allow you to get up to this point.
- A video tutorial of the information in this tutorial is linked below if needed.
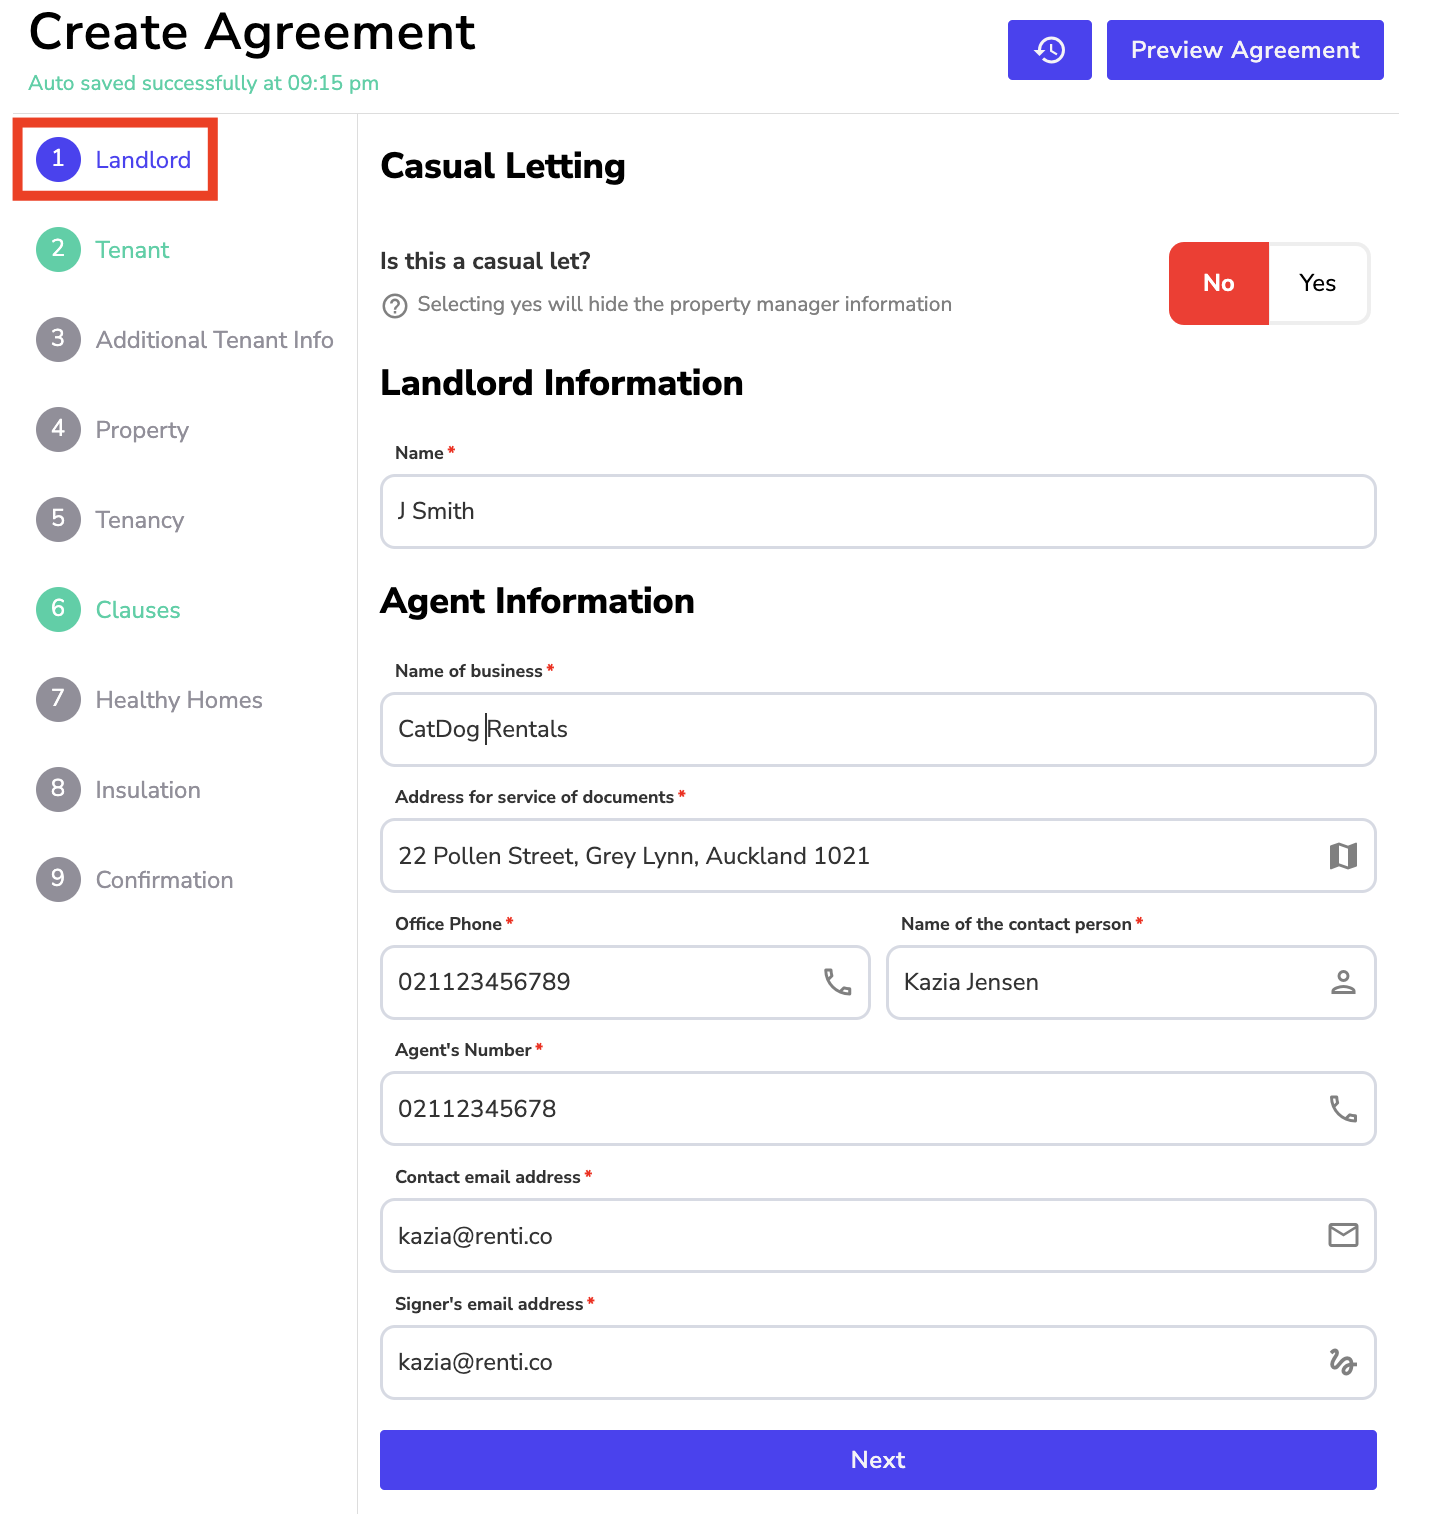
✅ Casual Letting:
- Is this a casual let? (Selecting ‘Yes' will hide the property manager's information).
✅ Landlord Information:
- Enter the landlord's name.
✅ Agent information:
- Name of the business,
- Address for service of documents,
- Office phone number,
- Name of the contact person,
- Agent's phone number,
- Contact email address,
- Signer's email address.
Once all the information has been entered, click ‘Next'.
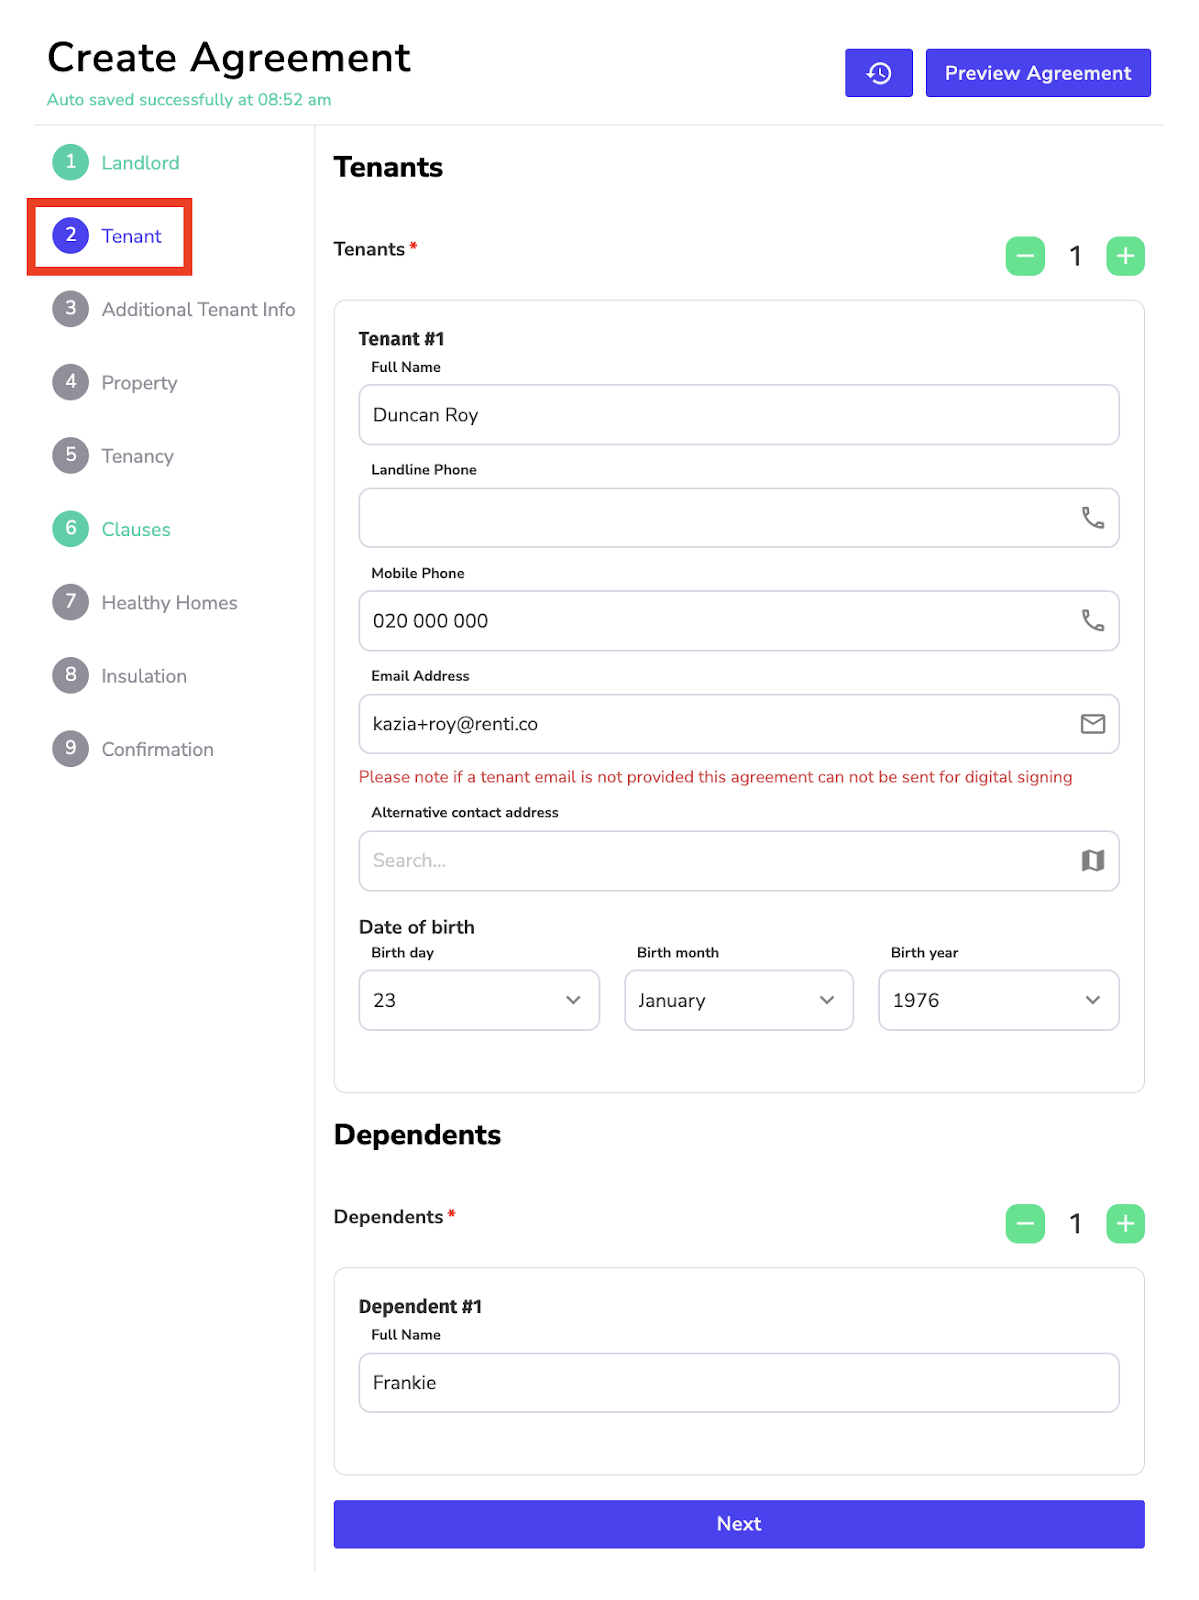
✅ Tenant information:
- Full name,
- Mobile phone,
- Email address,
- Date of birth.
✅ Dependants:
- First name.
Once all the information has been entered, click the ‘Next' button.
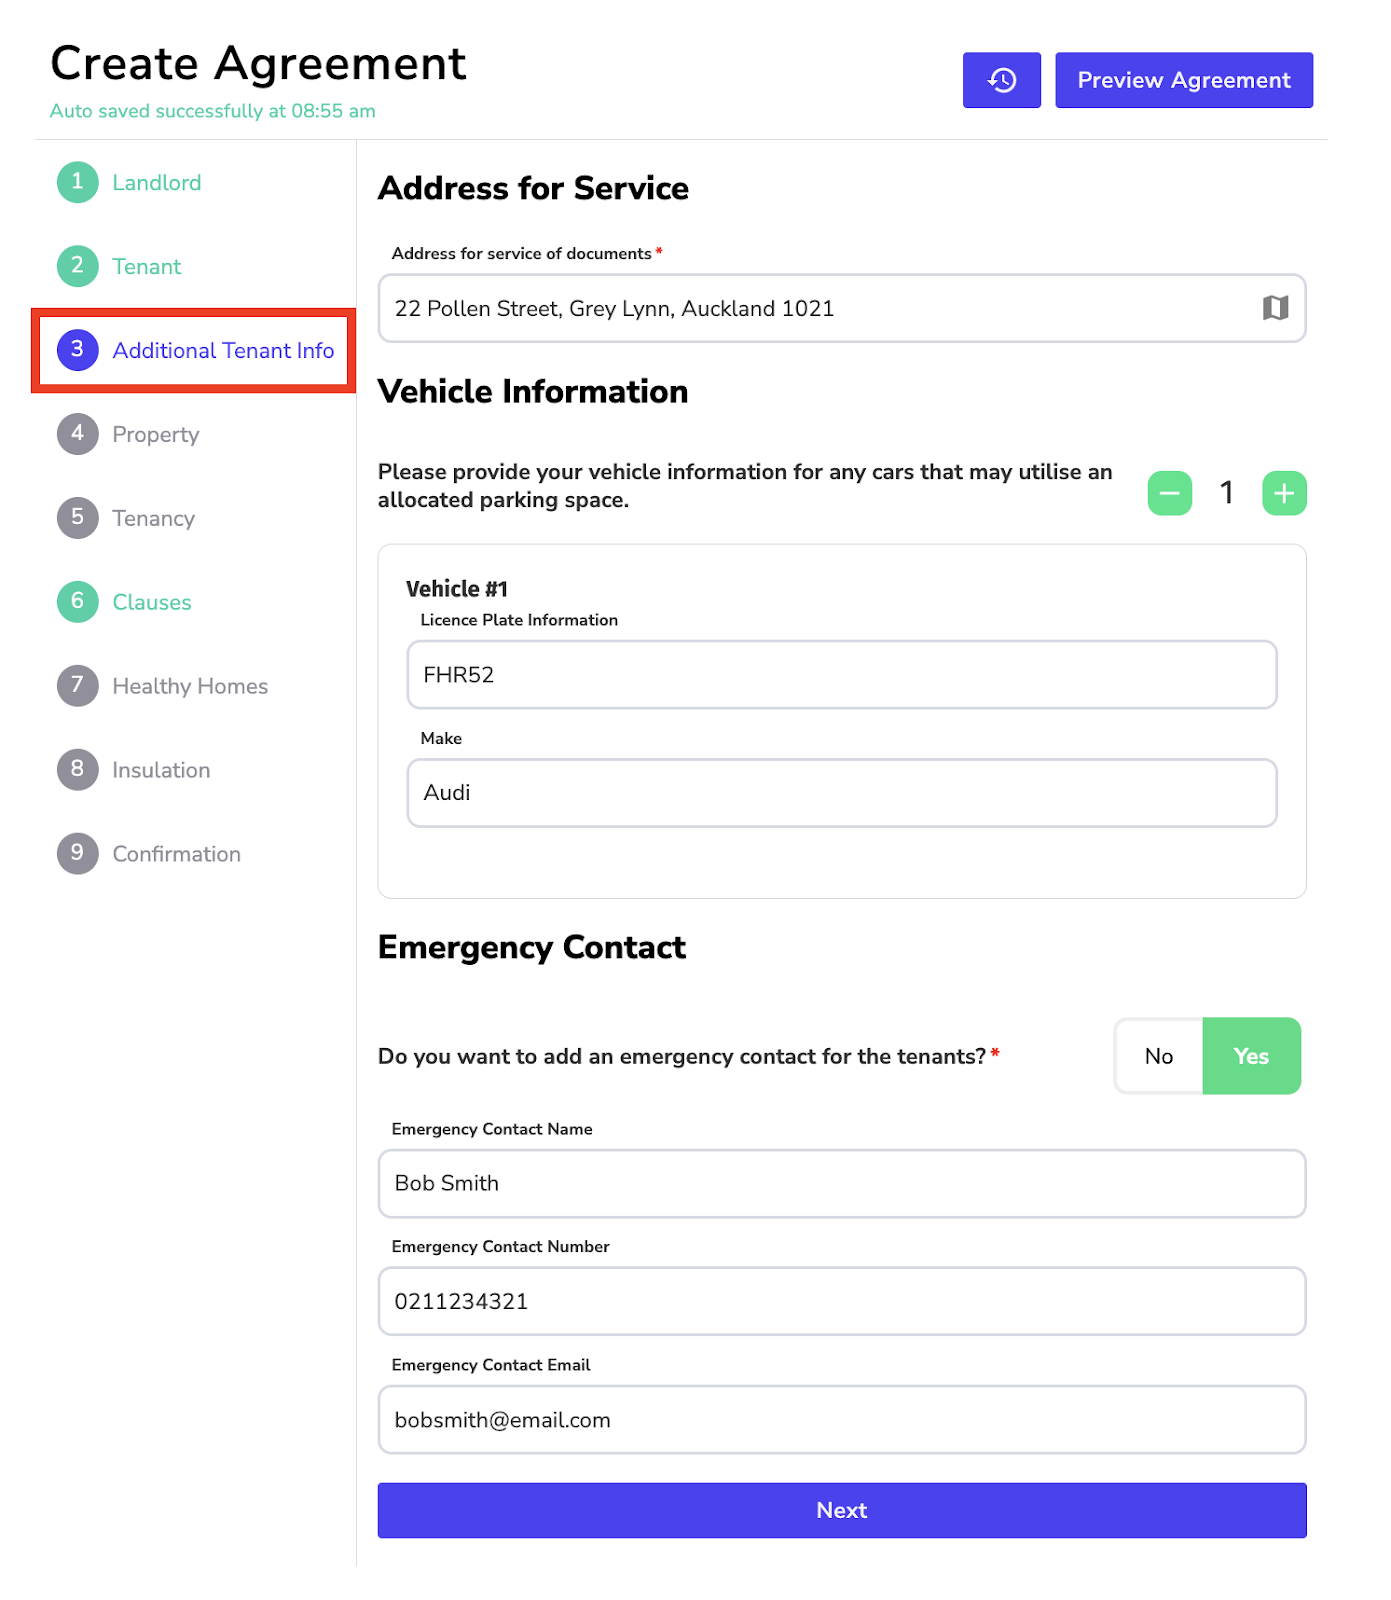
Address for Service:
- Address for service of documents.
Vehicle Information: OPTIONAL
- Use the
 and
and  to add the number of vehicles,
 - Enter the license plate information,
- Vehicle make.
Emergency Contact: OPTIONAL
- Fill in the emergency contact name,
- Emergency contact number,
- Emergency contact email.
Once all the information has been entered, click the ‘Next' button.
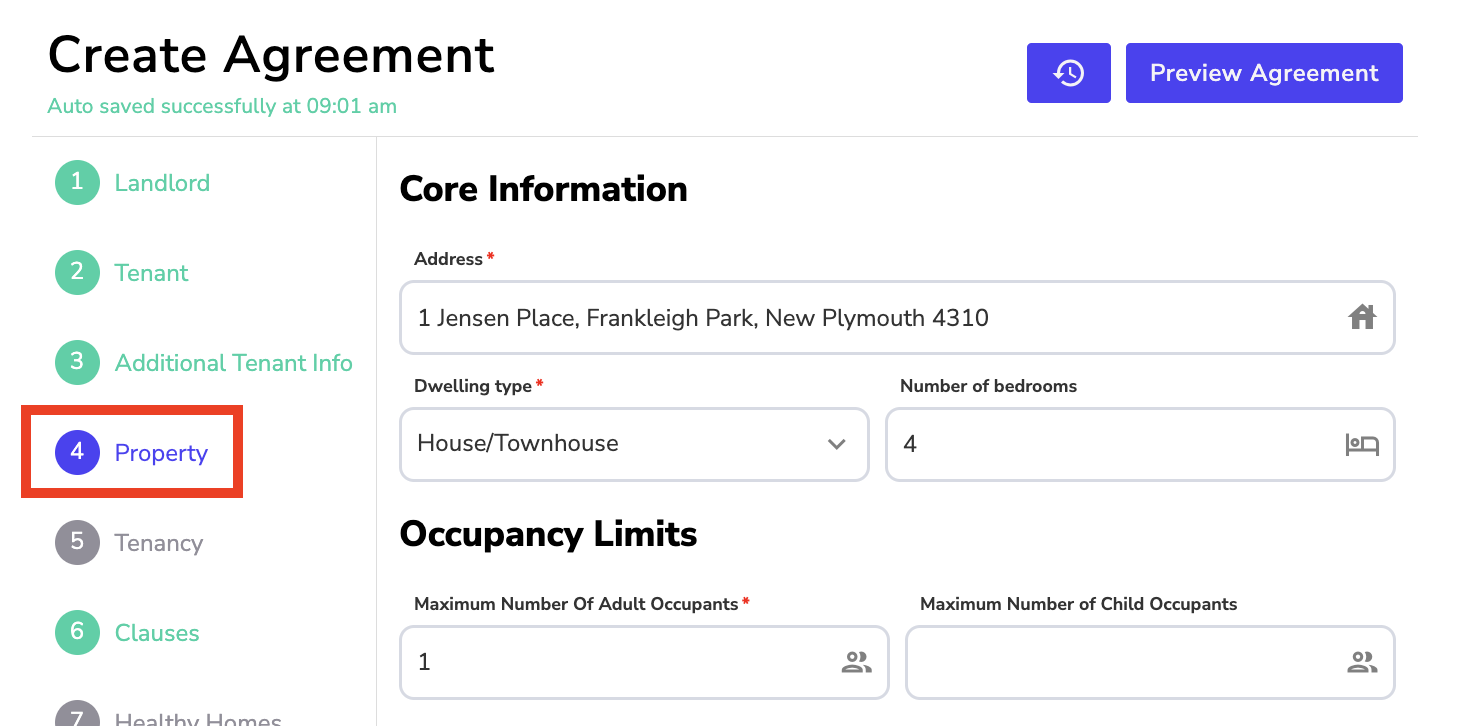
✅ Core Information:
- Property address,
- Number of bedrooms,
- Dwelling type.
✅ Occupancy Limits:
- The maximum number of adult occupants,
- Enter the maximum number of child occupants.
OPTIONAL
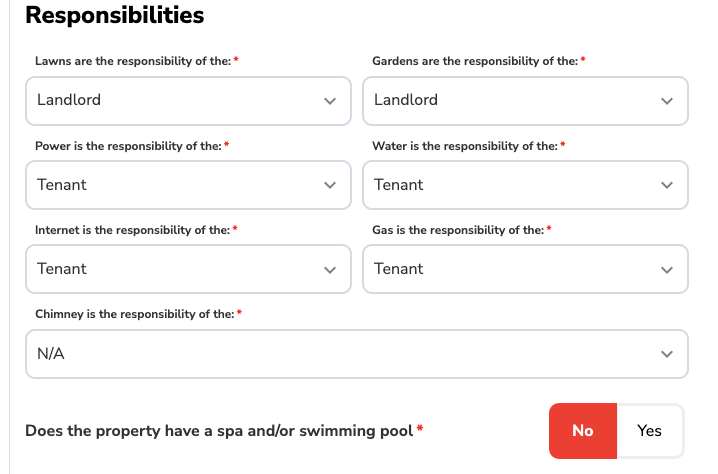
✅ Responsibilities:
- Select who is responsible for lawns,
- Gardens,
- Power,
- Water,
- Internet,
- Gas,
- Chimney.
- Does the property have a spa and/or swimming pool? Selecting ‘Yes' will include a spa/swimming pool clause in the clause section of the agreement.
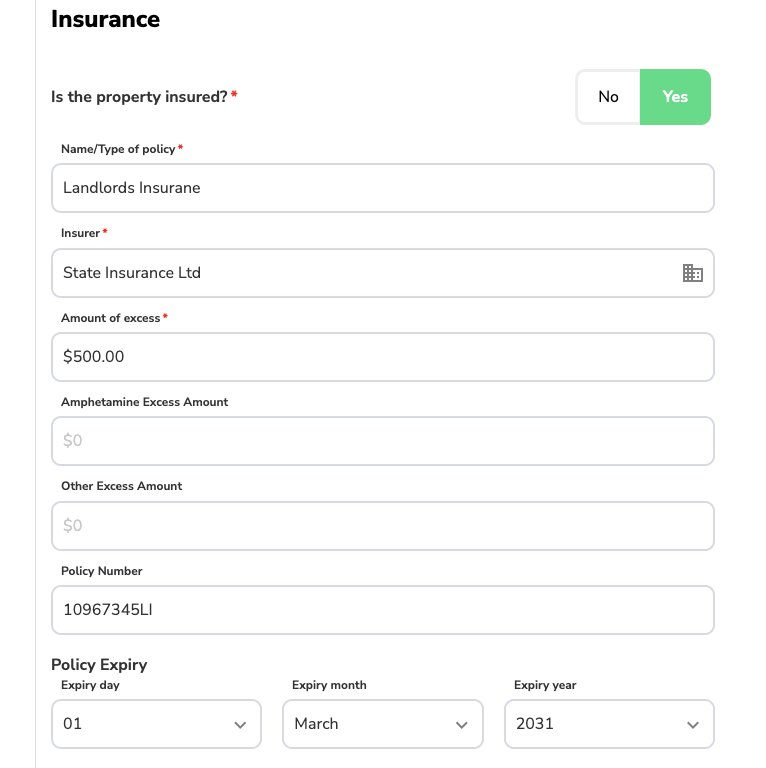
✅ Insurance:
- Is the property insured? If yes, answer the following:
- Name/Type of policy,
- Insurer,
- Amount of excess,
- Amphetamine excess amount,
OPTIONAL - Other excess amount,
OPTIONAL - Policy number,
OPTIONAL - Policy expiry date.
OPTIONAL
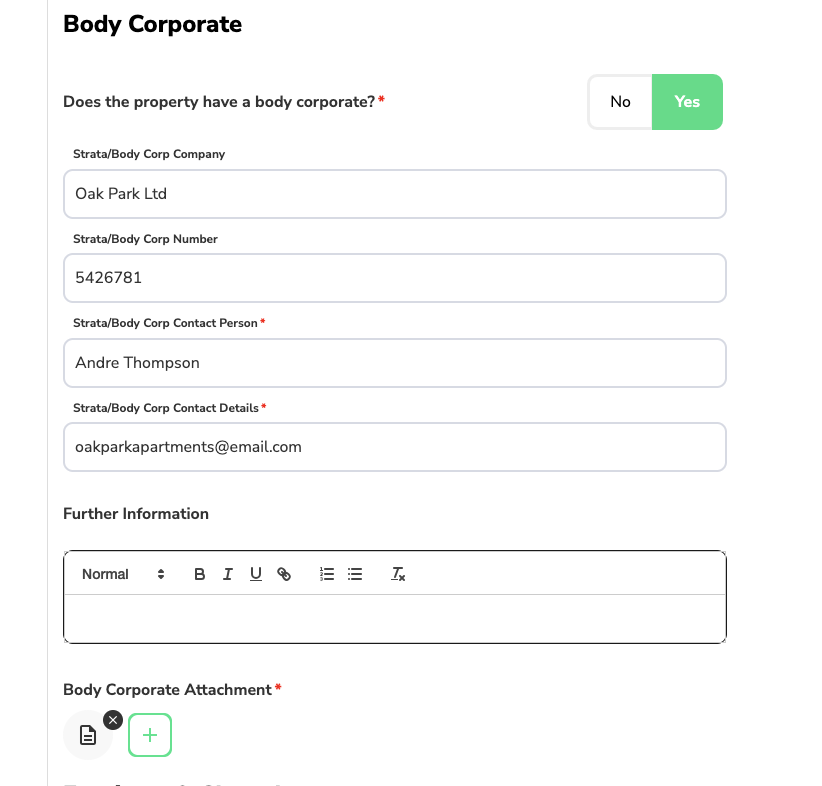
✅ Body Corporate:
- Is the property insured? If yes, answer the following:
- Strata/Body Corp company,
OPTIONAL - Strata/Body Corp number,
OPTIONAL - Strata/Body Corp contact person,
- Strata/Body Corp contact details,
- Further information,
OPTIONAL - Body corporate attachment.
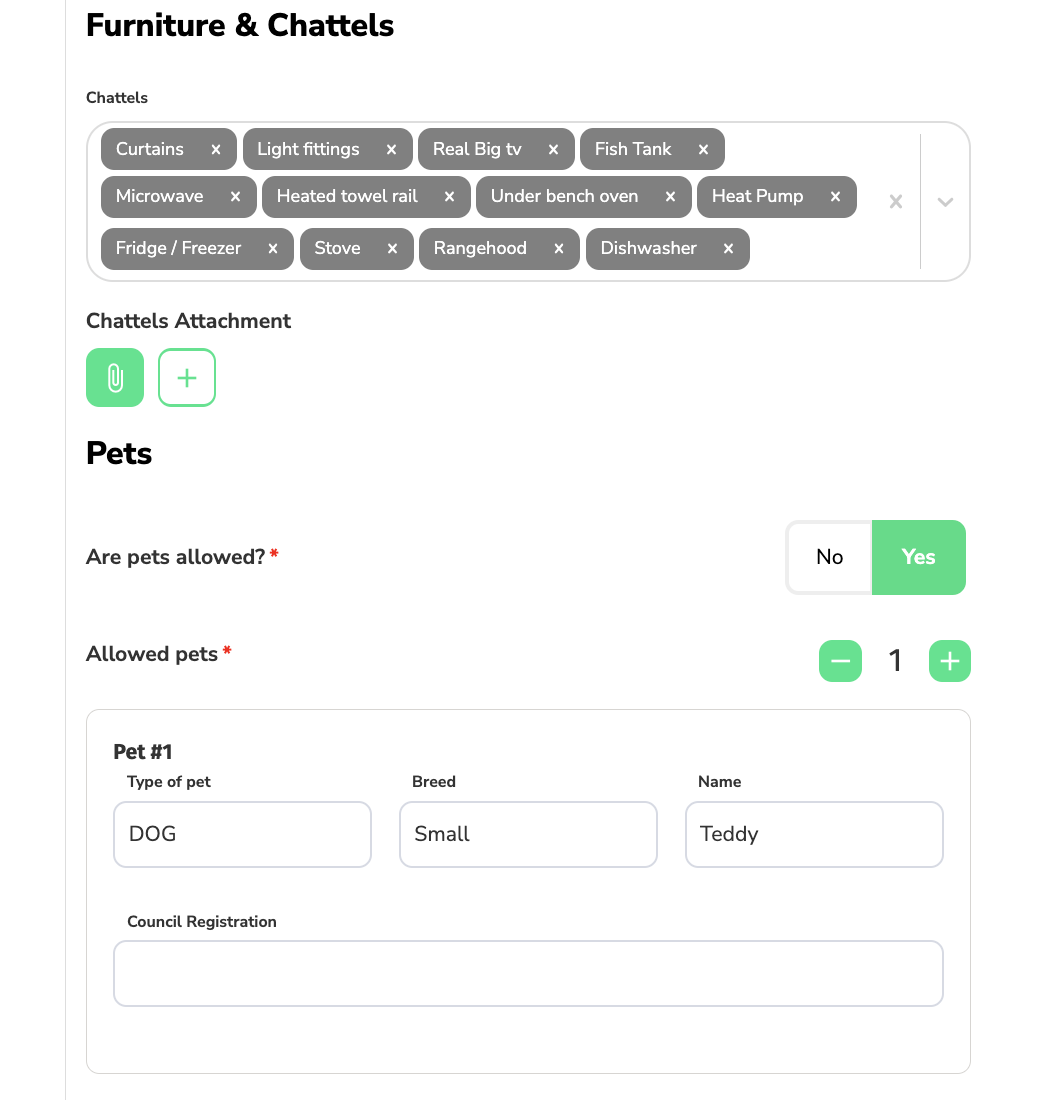
✅ Furniture & Chattels: OPTIONAL
- Select chattels from the dropdown list, enter your own or upload an attachment.
✅ Pets:
- Are pets allowed? If yes, enter the following:
- Use the and to add the number of pets,
- Type of pet,
OPTIONAL - Breed,
OPTIONAL - Pet name,
OPTIONAL - Council registration.
OPTIONAL
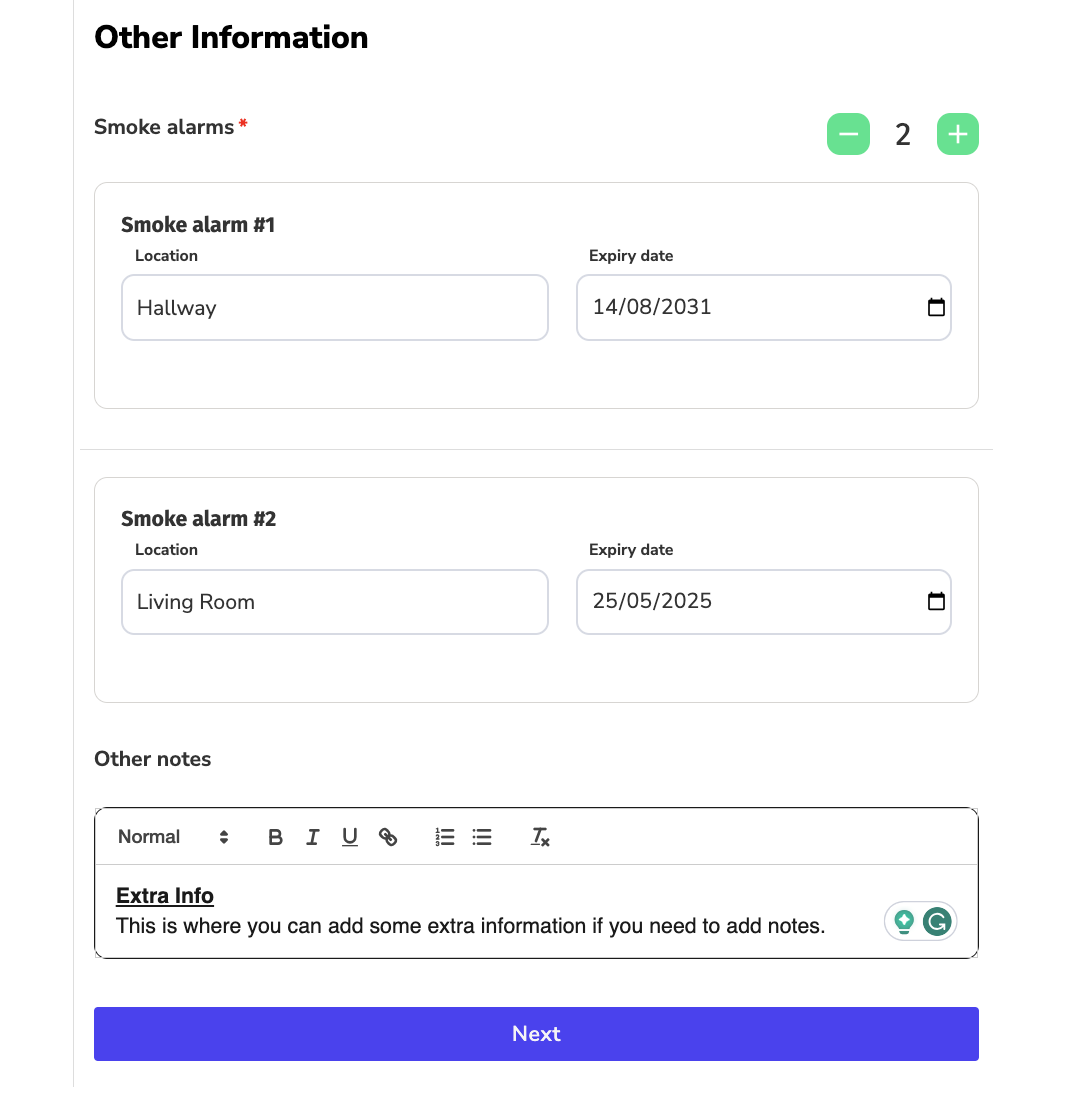
✅ Other Information:
- Enter the number of smoke alarms by using and ,
- The location,
OPTIONAL - Expiry date.
OPTIONAL - Add any other notes to be included in the tenancy agreement.
OPTIONAL
Once all the information has been entered, click the ‘Next' button.
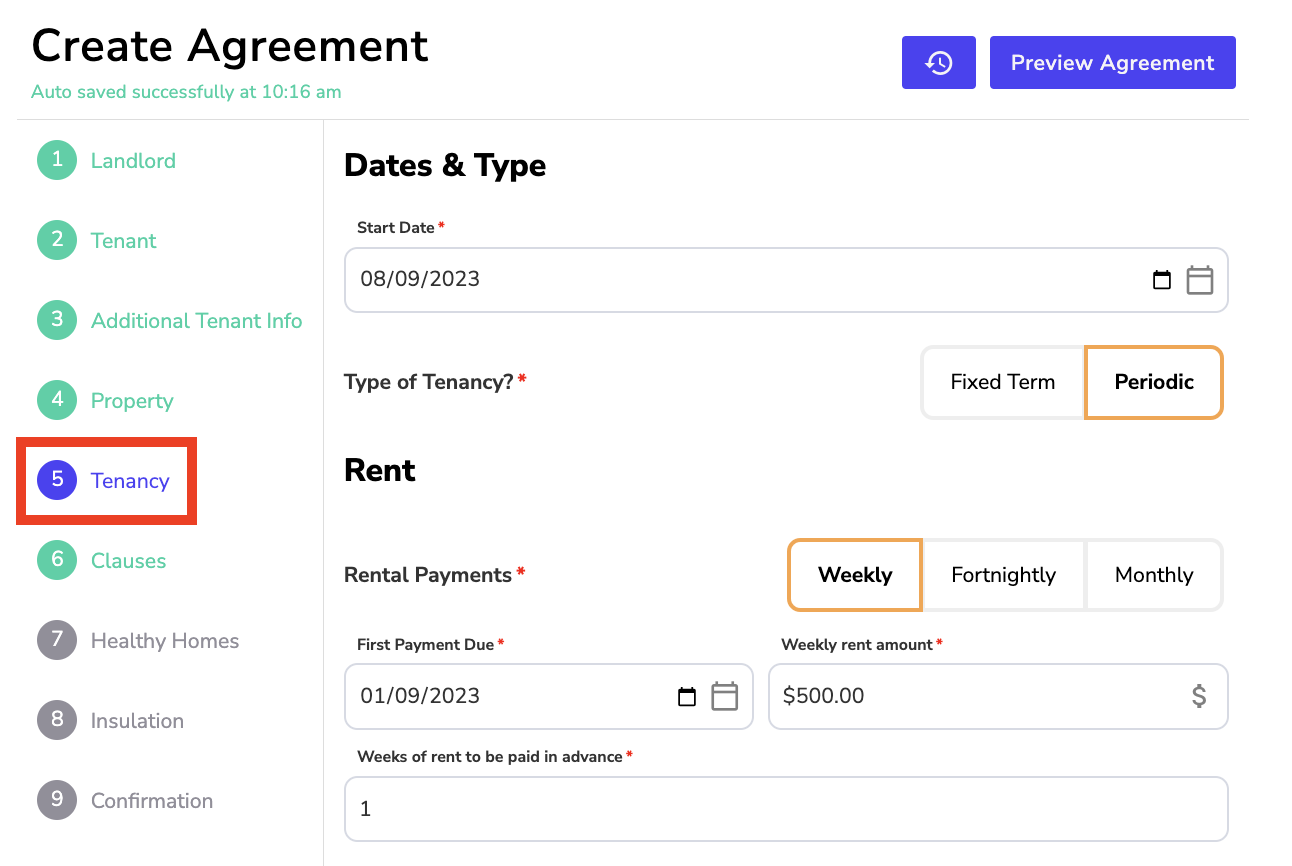
✅ Dates & Types:
- Enter the start date,
- Type of tenancy.
✅ Rent:
- Enter the rental payments,
- Weekly rent amount,
- Weeks of rent to be paid in advance,
- First payment due date.
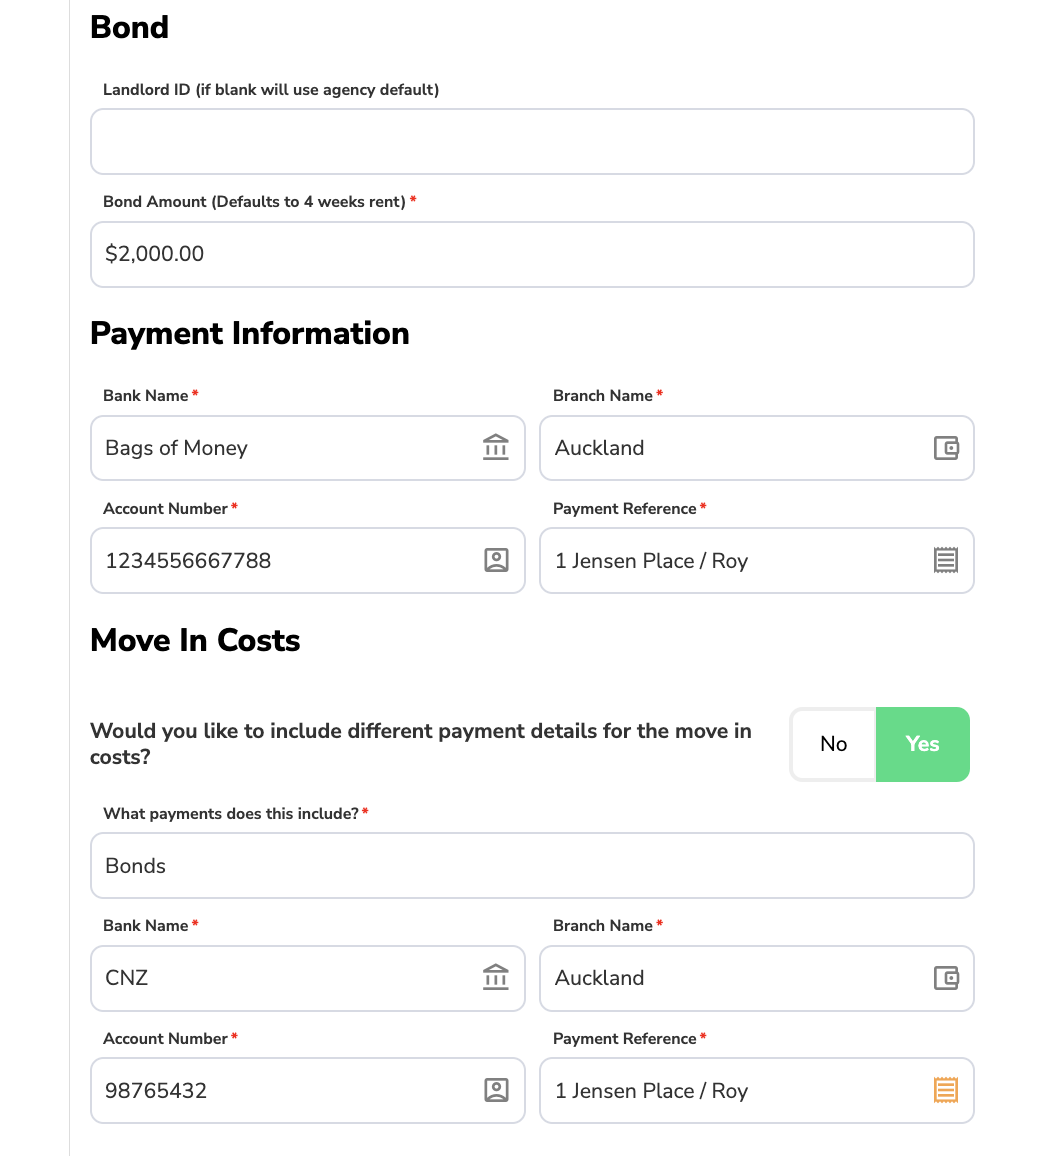
✅ Bond:
- Enter the landlord ID,
OPTIONAL - Bond amount.
✅ Payment Information:
- Enter the bank name,
- Branch name,
- Account number,
- Payment reference. (This will automatically be filled based on the agency settings).
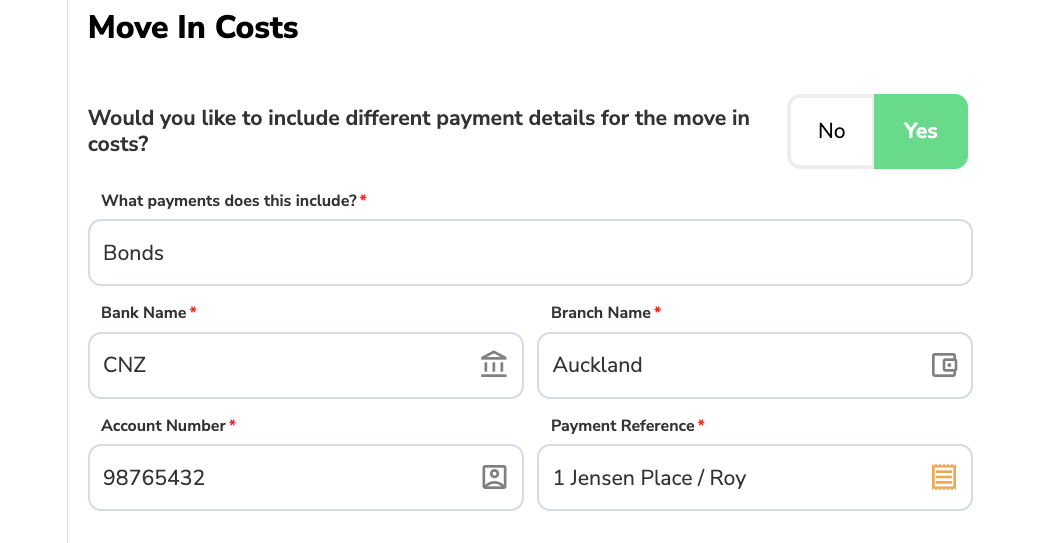
✅ Move In Costs:
- Would you like to include different payment details for the move-in costs? If yes, enter the following:
- Bank name,
- Branch name,
- Account number,
- Payment reference.

✅ Smokers:
- Are smokers allowed in the property? A clause will be added to the agreement based on the answer.
✅ Guarantor:
- Would you like to include a guarantor? If yes, enter the following:
- Enter full name,
- Address for service of documents,
- Mobile number,
OPTIONAL - Email,
- Alternative contact address,
OPTIONAL - Date of birth.
✅ Serviced Tenancies:
- Is this a serviced tenancy? A clause will be added to the agreement based on the answer.
✅ Additional Files:
- Upload any additional files that you would like to have included with the tenancy agreement.
Once all the information has been entered, click the ‘Next' button.
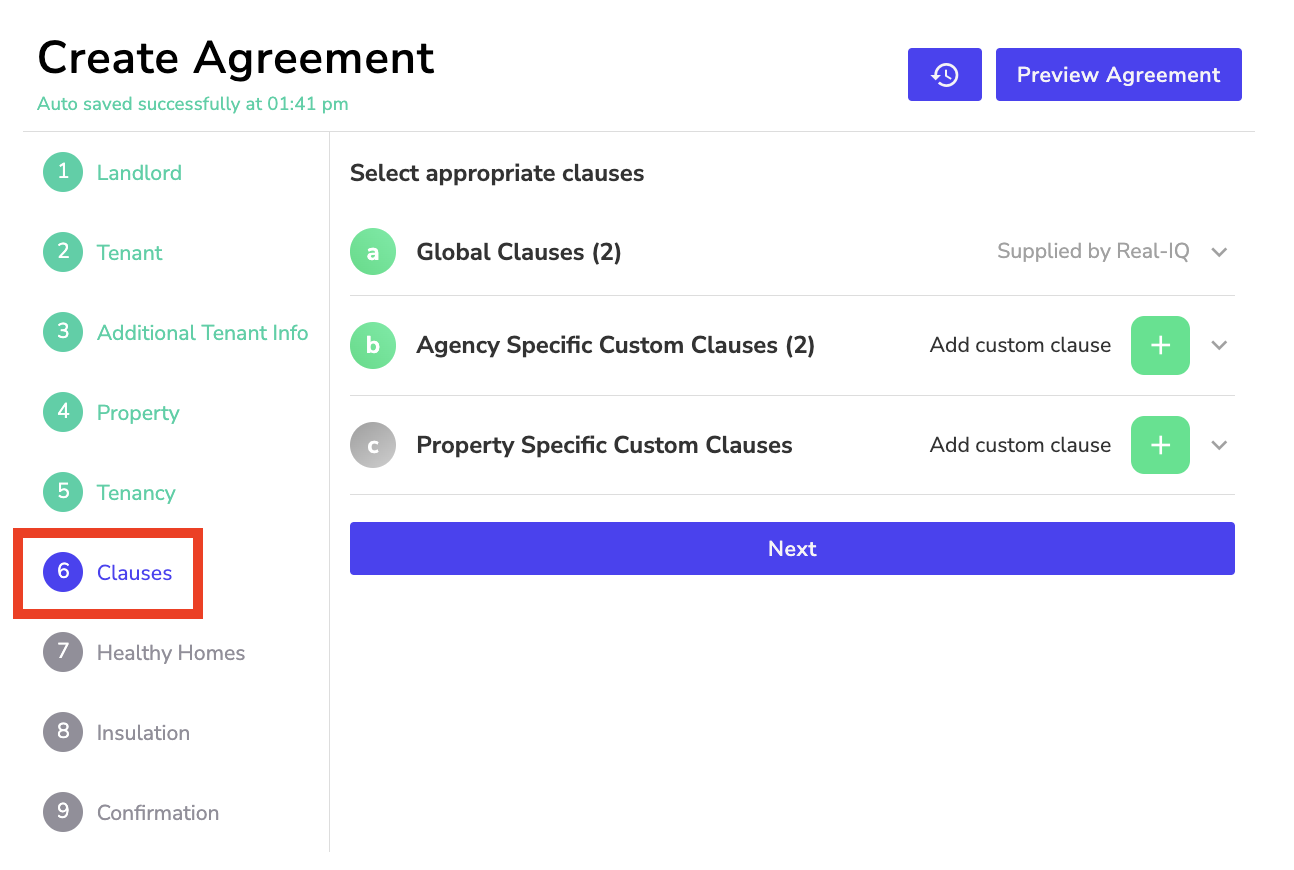
Different types of clauses:
- Standard Clauses: These are clauses that are included in every tenancy agreement that are provided and maintained by Renti.
- Global Clauses: These are clauses that are provided by Real-IQ and can be added to an agreement at the time of building. These can be used across all agreements.
- Agency-Specific Custom Clauses: These clauses are written and maintained by your agency. They can be enforced across all agreements automatically - this can only be done in your manage agency setting by a user with owner status. Or if the clauses are optional they can be turned on and added to an agreement at the time of building.They are available across all tenancy agreements in your agency.
- Property-Specific Custom Clauses: These can be created at the time of building the tenancy agreement and are saved for when you come back to create an agreement for the same property again.
Go through each category of clauses and click the toggle button to turn on the selected clause in the agreement.
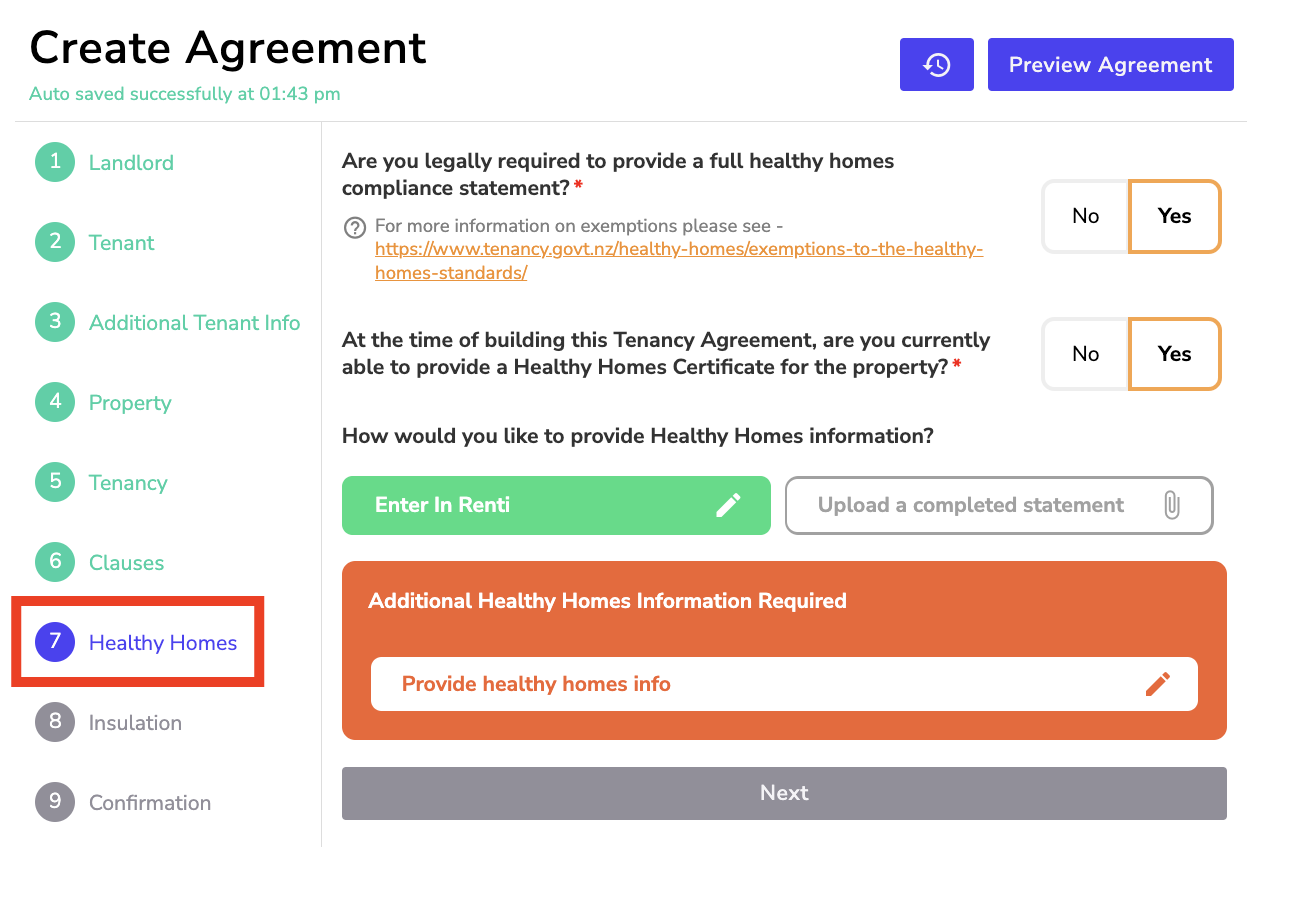
Are you legally required to provide a full Healthy Homes compliance statement?
If you select ‘Yes':
- At the time of building this Tenancy Agreement, are you currently able to provide a Healthy Homes Certificate for the property?
- If ‘yes': Provide a Healthy Homes certificate either by uploading the statement or manually entering it in Renti.
- If ‘no': In the agreement, it will reflect that no statement was provided but that the owner will take all reasonable steps to ensure that the property meets the Healthy Homes Standards 2019 within 120 days of the tenancy's start date.
If you select ‘No':
- Select the exemption reason from the drop-down.
- Enter a brief description of the exemption.
Once all the information has been entered, click the ‘Next' button.
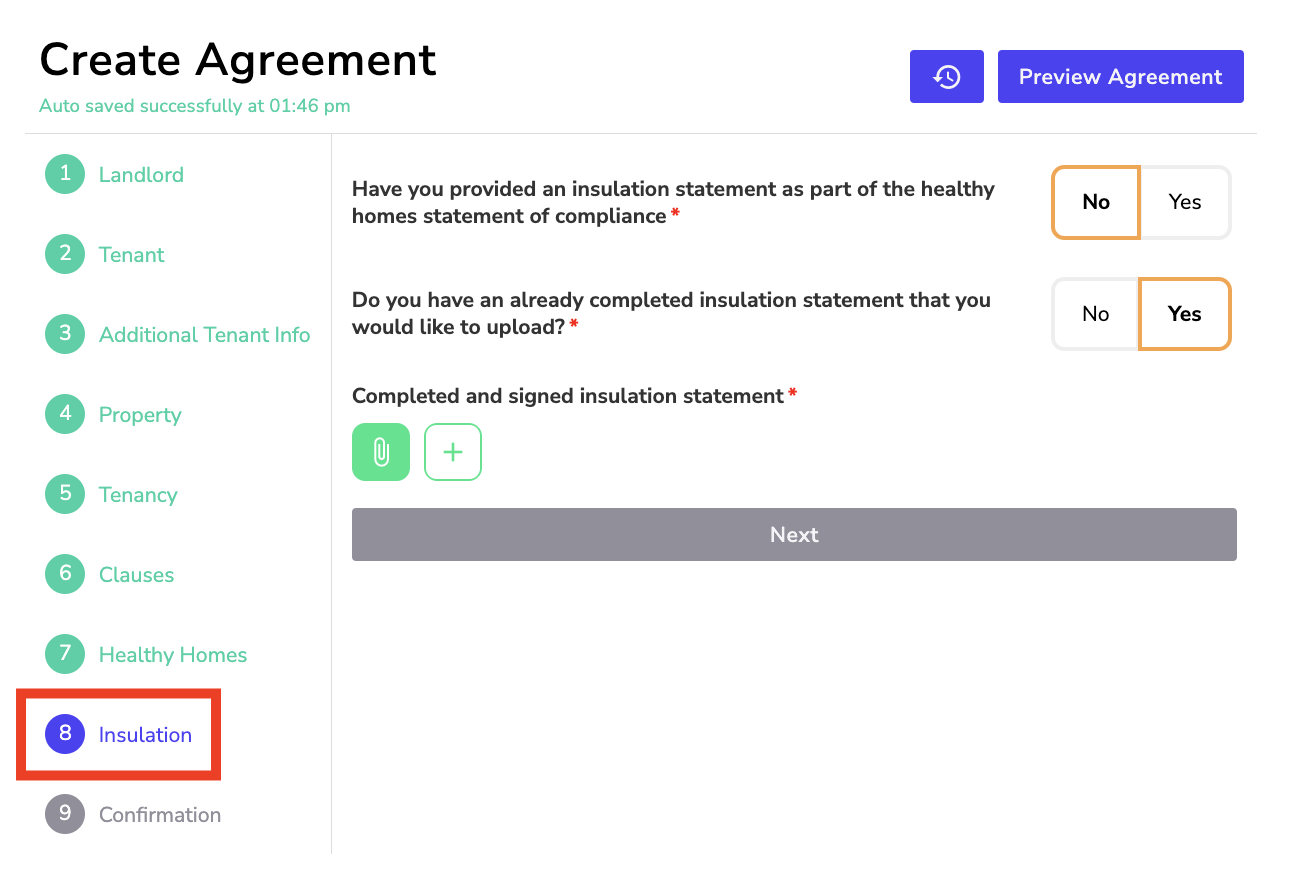
Is insulation information included as part of the Healthy Homes statement of compliance in the previous section?
If you select ‘Yes':
- You will be able to continue by clicking the ‘Next' button.
If you select ‘No':
- Do you have an already completed insulation statement that you would like to upload?
- If ‘yes': Upload an insulation statement.
- If ‘no': Enter the insulation information in Renti manually.
Once all the information has been entered, click the ‘Next' button.
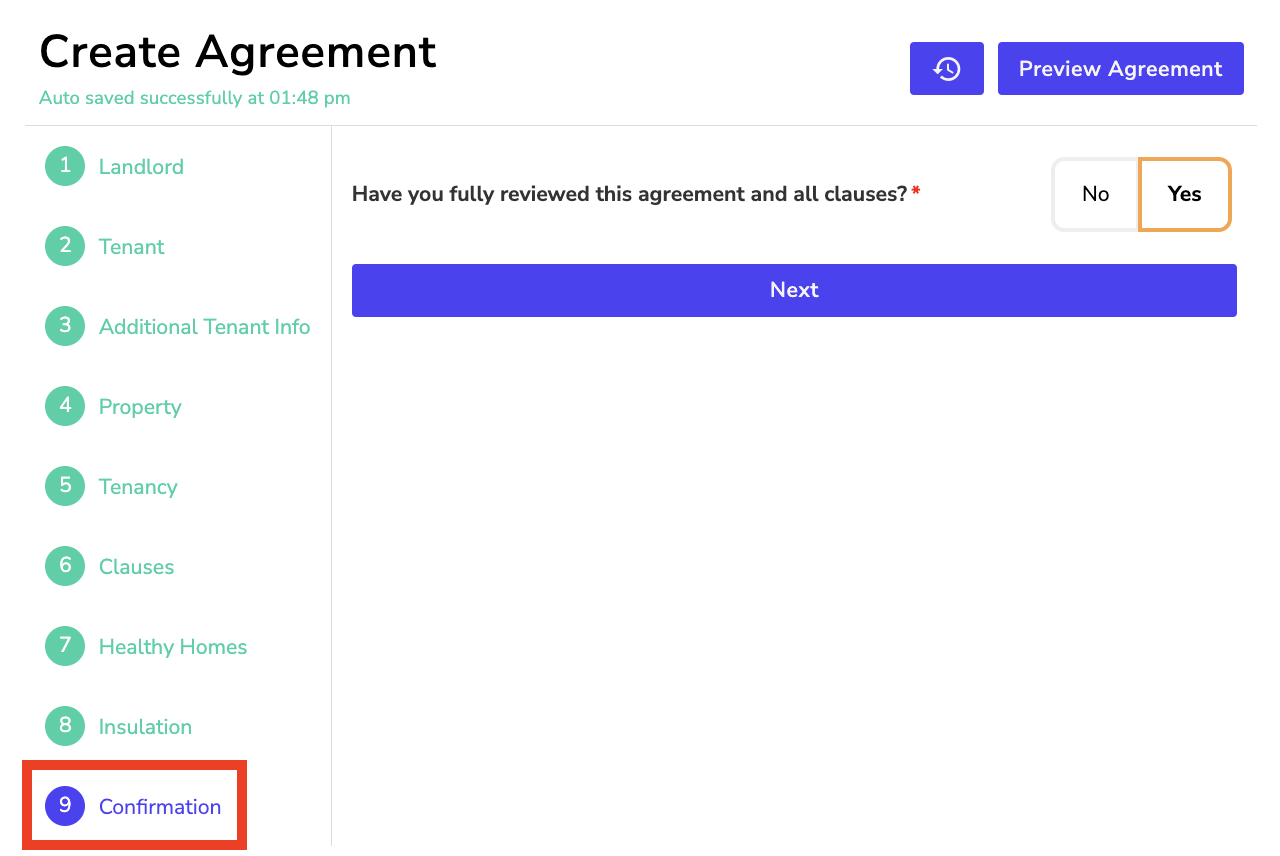
Have you fully reviewed this agreement?
- Click ‘Preview Agreement' to review the agreement and to ensure everything is correct.
- Once done, click ‘Yes' to move to the agreement signing options.