Assignments & Tenant Change in Renti allows you to either assign an existing tenancy to a new group of tenants or update the tenants for an existing tenancy.
This tutorial will guide you through the process of creating an Assignment or Change of Tenant in Renti.
Resources
- Renti Help Centre contains further resources on processing applications to allow you to get up to this point.
- A video tutorial of the information in this tutorial is linked below if needed.
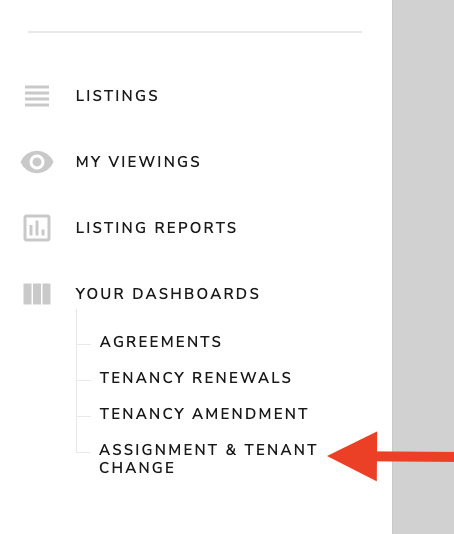
- Click on the ‘Assignments & Tenant Change' in the navigation bar on the left-hand side.
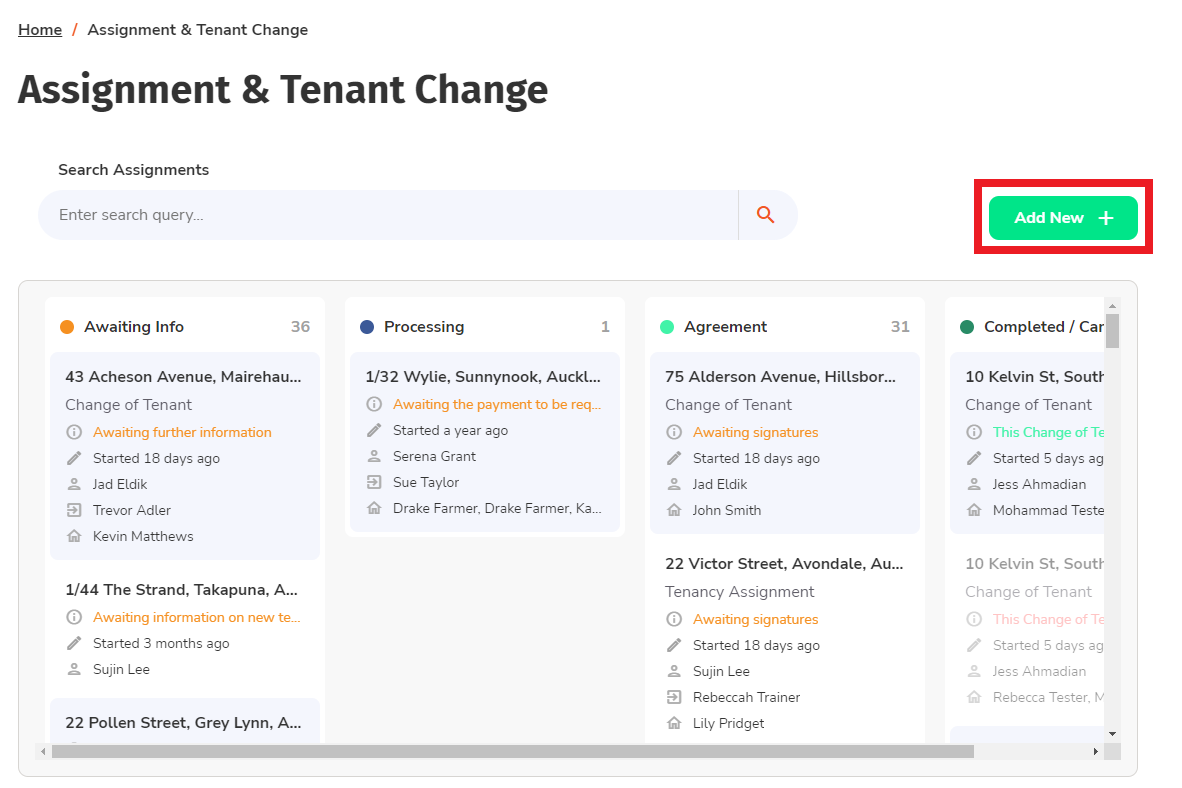
- Click ‘Add New'.
- Select a property manager you wish to be assigned to this assignment or tenant change.
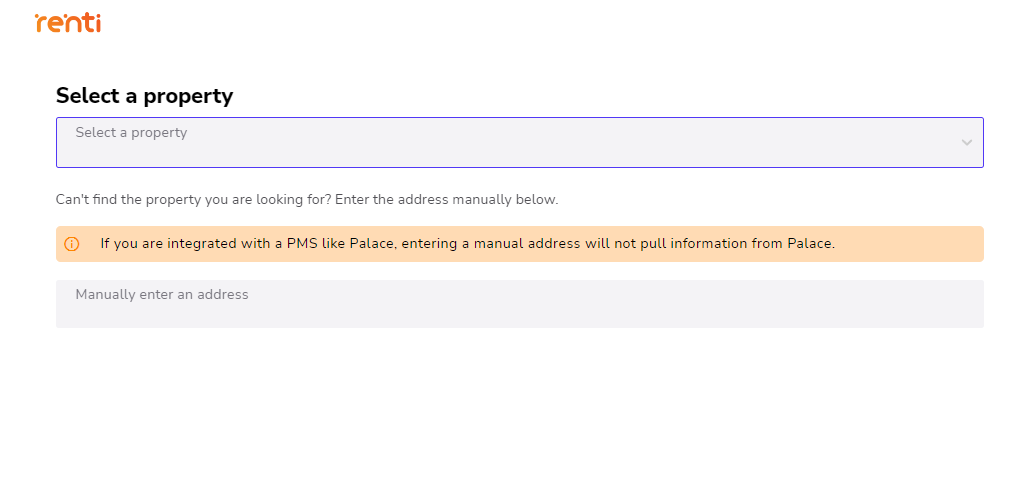
- Select an address from the dropdown list if you are integrated with a PMS like Palace, otherwise, manually enter an address.
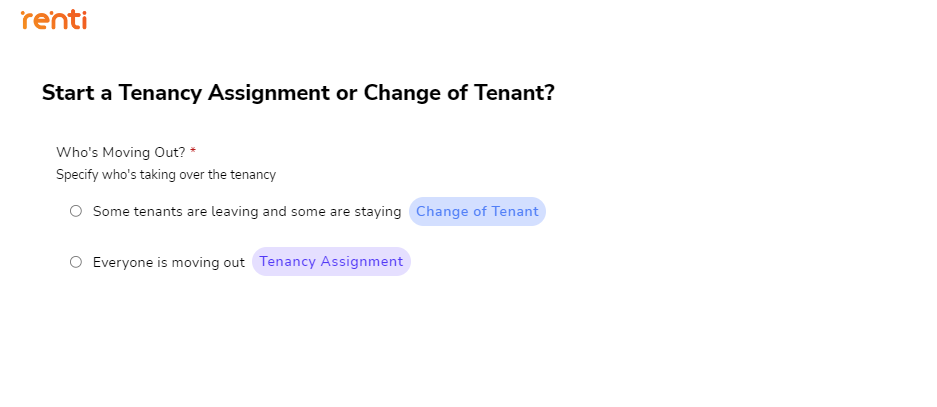
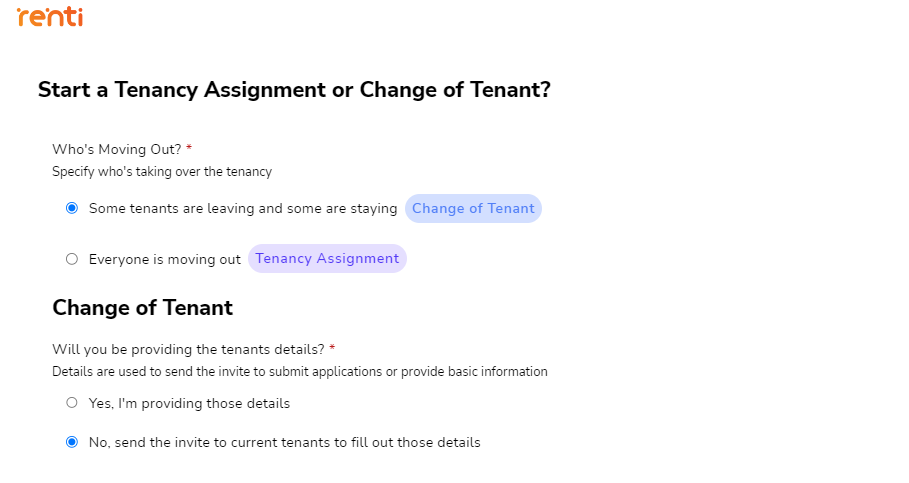
- Select whether some tenants are leaving or all tenants are leaving.
- Select whether you will be providing the information on the tenants or whether you would like the existing tenants to provide this themselves.
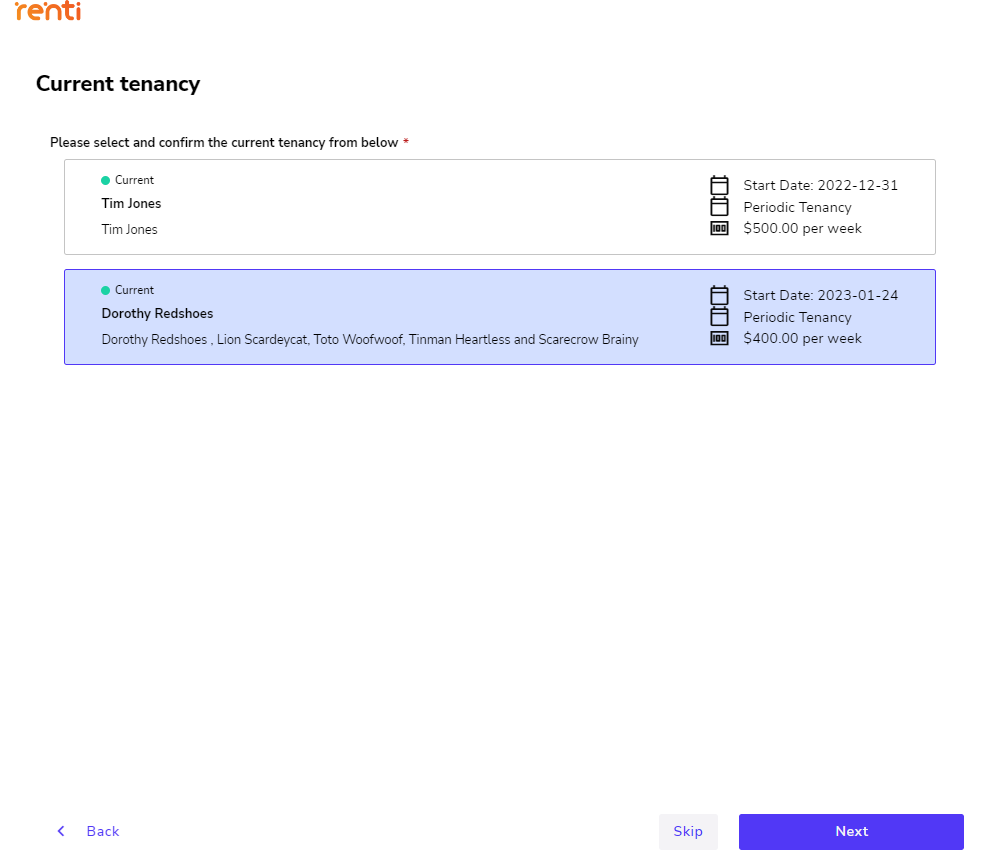
- If you are integrated with a PMS like Palace, you will be required to select the current tenancy.
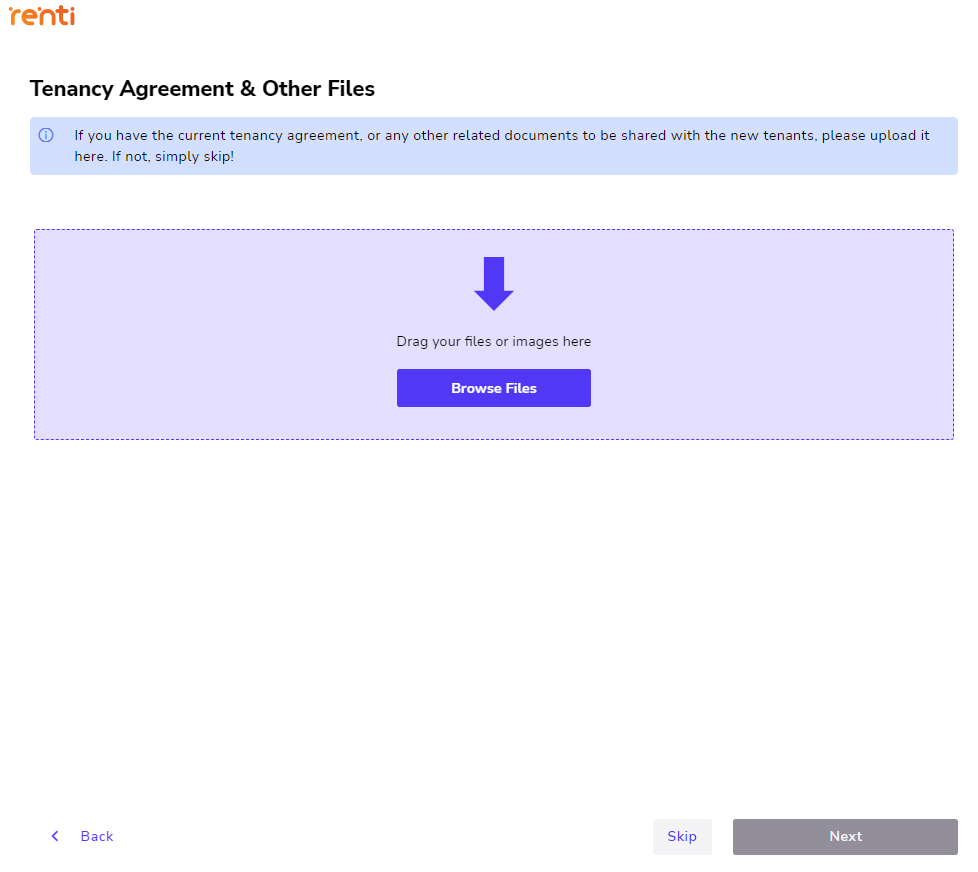
- Upload the current Tenancy Agreement or any other files you would like to be shared with the incoming tenants. Otherwise, you can click 'Skip'.
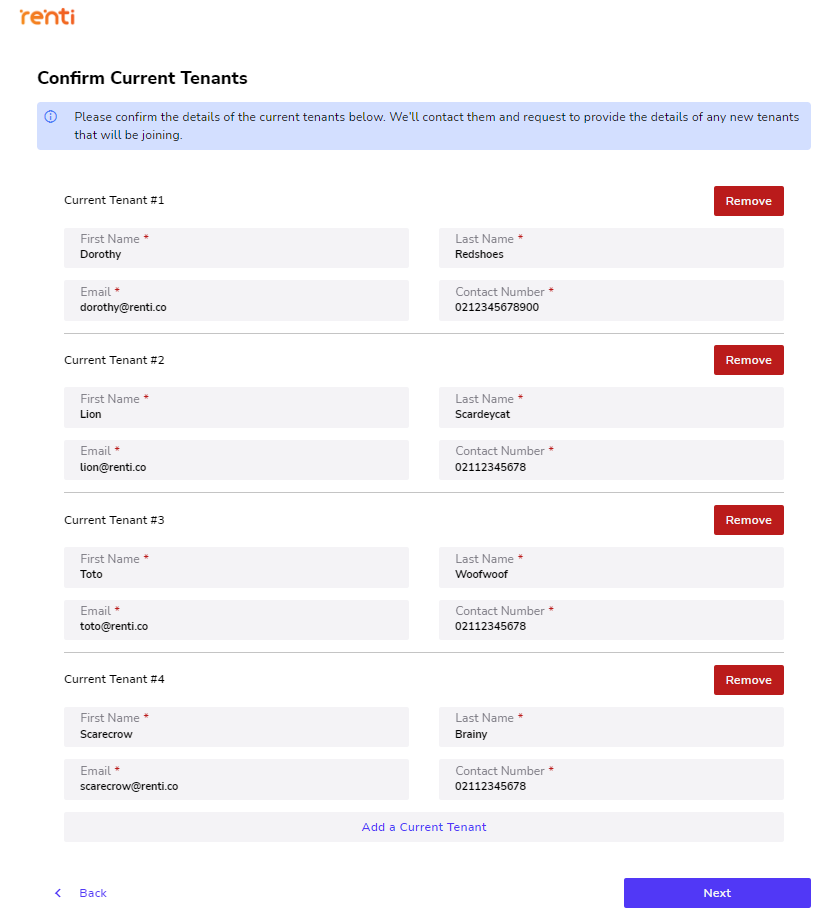
- Confirm the existing tenants' information (if you are integrated with a PMS like Palace), otherwise, enter the existing tenants' information.
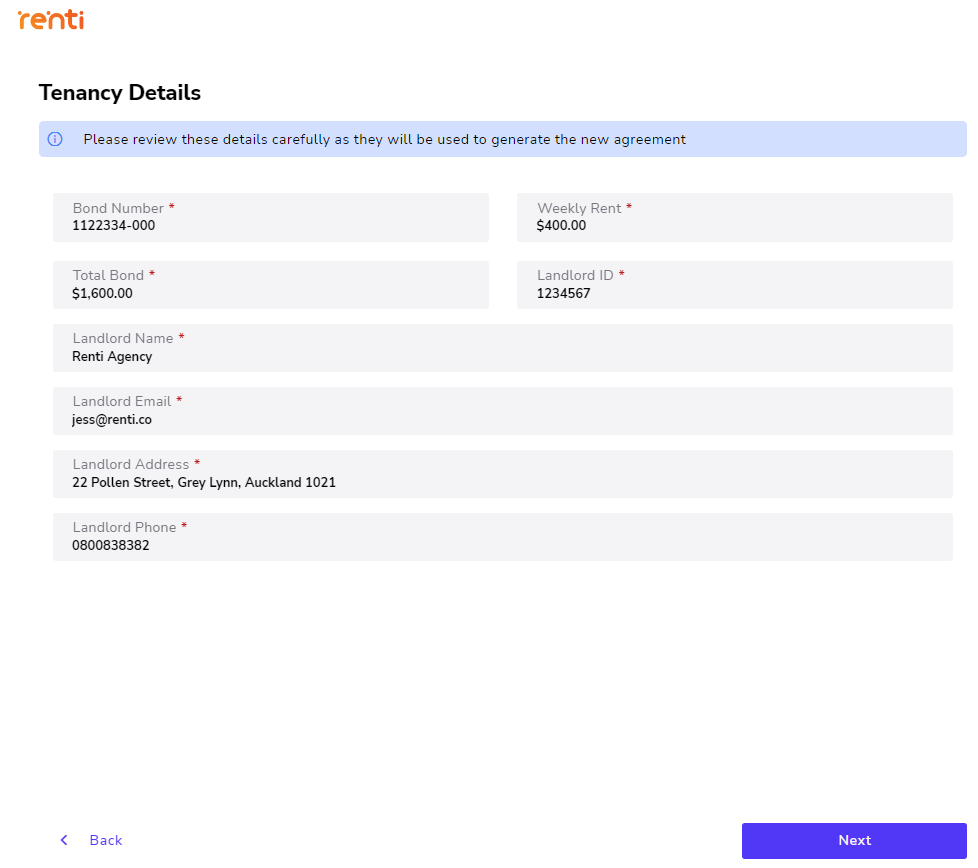
- Confirm the tenancy details (if you are integrated with a PMS like Palace), otherwise, enter the tenancy details.
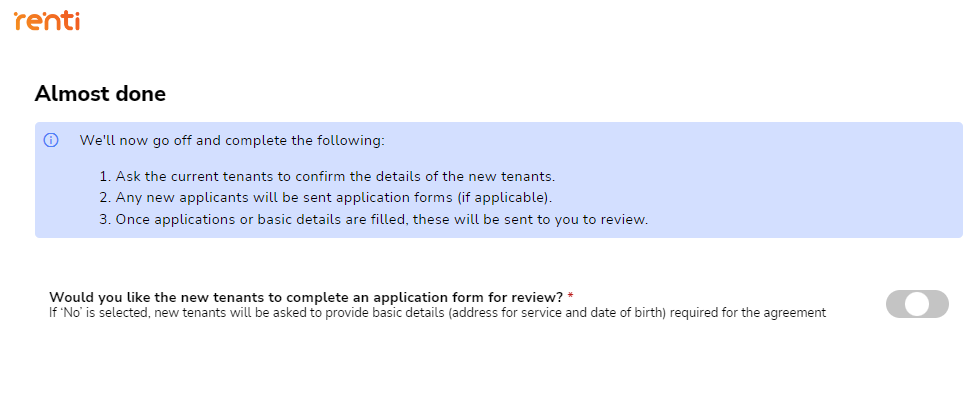
- Select whether you would like the incoming tenants to fill an application form out for you to review. If not, the incoming tenants will only be required to enter their basic details such as date of birth and current address.
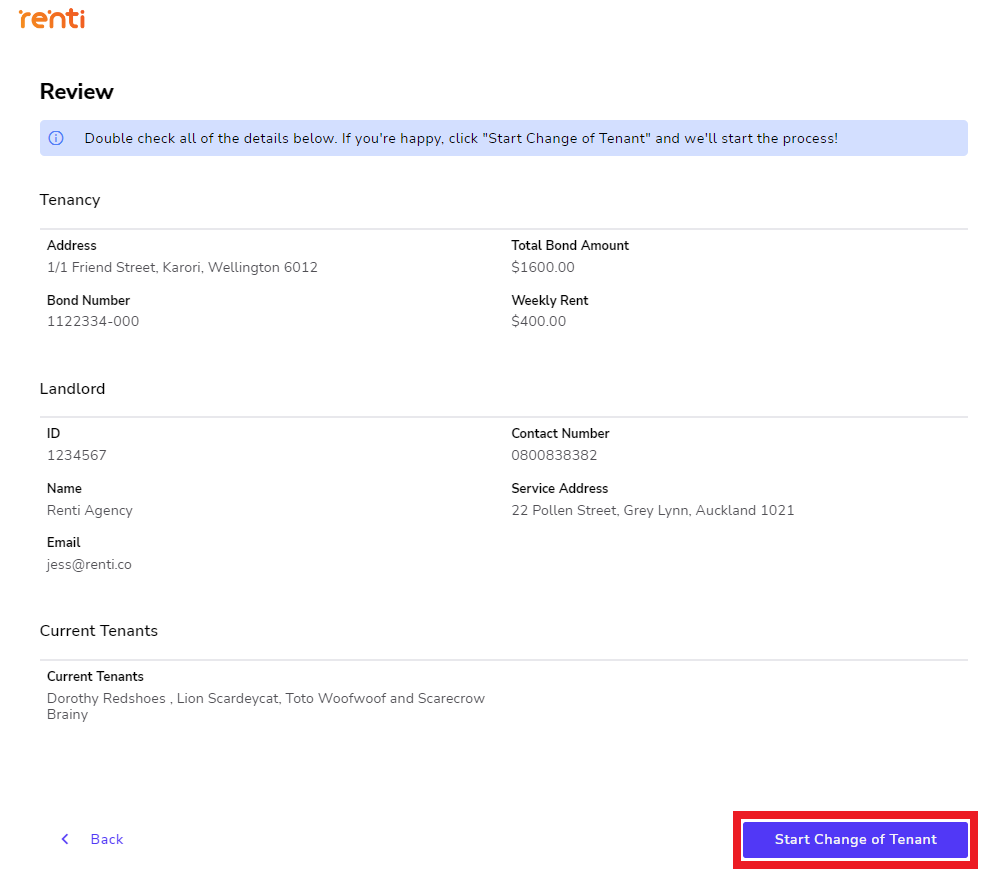
- Review the entered information and click 'Start' once you are ready to go!
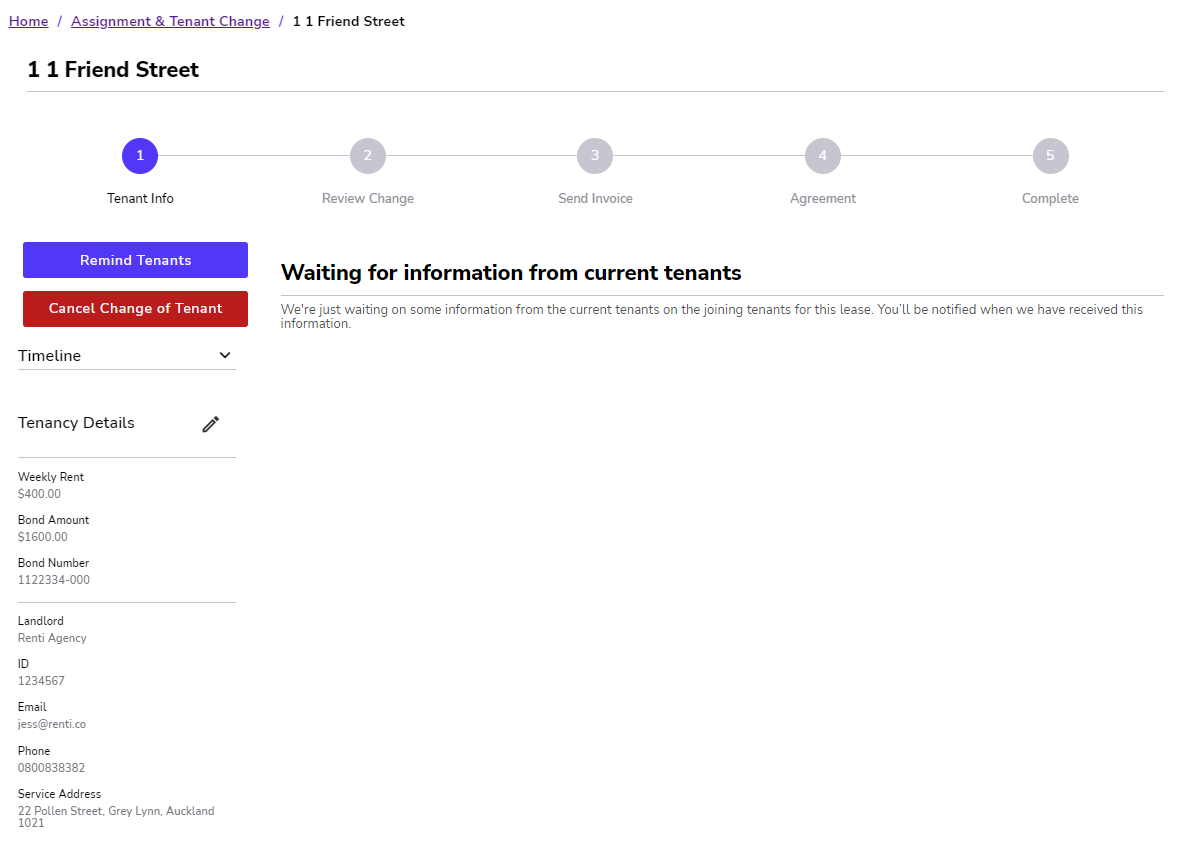
Once your tenants have provided the information or if you have already entered this information in the steps earlier:
- Review the tenant information provided is correct.
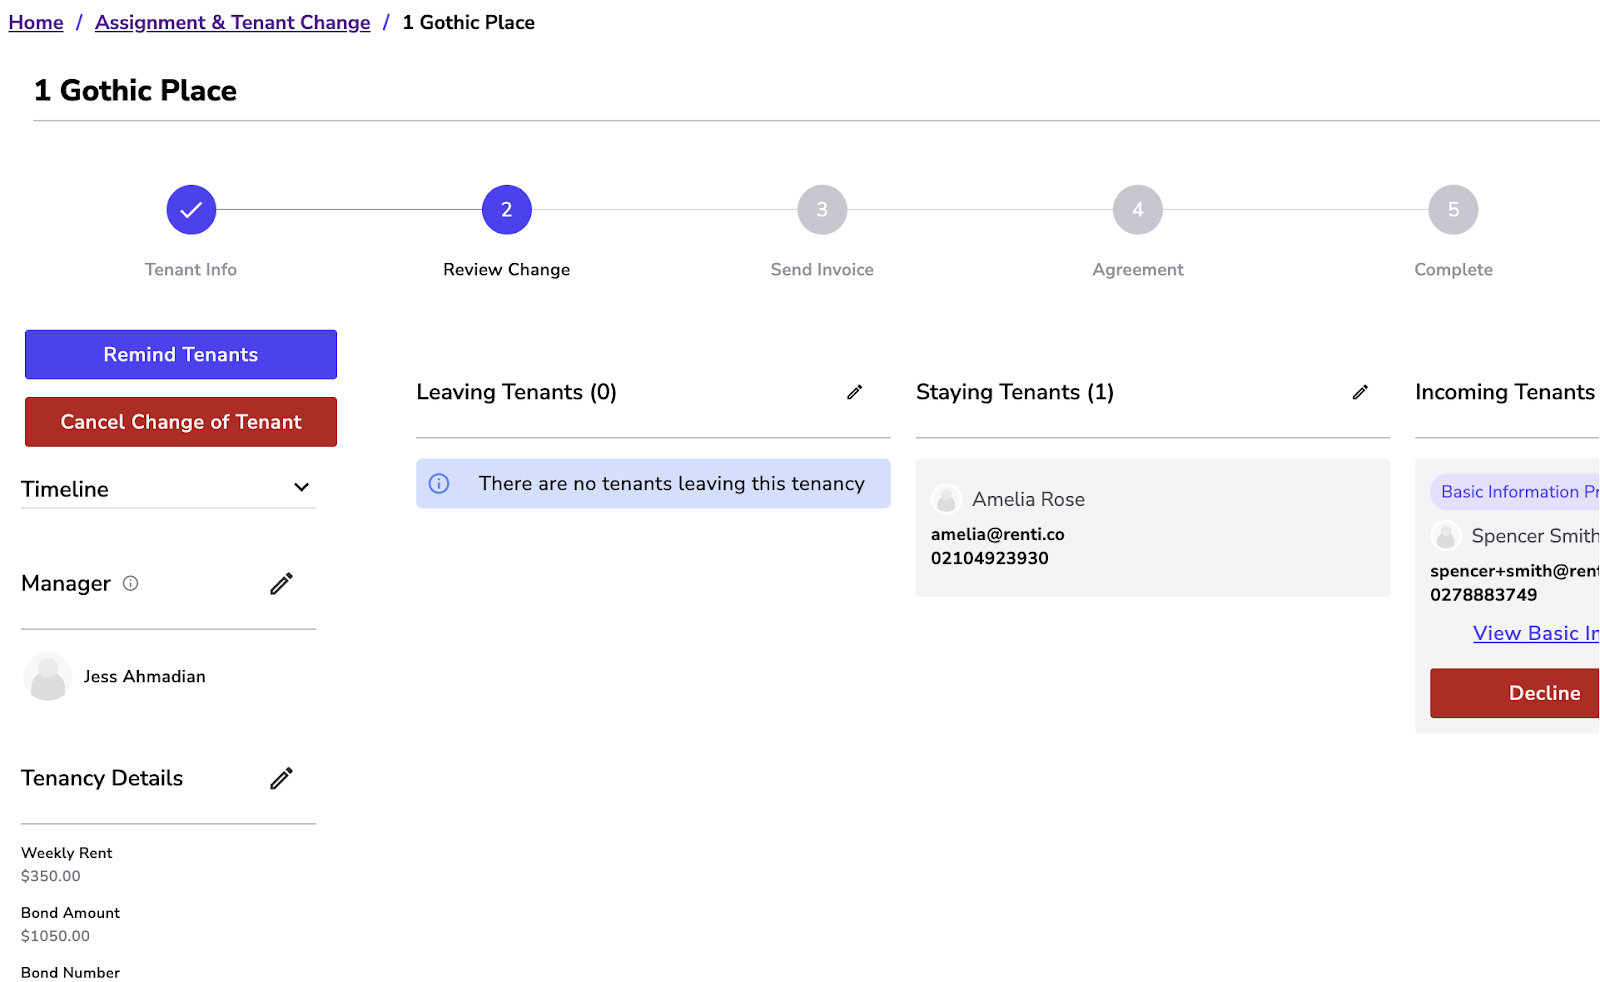
- If you have any incoming tenants, scroll across the screen to review their information, and run any necessary checks to accept or decline them.
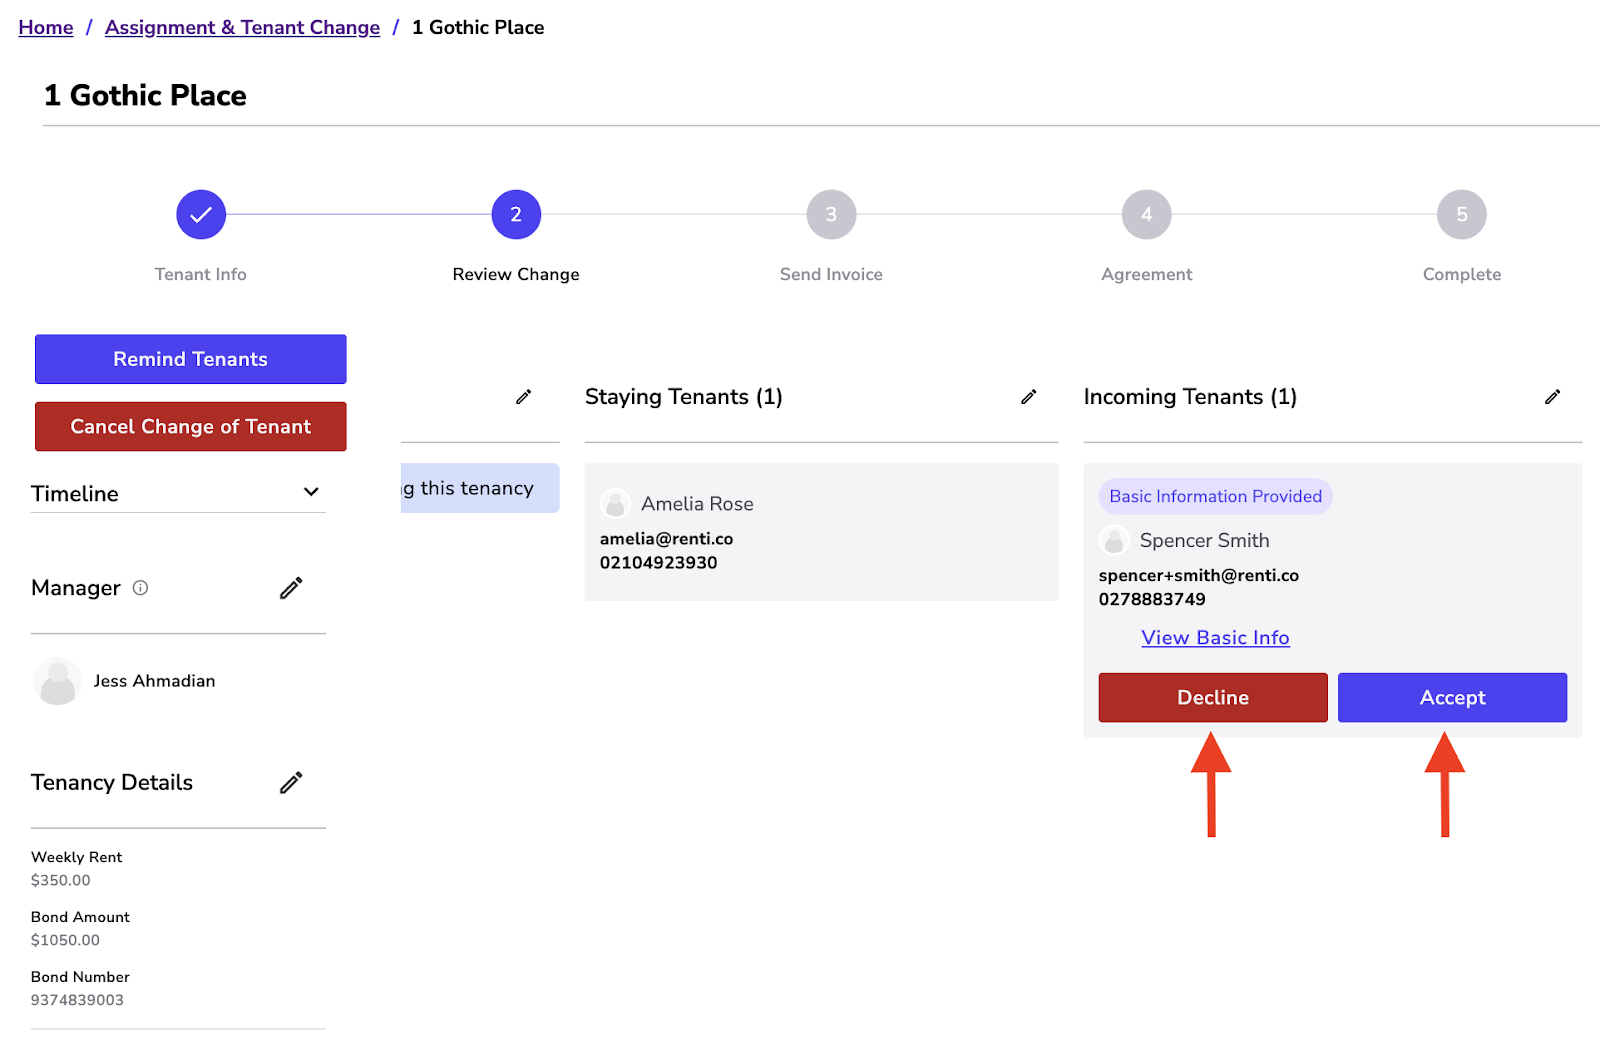
- Once all the incoming tenants have been accepted or once all the tenant information has been provided, you will be sent to the next stage.
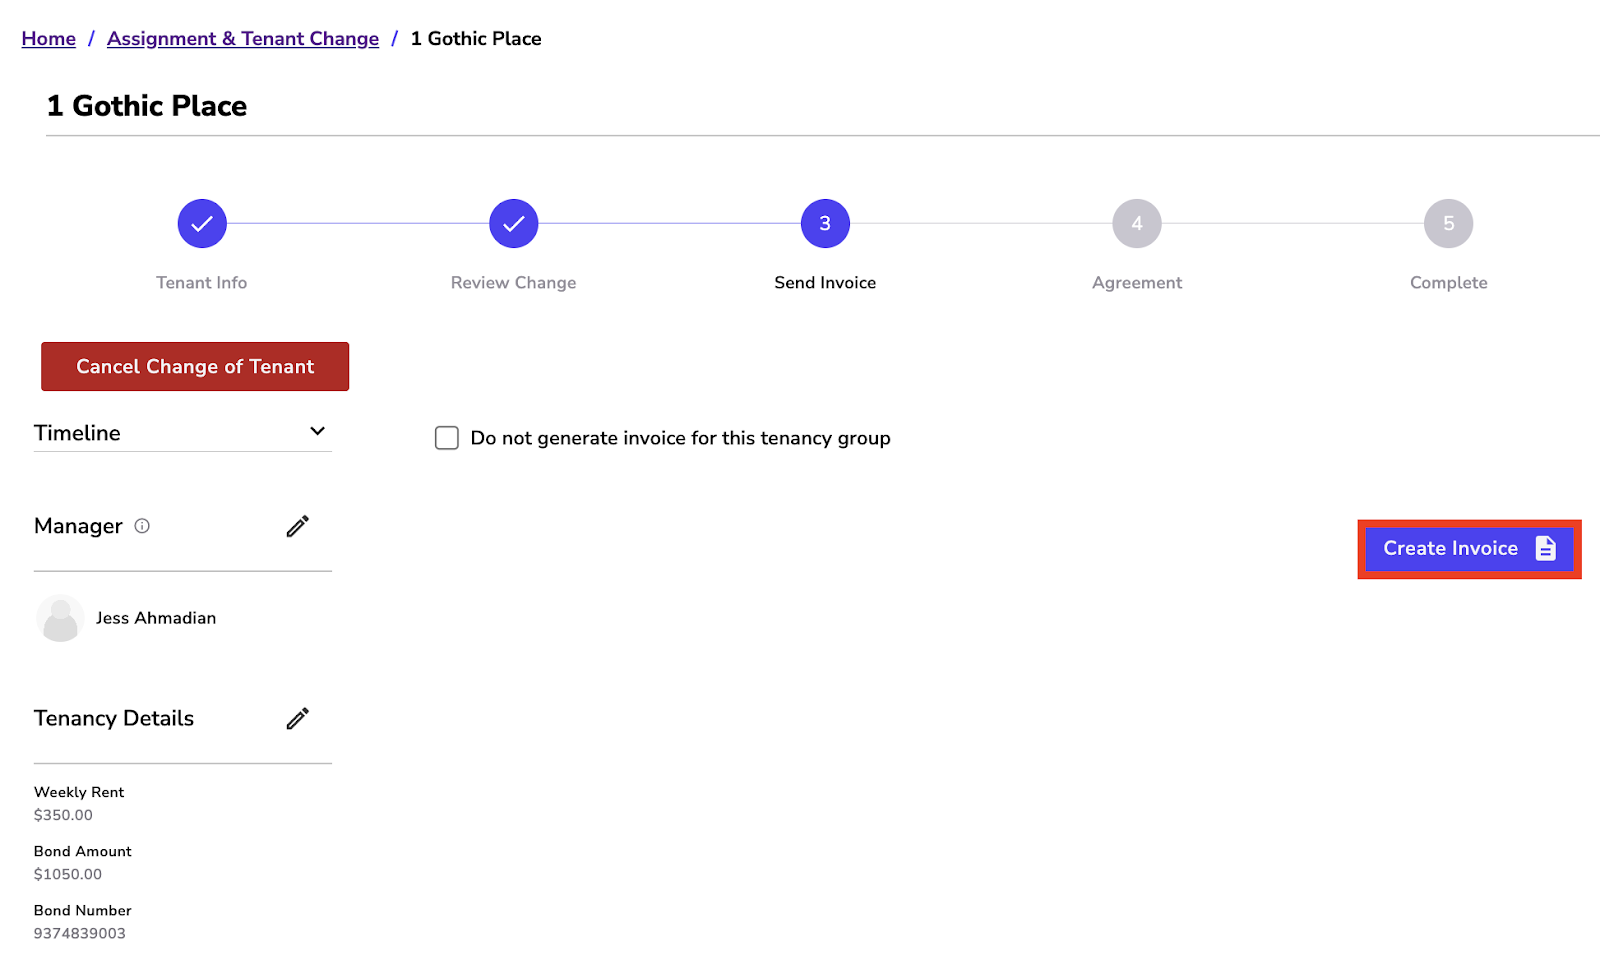
In Renti's Assignment & Tenant Change, you have the ability to create an invoice for any charges necessary.
- If you do not require to generate an invoice, tick the box 'Do not generate invoice for this tenancy group'.
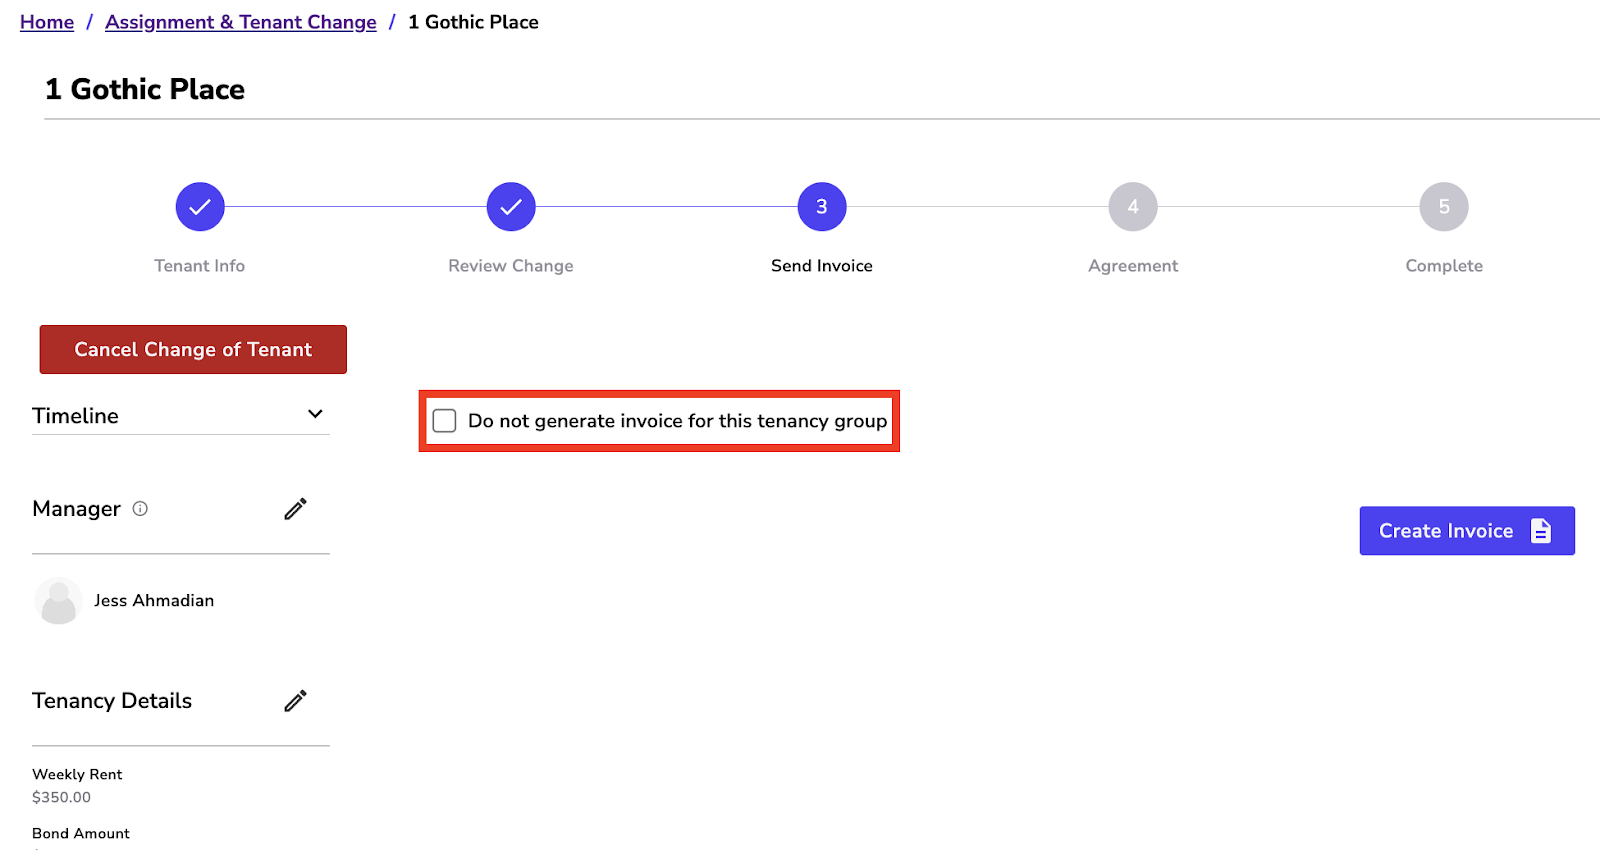
- If you do require to generate an invoice, click ‘Create Invoice'.
- Add the number of charges you wish to add.
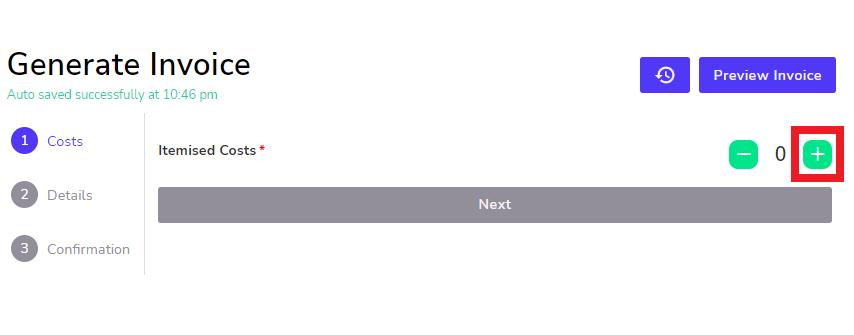
- Select the charges you wish to add.
- Click 'Next'.
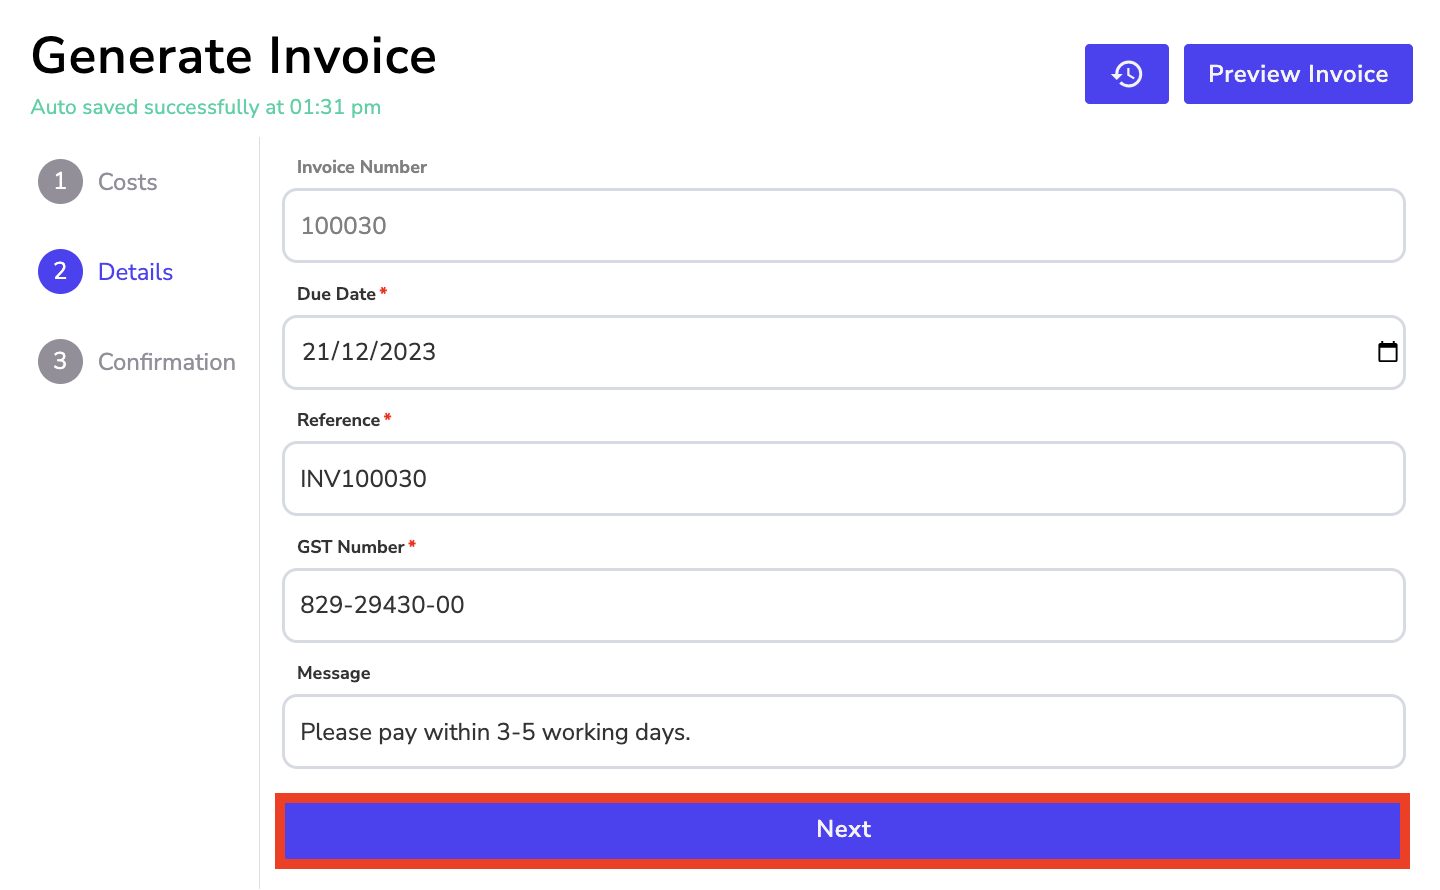
- Fill in the fields and click 'Next'.
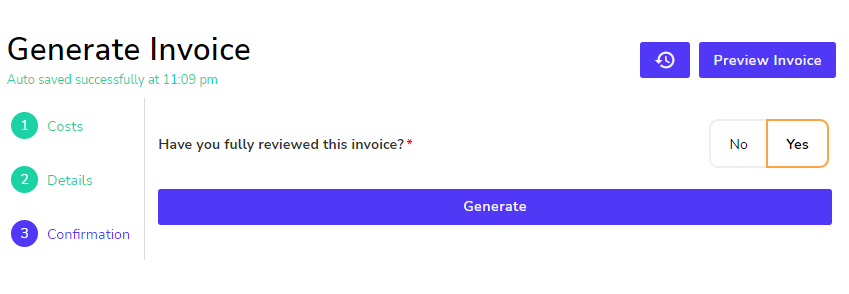
- Click 'Yes' and select 'Generate'.
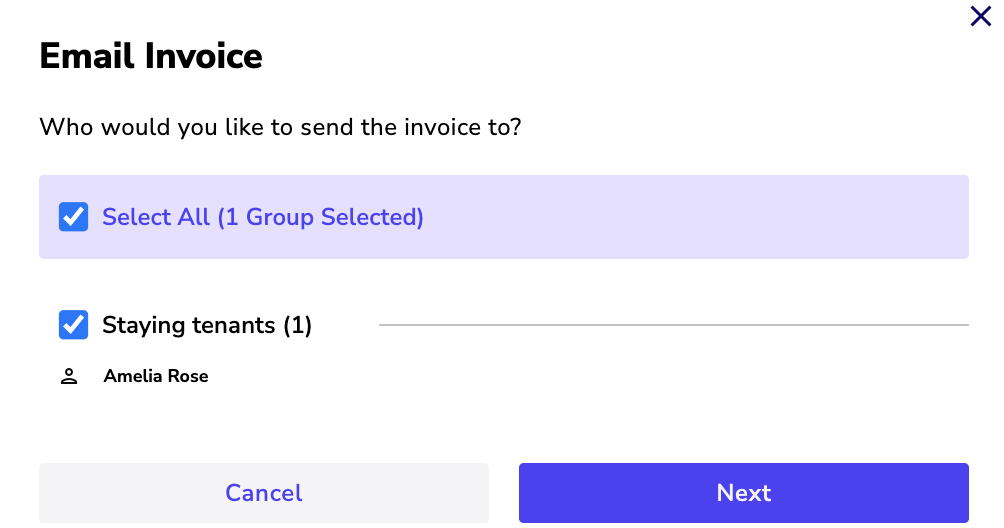
- You can now either email the invoice or download it to be sent.
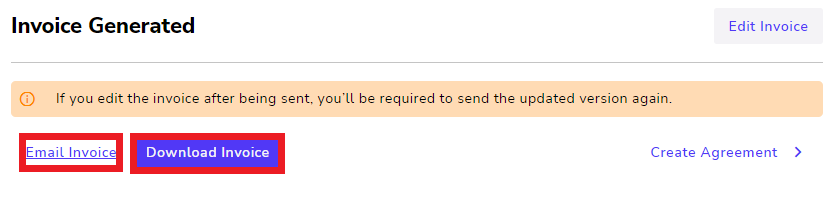
- If you choose to email it, this will allow you to select which tenant to send this to.
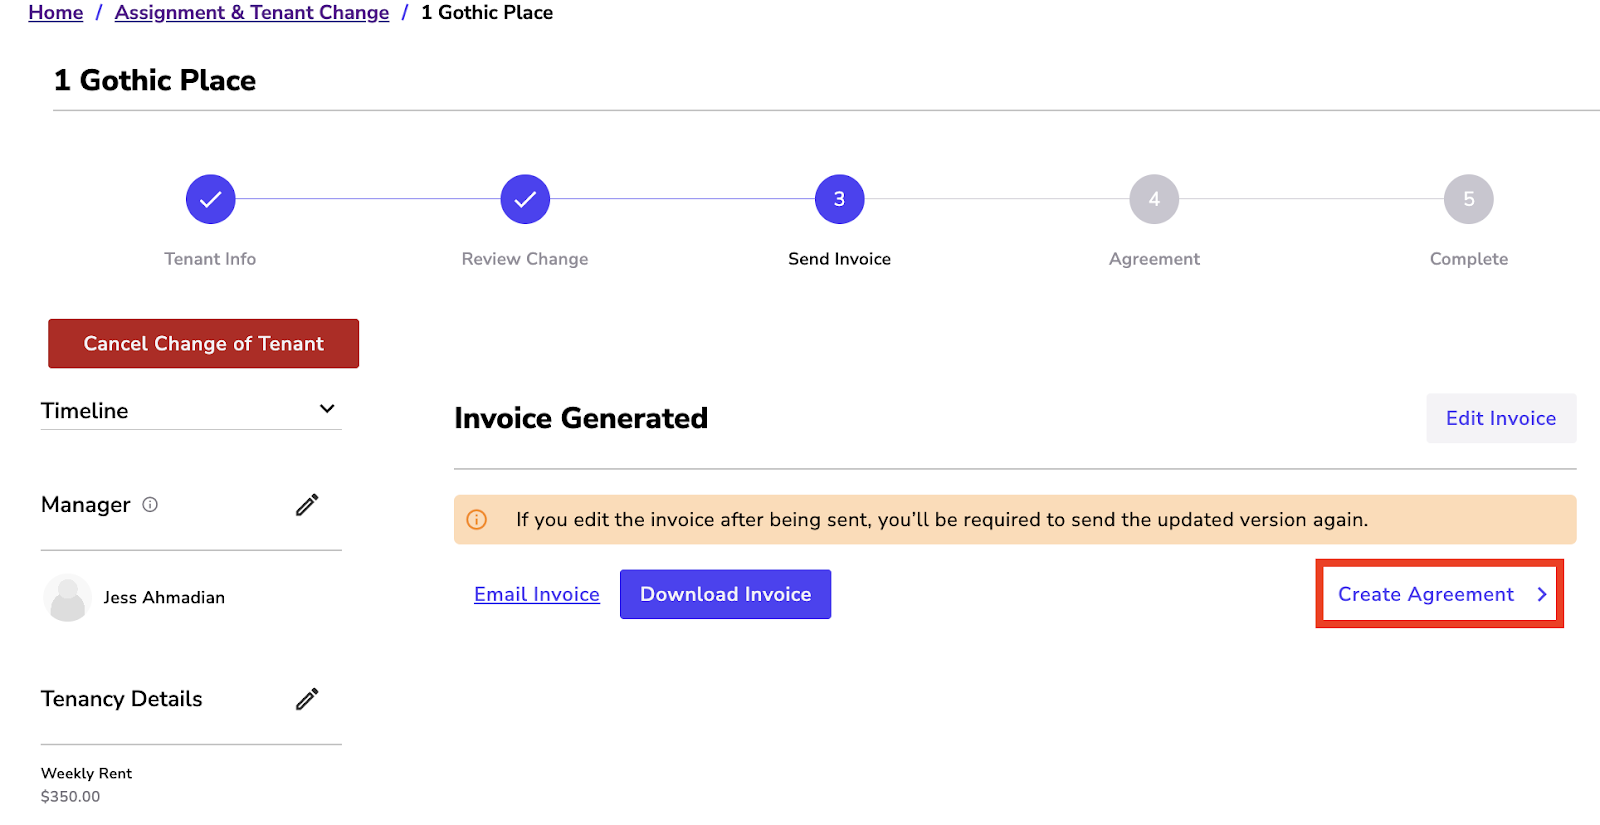
When you have selected to skip the invoice or have finished with the invoice stage:
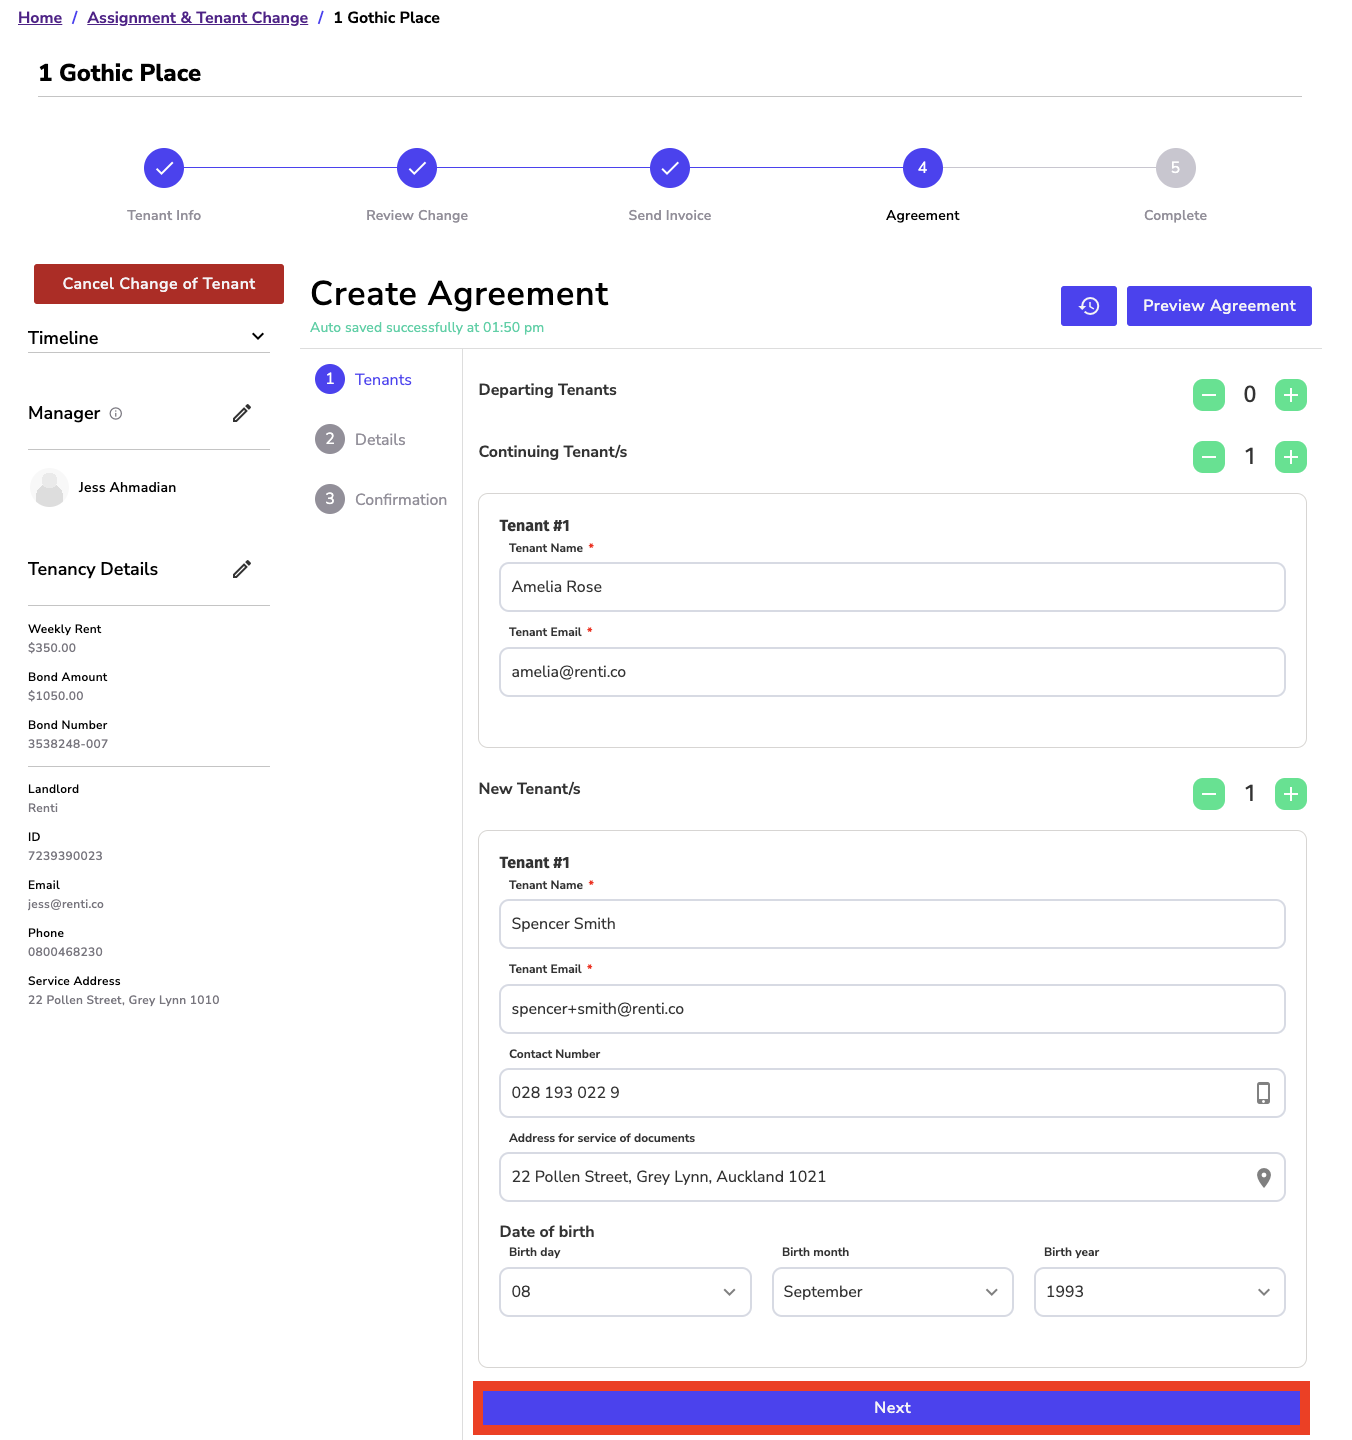
- Click ‘Create Agreement'.
- Review the tenant's departing, staying and joining to ensure all the information is correct.
- Click ‘Next'.
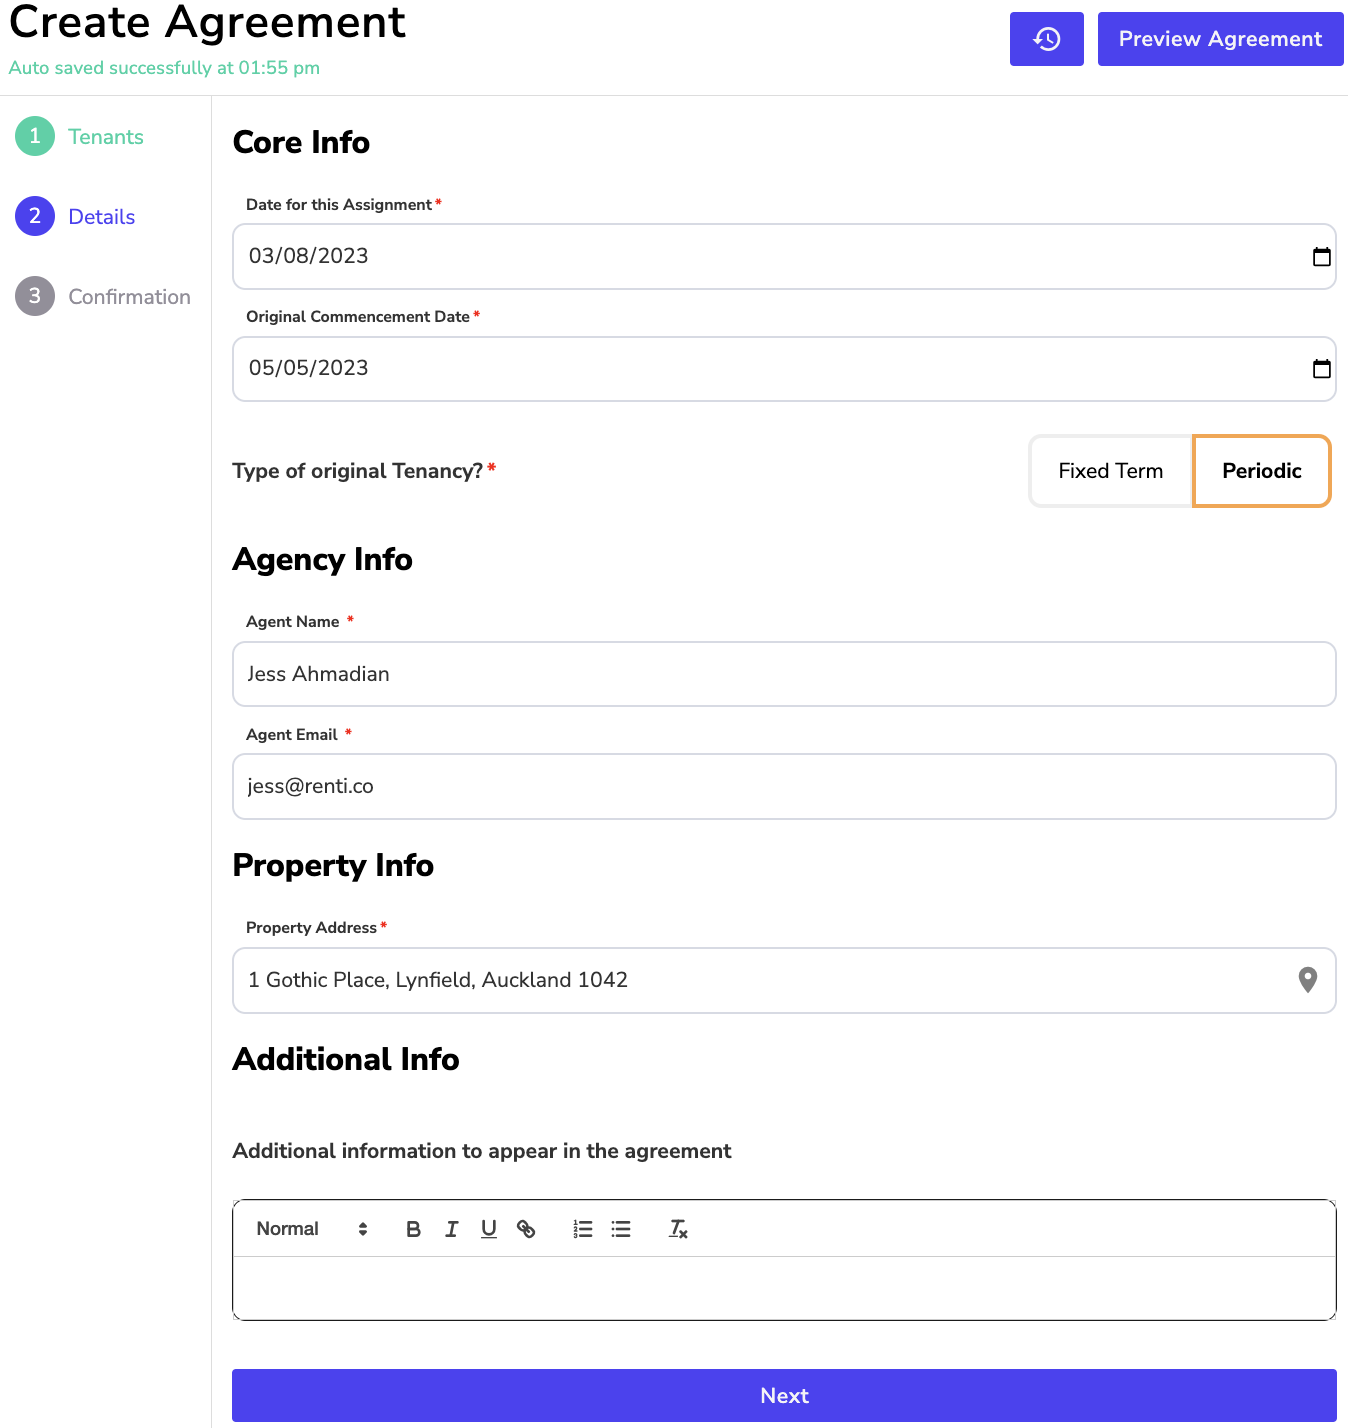
- Most of the information will be pre-populated for you so just enter the original commencement date for the original tenancy agreement and the type of tenancy.
- Click ‘Next'.
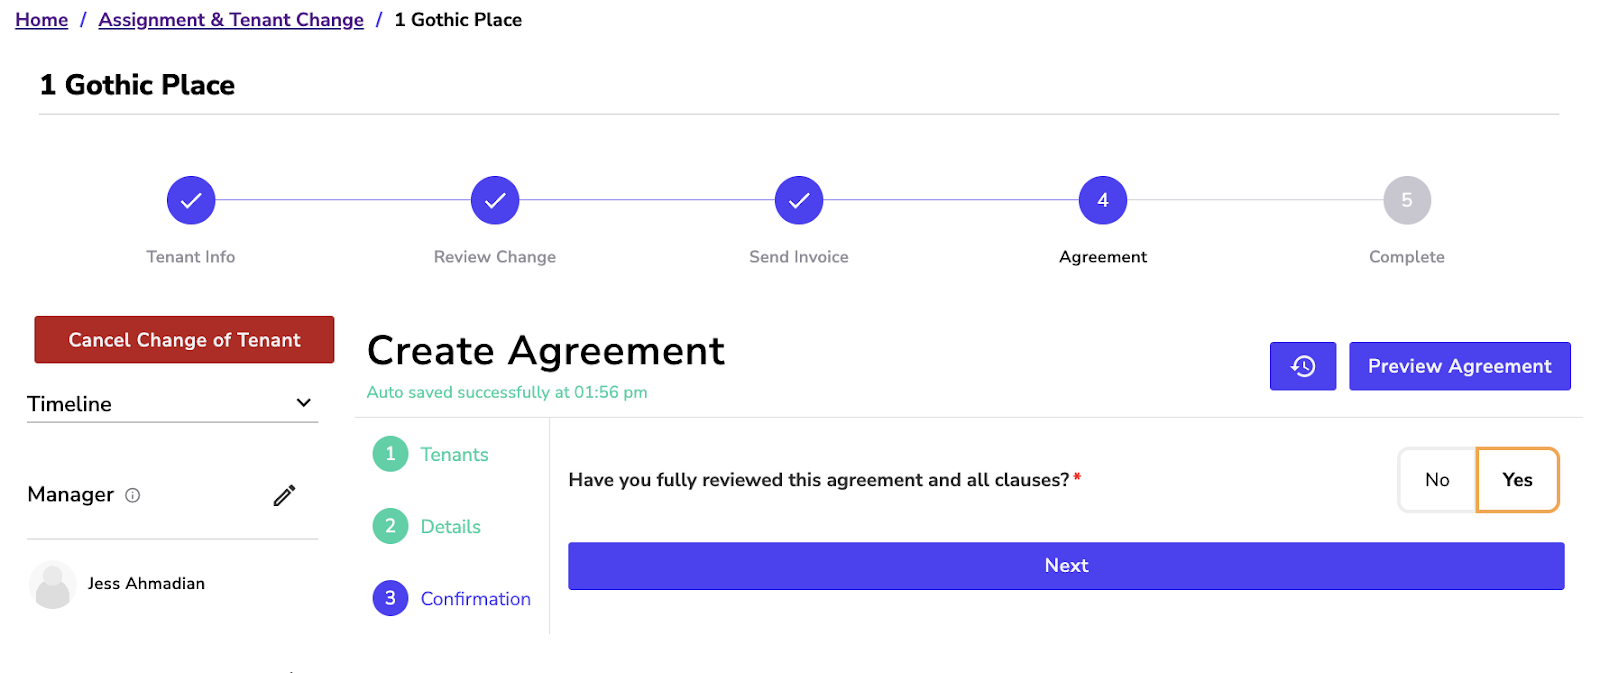
- When you have fully reviewed the agreement, select ‘Yes'.
- Click ‘Next'.
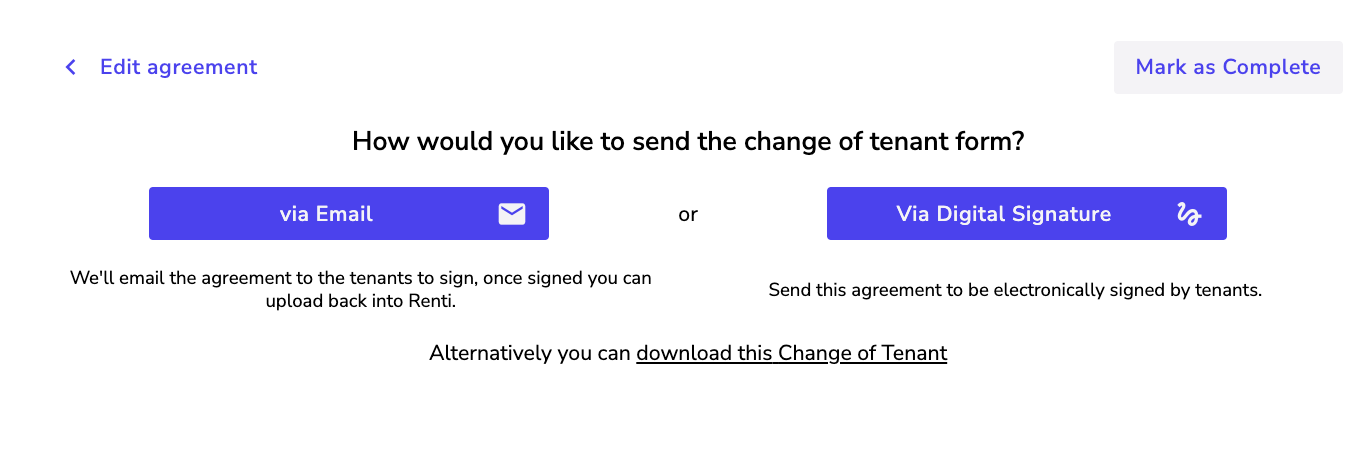
Sending an Assignment or Tenant Change for signing is the usual process as sending a tenancy agreement for signing.
Once you have fully reviewed the Assignment or Tenant Change, you will have three different ways to get the agreement signed:
📝 Digital Signing,
📧 Via Email,
📩 Downloading the agreement.
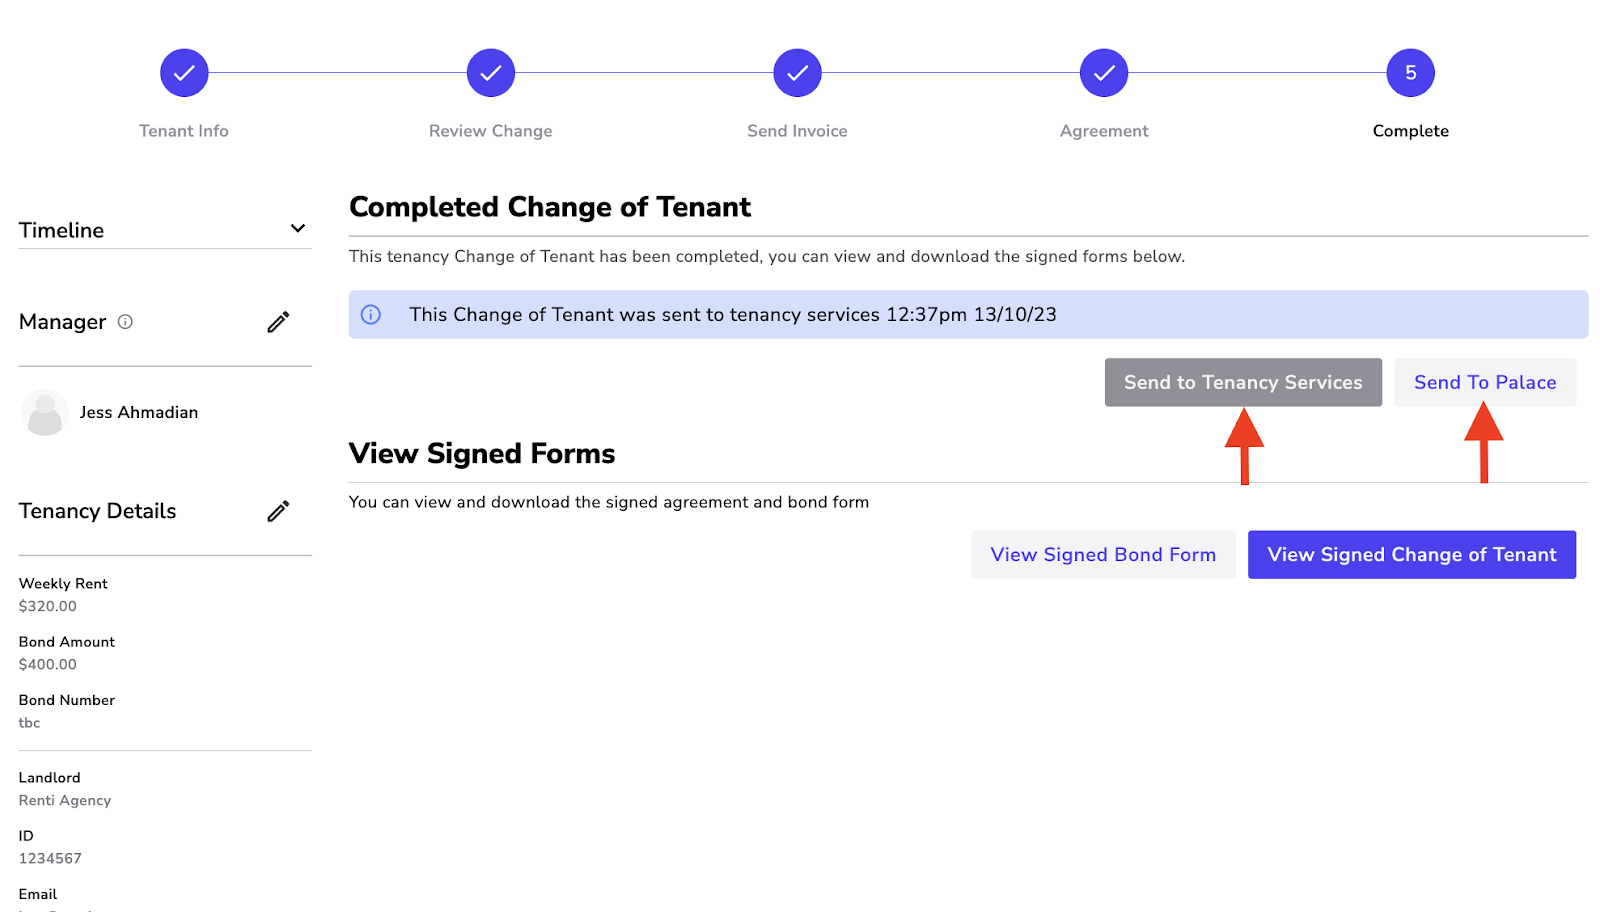
Once you have completed the signing for the Assignment or Tenant Change, you will be taken to the completed stage.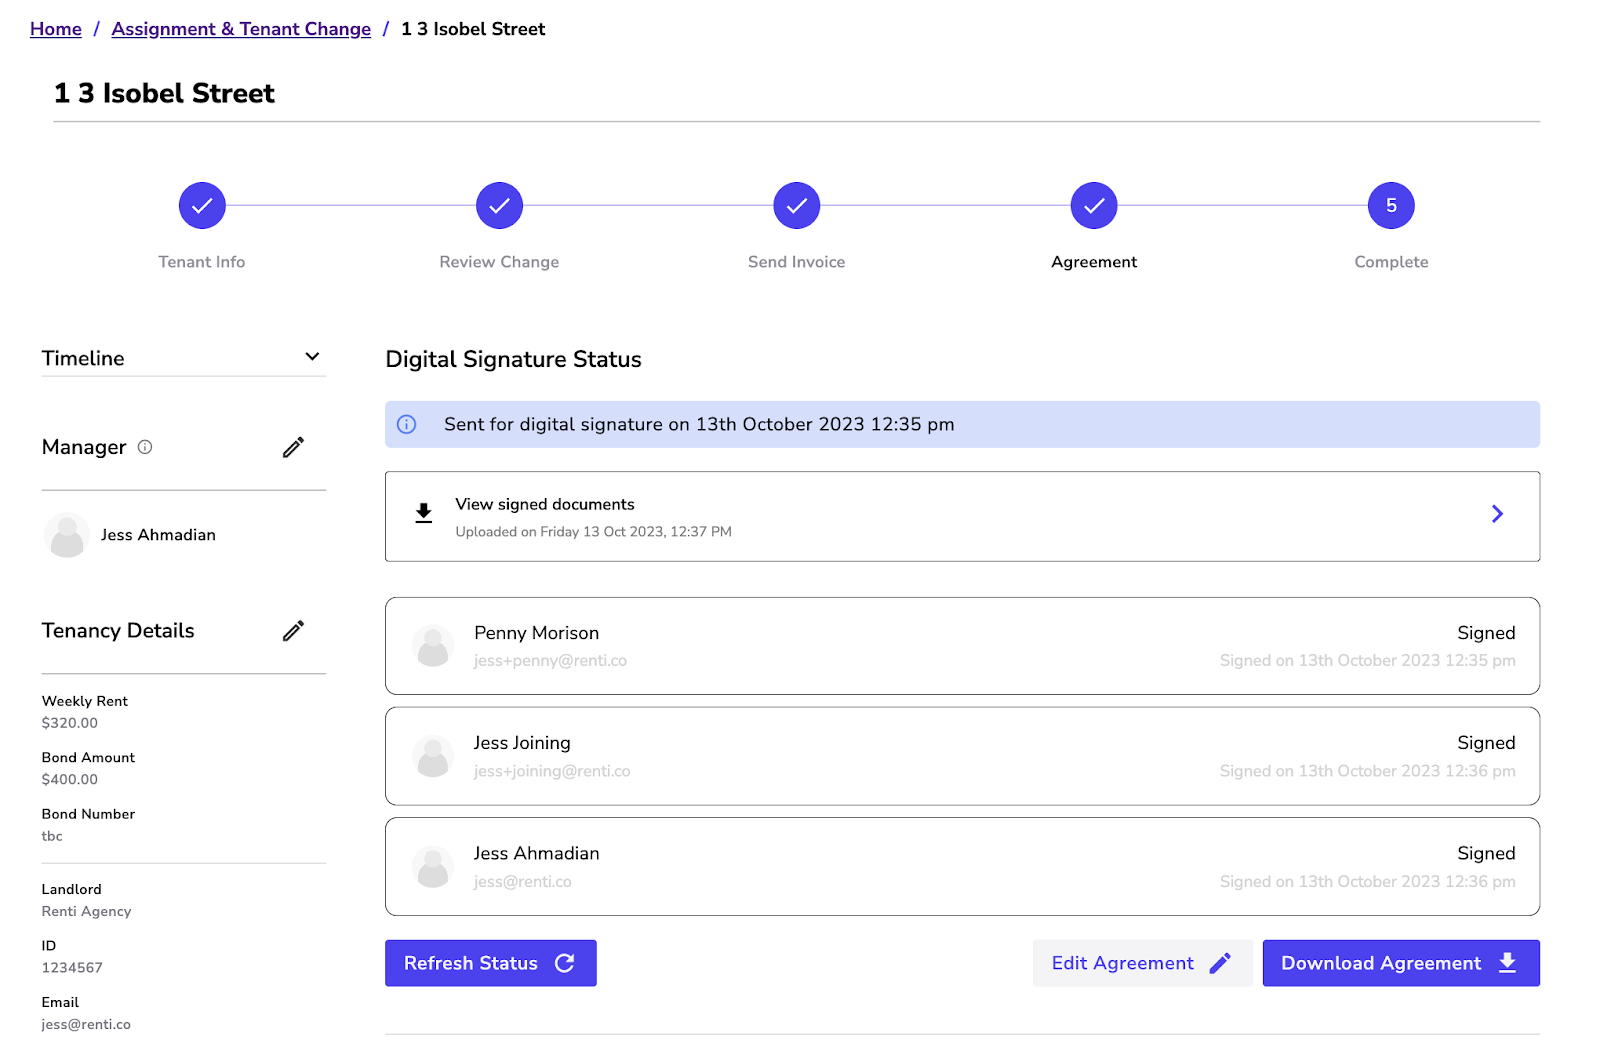
You will have the following options:
✅ Send the bond form straight to Tenancy Services
✅ If you are integrated with a PMS like Palace, you can send it to Palace.
✅ The bond form and agreement are separated, download separately, if needed.