The purpose of this tutorial is to assist in understanding which information will be visible during different stages of the application process. The applicant's information is accessible to the property manager at specific stages, ensuring that privacy guidelines are met.
This tutorial will guide you through the process of processing applications.
Resources
- Renti Help Centre contains further resources to allow you to get up to this point.
- A video tutorial of the information in this tutorial is linked below if needed.
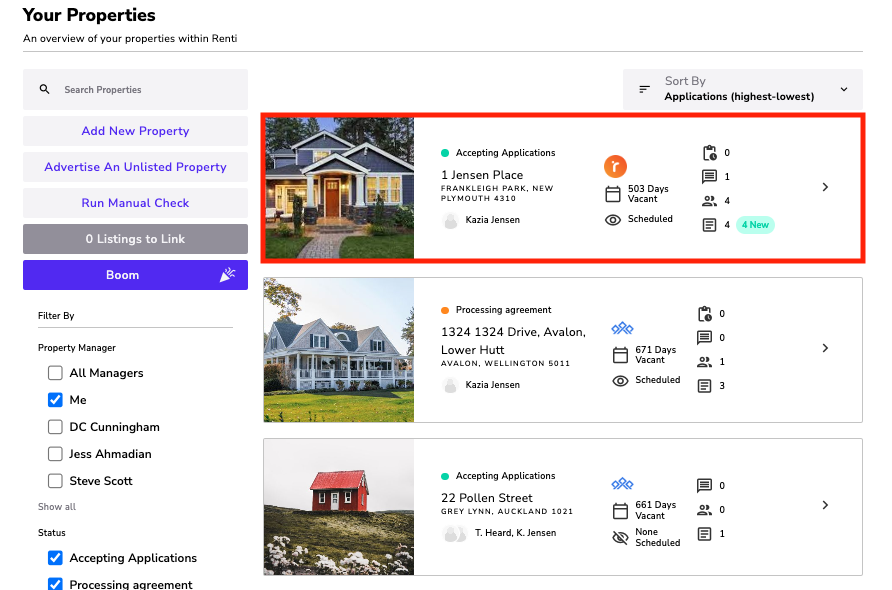
Once an application has been submitted, it will appear in Renti on the specific listing that the applicants have applied for.
- Click on the applicant's name to access their application information.
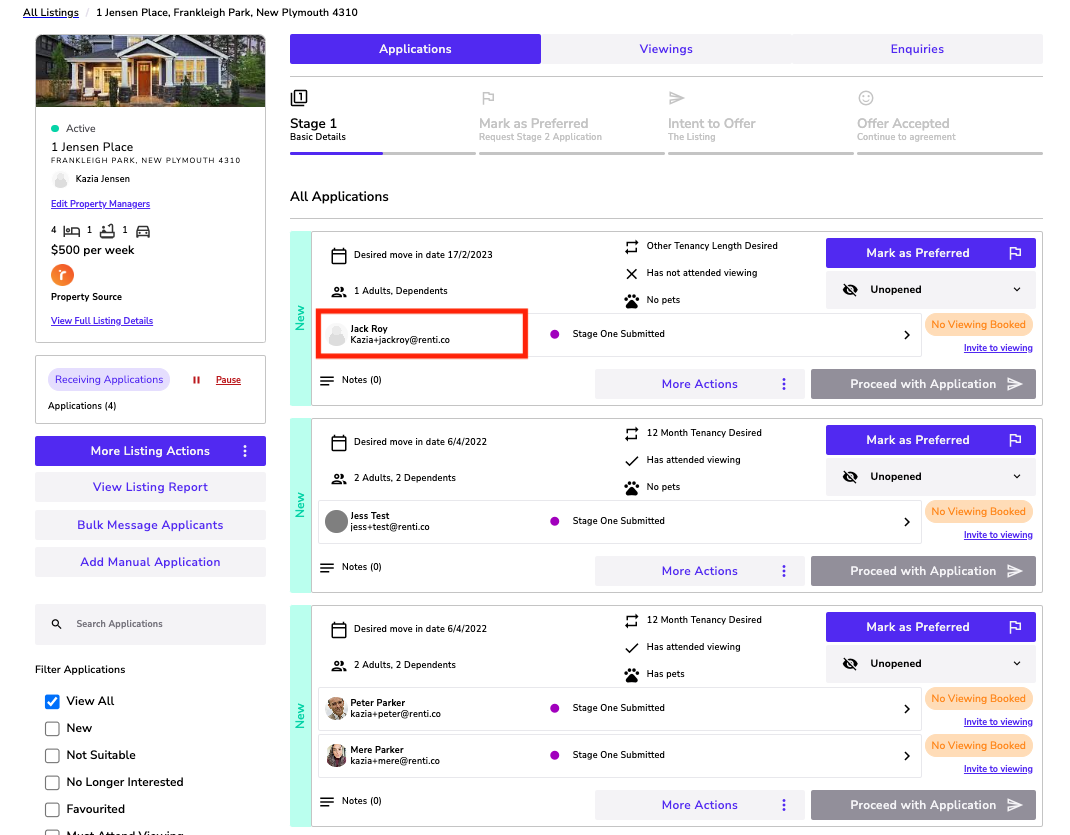
- As per the Privacy Commission's guidelines, you will receive Stage One information first.
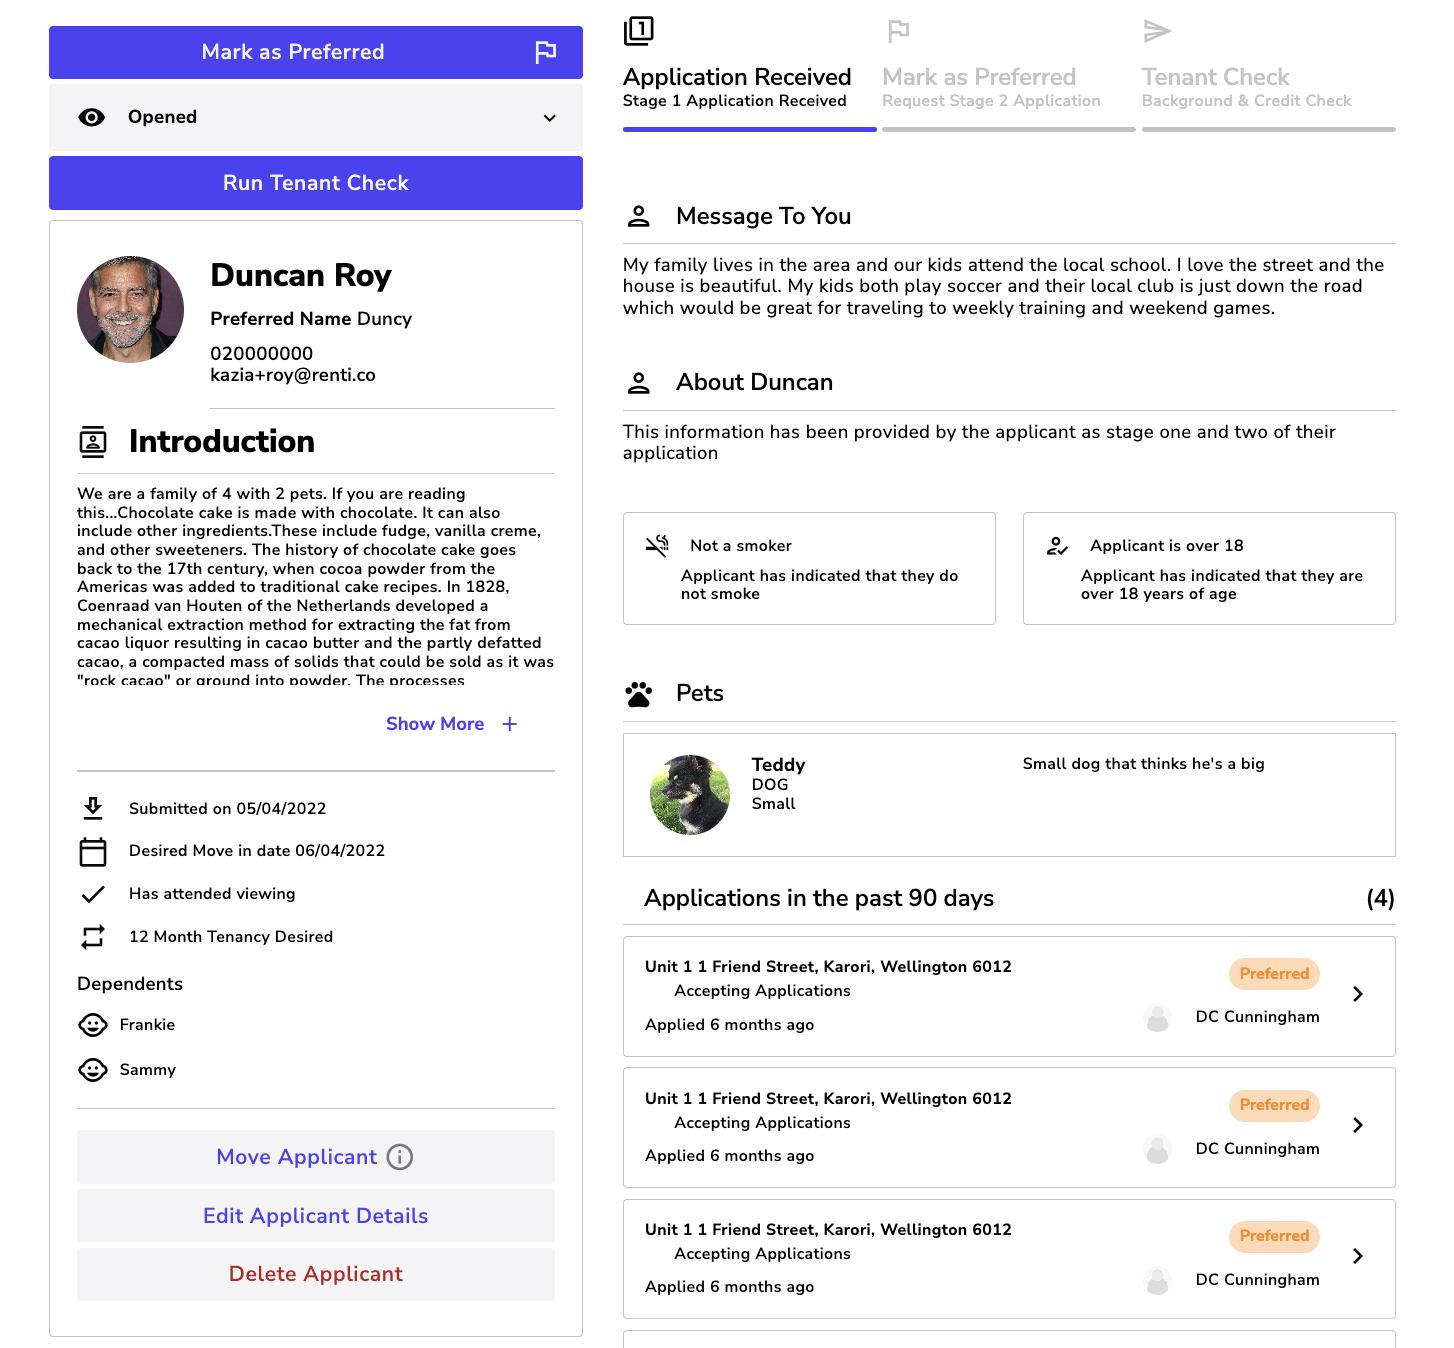
Stage One includes the following information:
- Applicant's basic details: Legal full name, email address, phone number, if they're over 18 and if they're a smoker or not.
- Applicants extra details: A preferred name and profile picture.
OPTIONAL - Introduction: This is where the applicant will enter a description of themselves.
- Message to you: The applicant may tell you specific details about this property or ask questions about the property.
OPTIONAL - Pets: Any pets that are part of the application.
- Application Details: Date application was submitted, desired move-in date, desired tenancy length, and if a viewing been attended.
- Dependants: Anyone under the age of 18 that will be tenanting the proeprty with them.
- Other Applicants: Anyone other applicants over the age of 18 who will be tenanting this property with them.
- Applications in the past 90 days: Any other properties that this applicant has applied for within your agency in the past 90 days.
- Once you are ready to access an applicant's stage two information, select the relevant application and click ‘Mark as Preferred'.
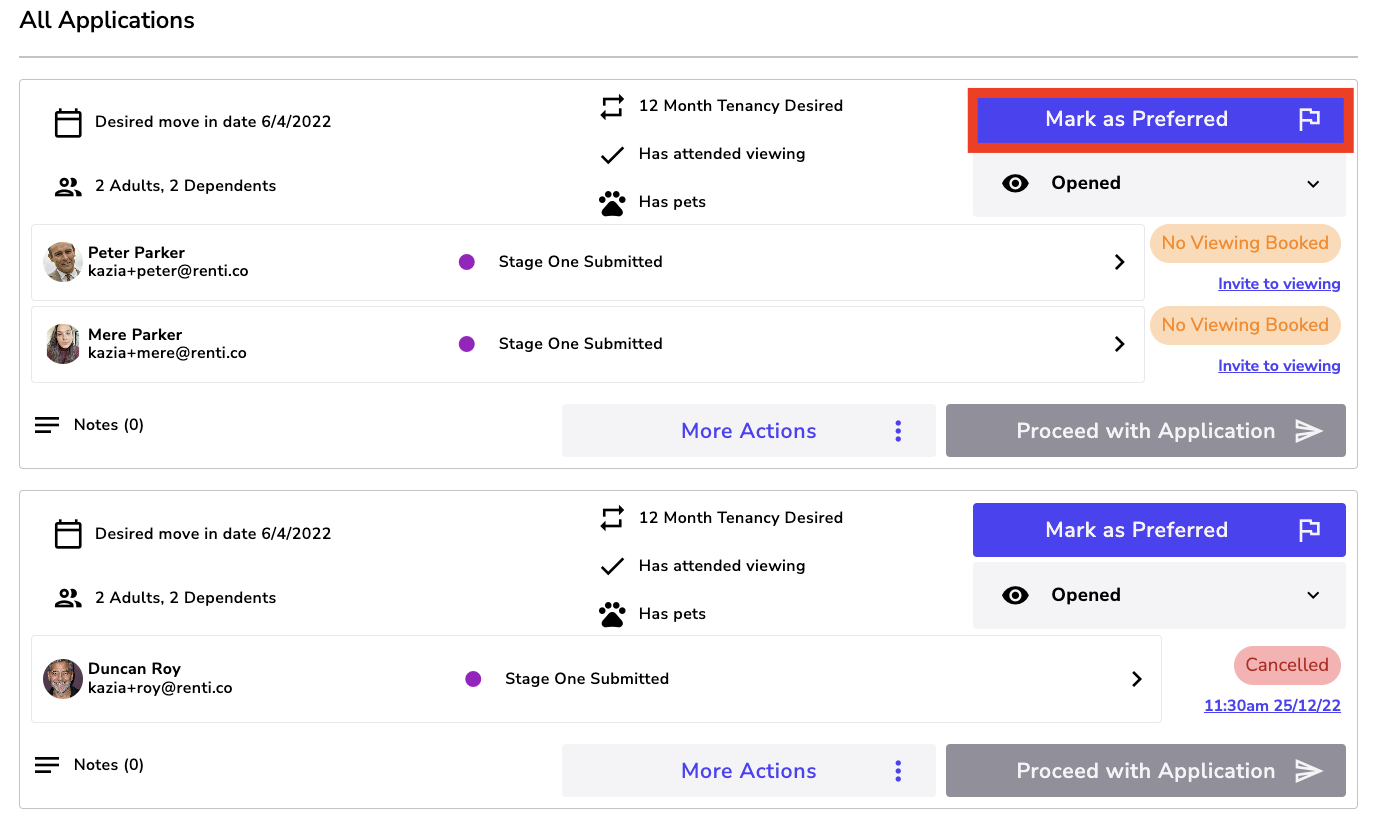
- A pop-up will appear, click the ‘Mark as Preferred' button.
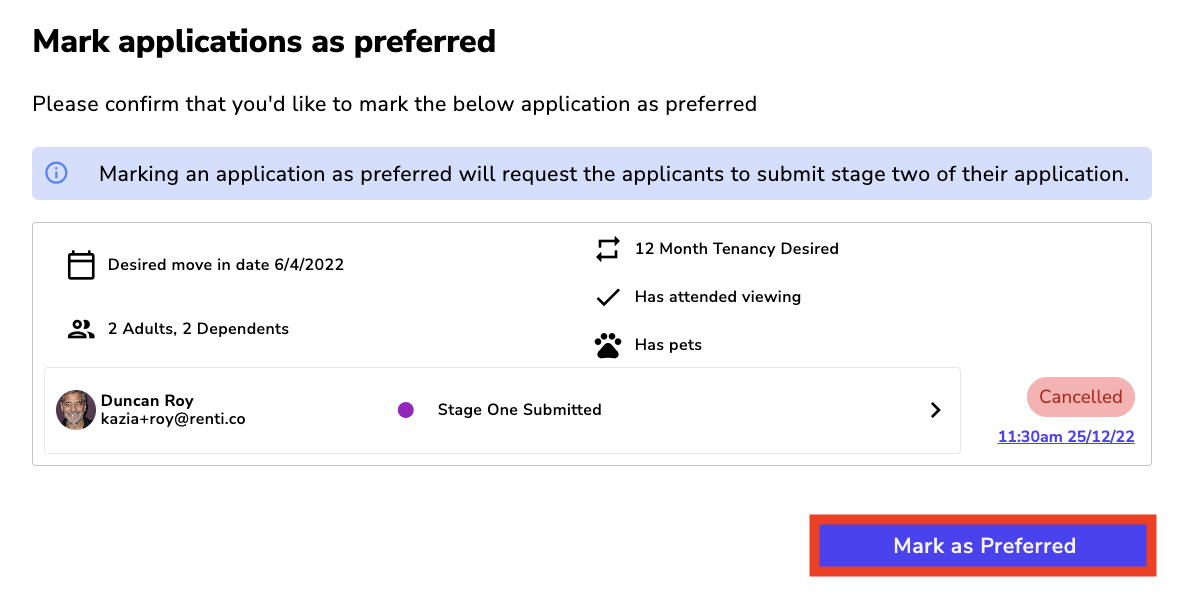
- Click the ‘Close' button.
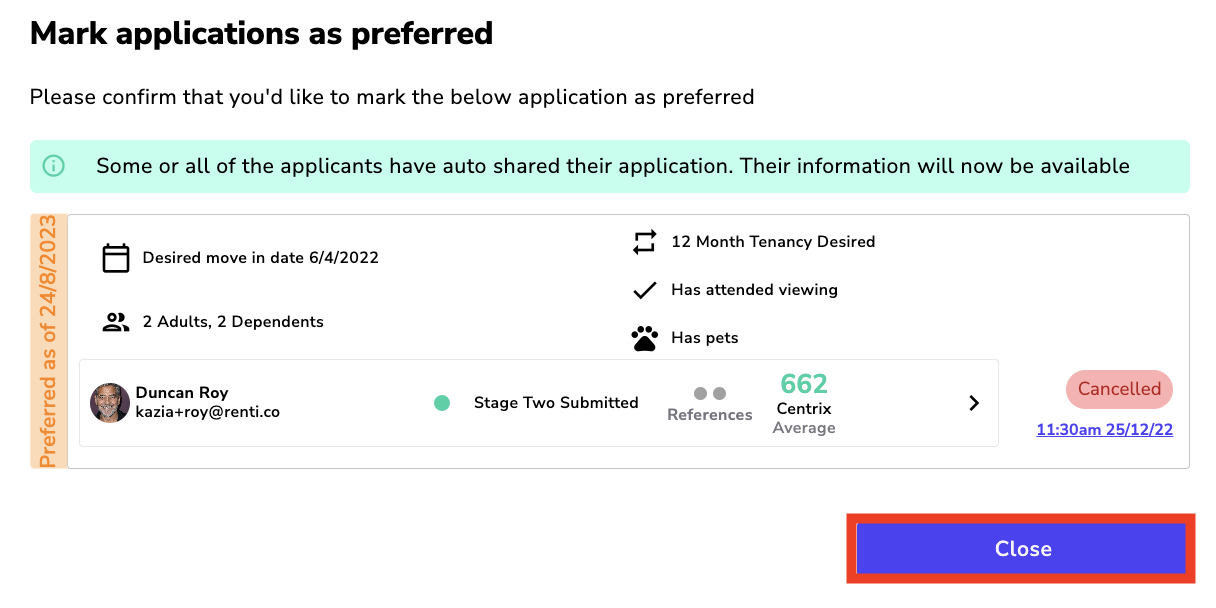
If the applicant has completed stage two of the application:
- An email is sent to the applicant(s) informing them that they have been shortlisted.
- You will be able to see the applicant's stage two information.
- The status of the applicant will change to ‘Stage Two Submitted'.
If the applicant has not completed stage two of the application:
- An email is sent to the applicant(s) informing them that to proceed with their application, they need to submit their stage two information. This can easily be done by clicking on the button in the email that is sent.
- You will be able to remind the applicants to finish their stage two information every 48 hours by clicking on the applicant's application.
- The status of the applicant will change to ‘Stage Two Requested'.
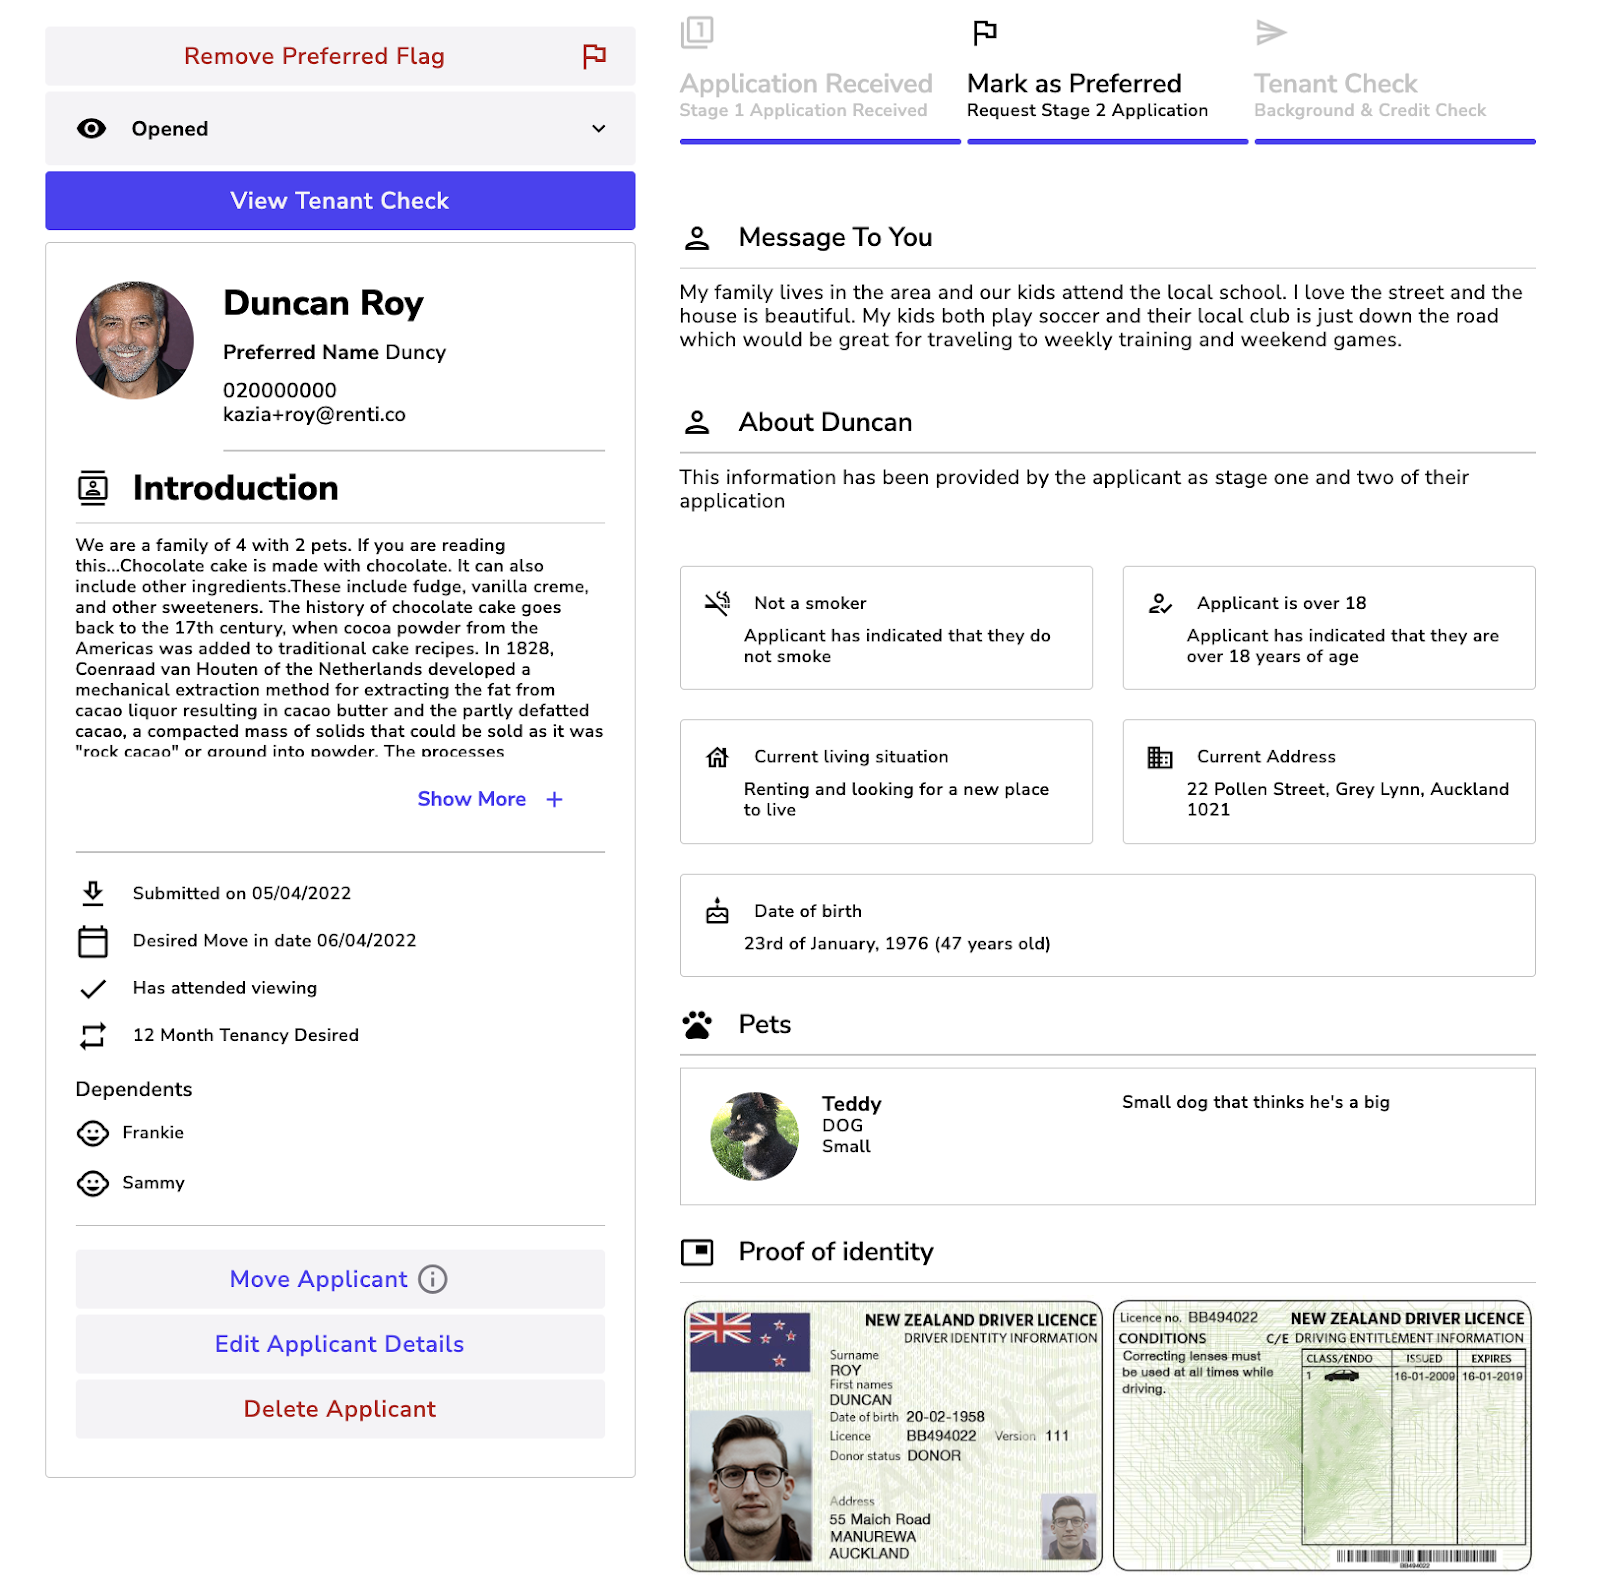
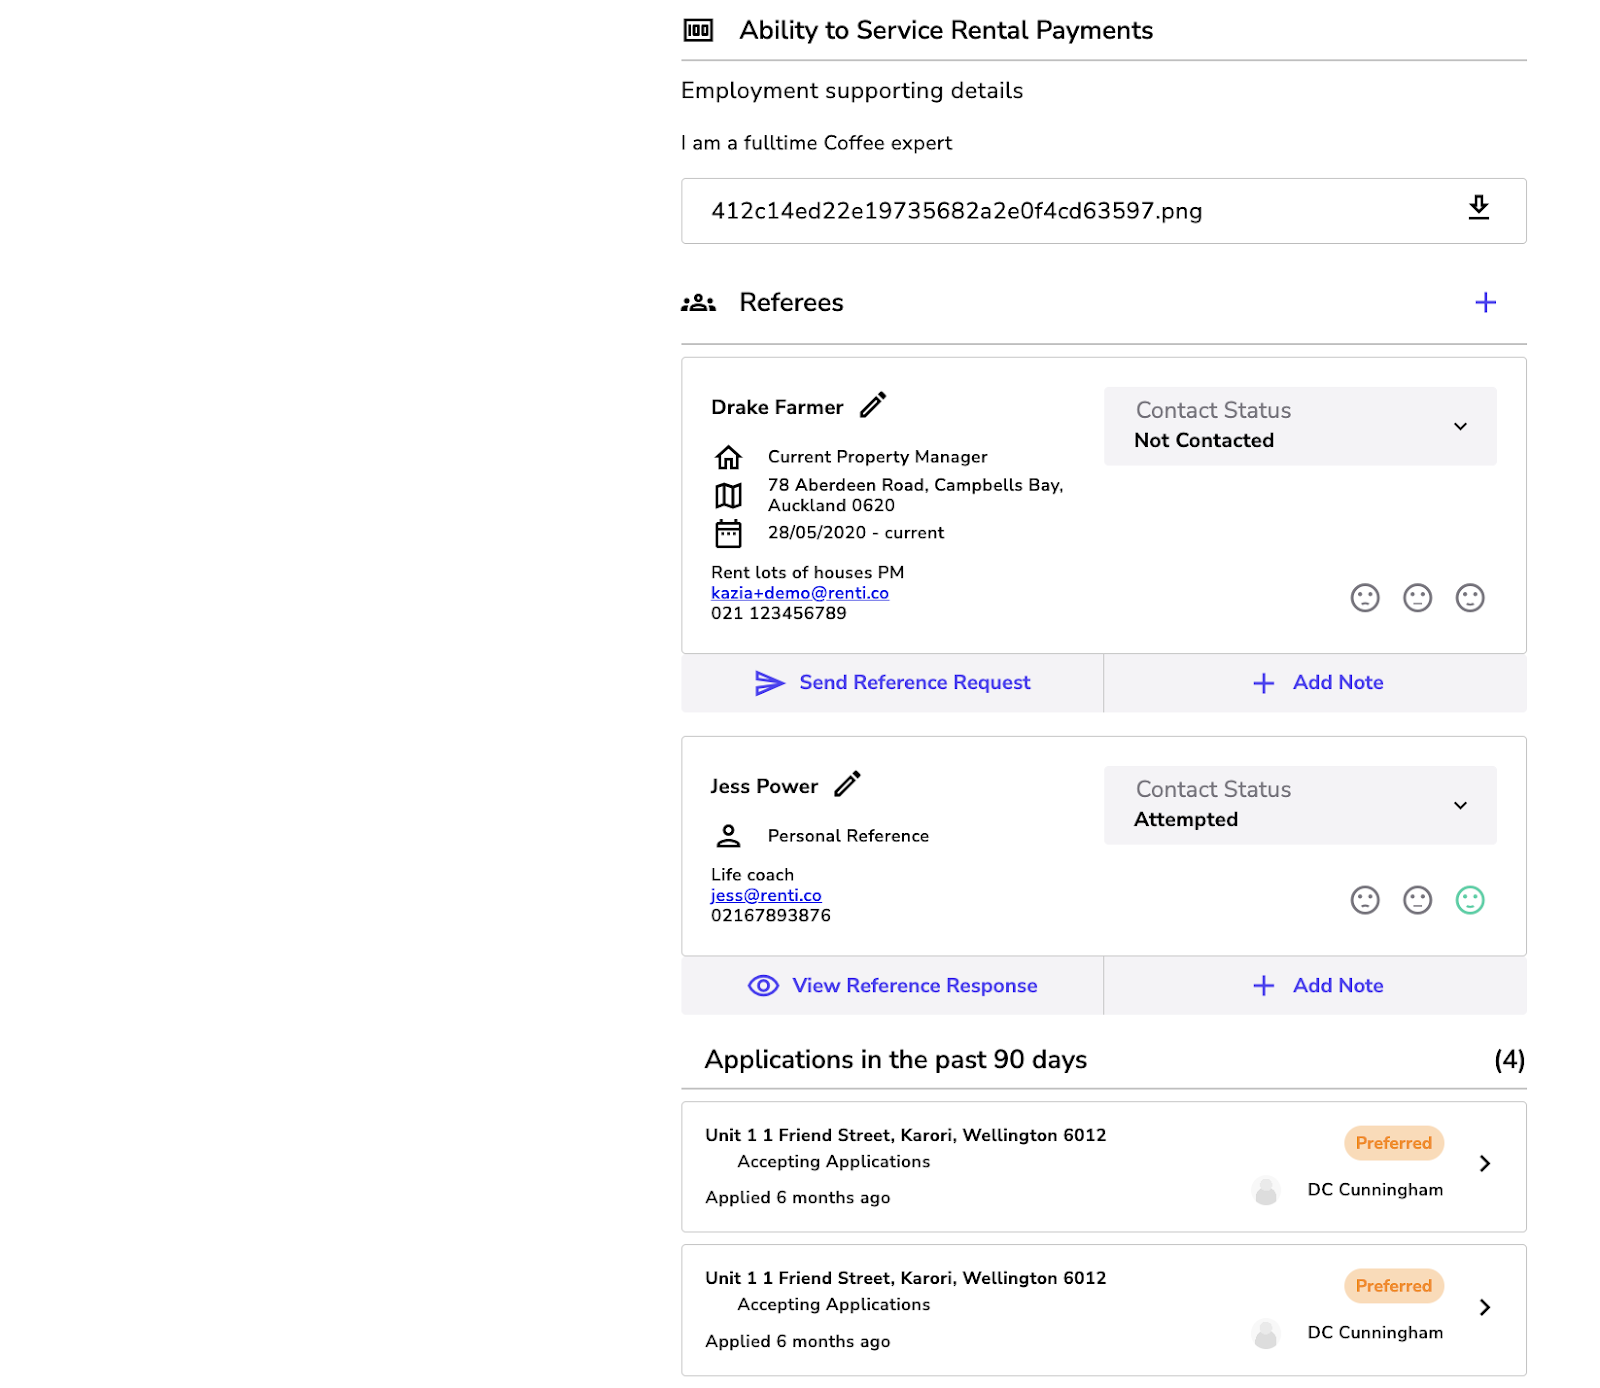
As per the Privacy Commission guidelines, you will now be able to view Stage One and Stage Two information. Stage Two includes the following information:
- Current Living situation: Current address and their current living situation (Renting, own my own home or moving out of home for the first time).
- Personal Information: Date of birth.
- Proof of Identity: The submitted ID will show here.
- Ability to service rental payment: Applicants need to select a minimum of one of the options that best reflects how the applicants can pay their rent (Receiving assistance, studying, employed, or other). For each option selected the applicant will need to provide a description and upload a supporting document or referee if employed is the selected option.
- References: You will always see a personal reference. You may see a landlord reference if the applicant has selected their living situation as "renting". Also, you may see an employment reference if they have selected "employed".
You can do reference checks in Renti in two different ways:
Email the reference:
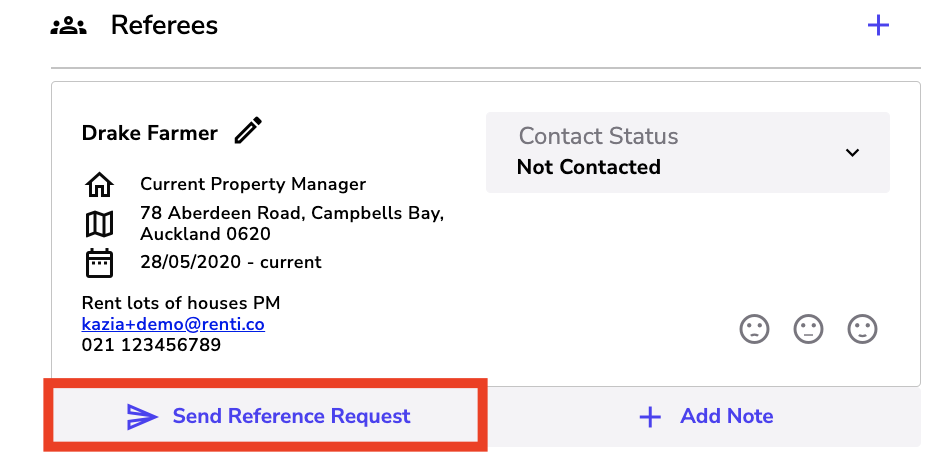
- Click the ‘Send Reference Request' button.
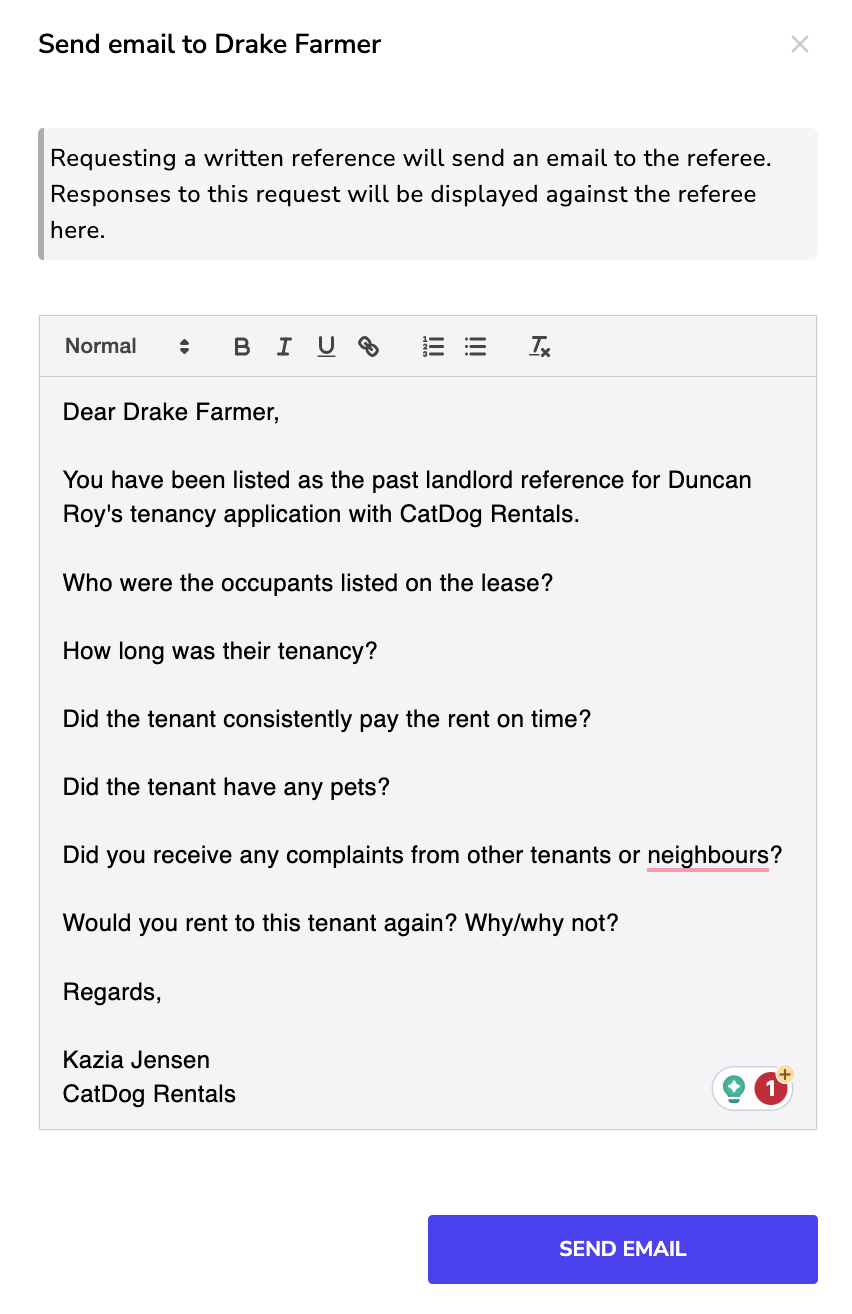
- A pop-up will appear to send an email to the reference.
- Add any extra information then click ‘Send Email'.
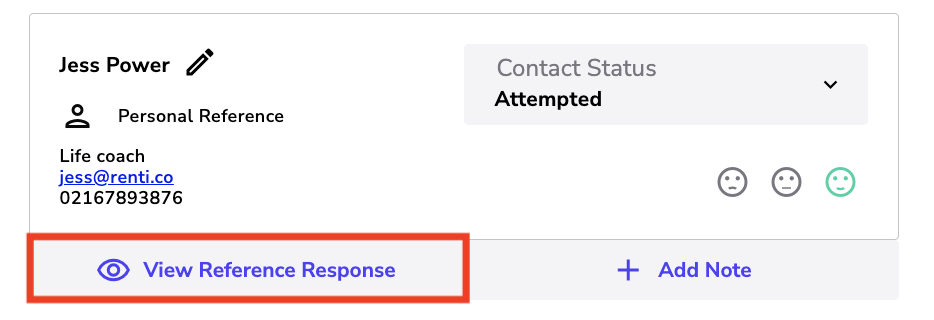
- When the reference replies, you will receive an email notification or you can also view the reply in the application.
- Click the ‘View Reference Response' button.
Contact / Call the reference:
- Under the referee details, you will find all the contact details including a contact phone number.
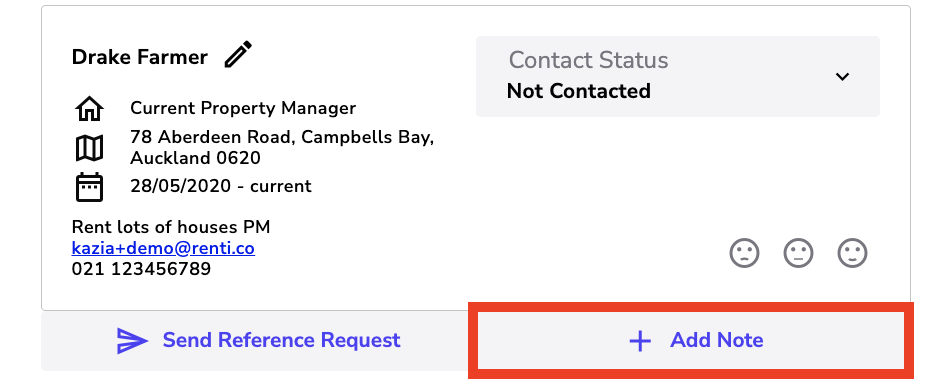
- To add reference notes to the application, click the ‘Add Note' button.
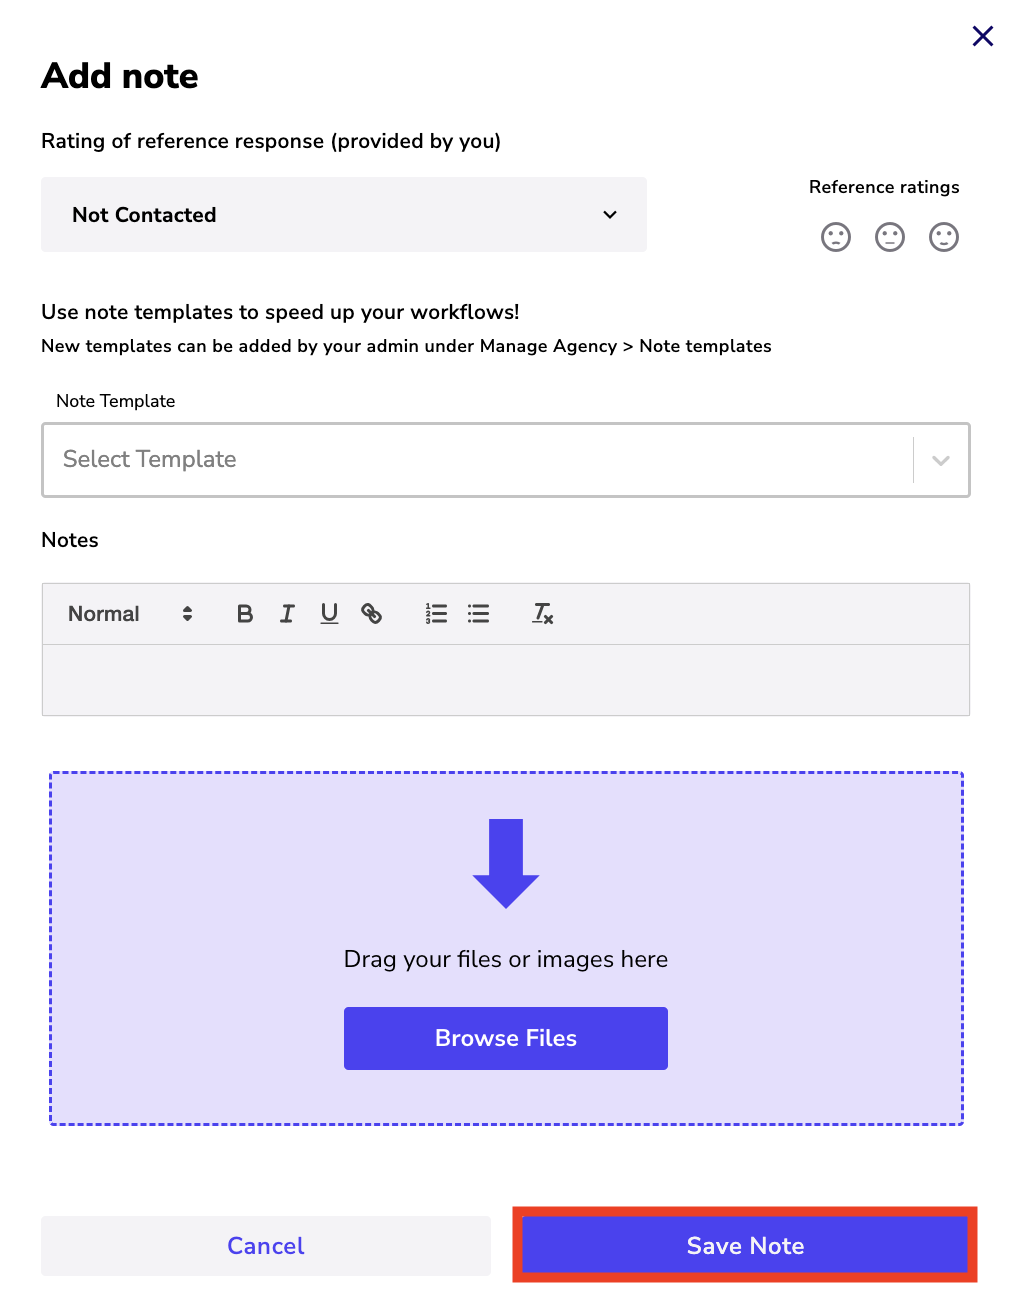
- A pop-up will appear allowing you to add notes and upload any files.
- Click the ‘Save Note' button to save this against the application.
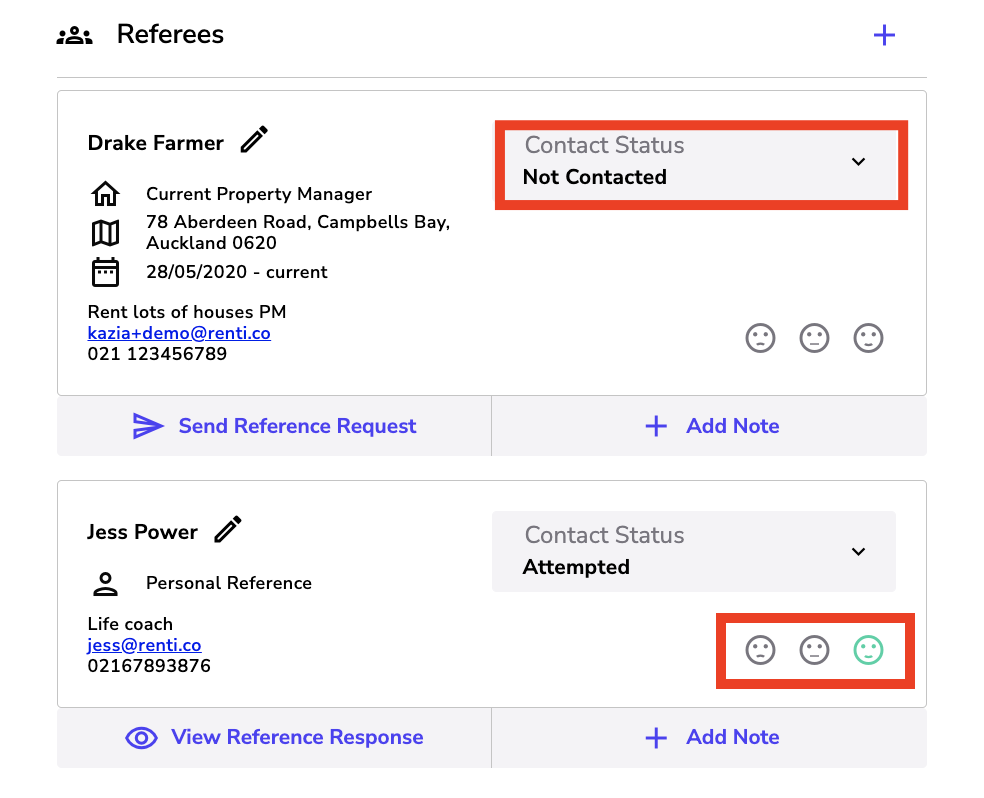
Rating References:
- Contact Status: You can keep track of any work you have done on the reference. Select from the dropdown to reflect any actions you have taken.
- Reference Ratings: Once you have completed a reference you can record a rating. Select a face that best represents the reference given.
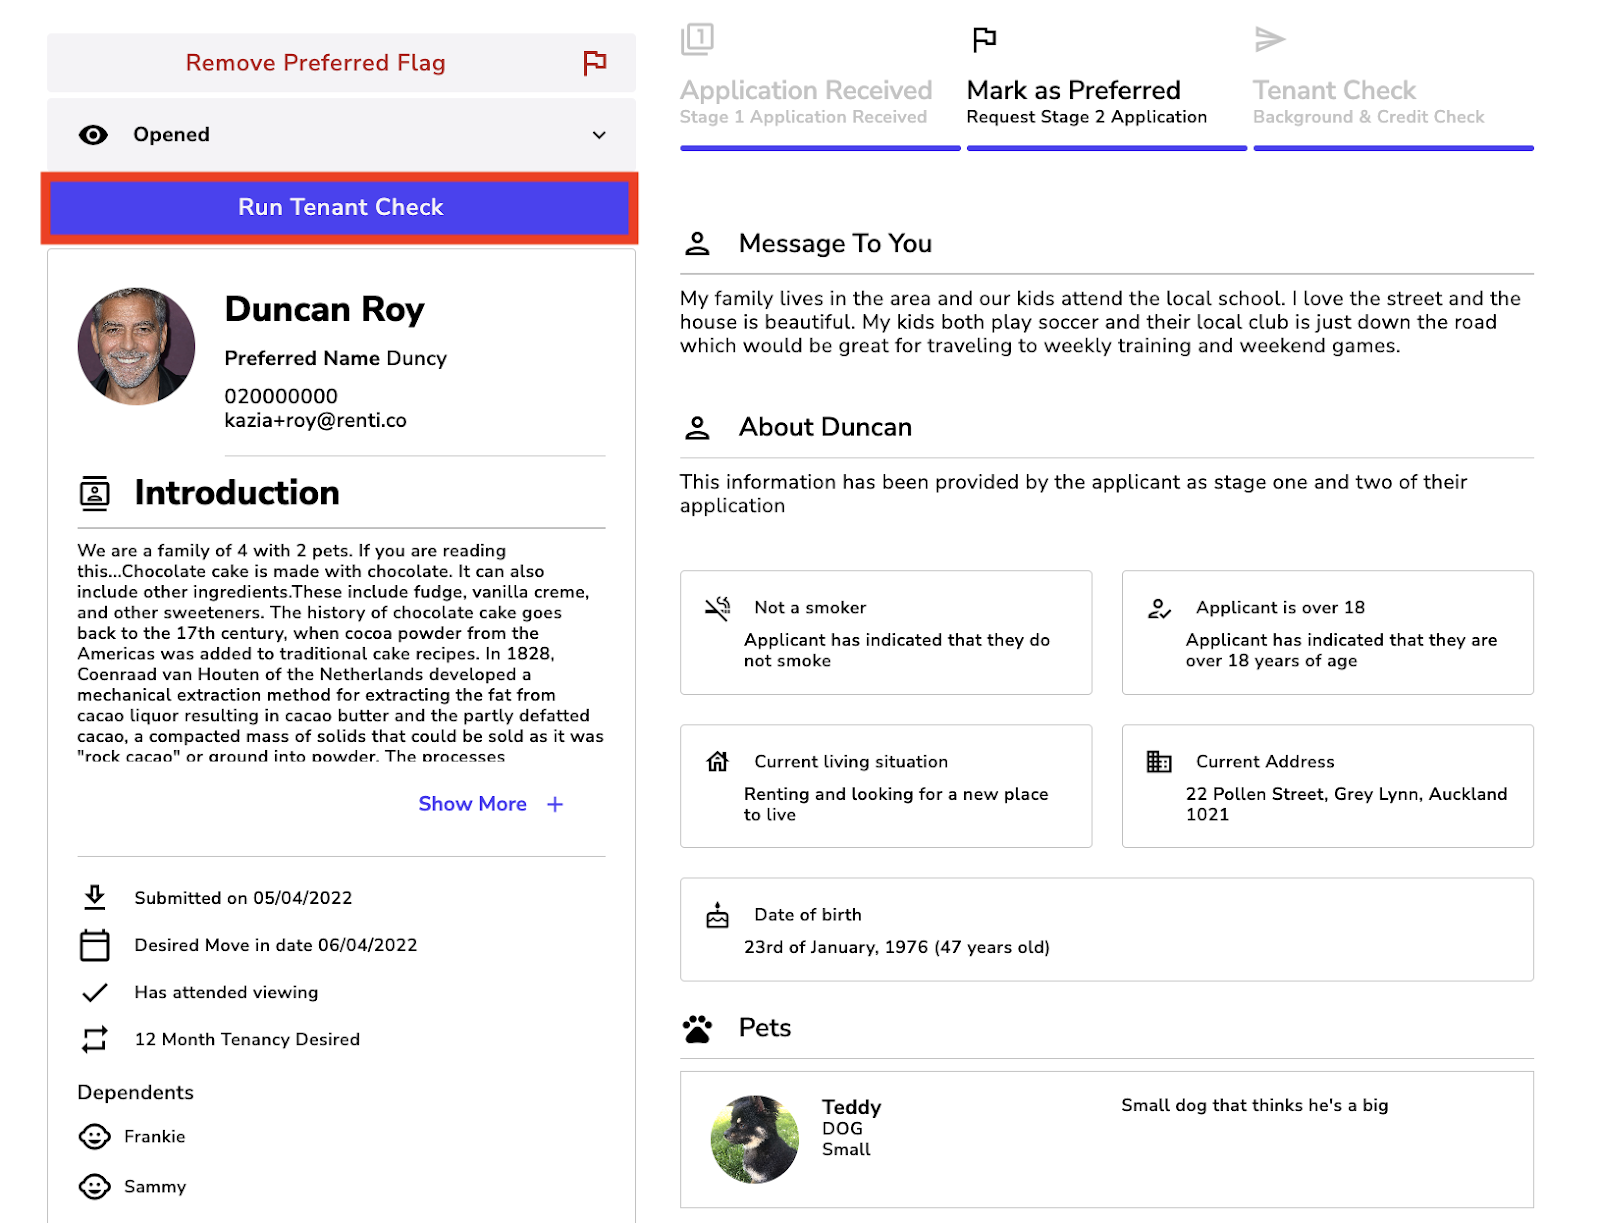
Once stage two information has been requested and submitted, you are able to run a tenant check which consists of:
- 🎫 New Zealand driver license verification checks,
- 💳 Centrix credit checks,
- 🧑⚖️ Judicial Decisions database search,
- 📋 Parole Board database search,
- 📑 Tenancy Tribunal database search,
- 🔎 Online search,
- 📰 News Outlet search.
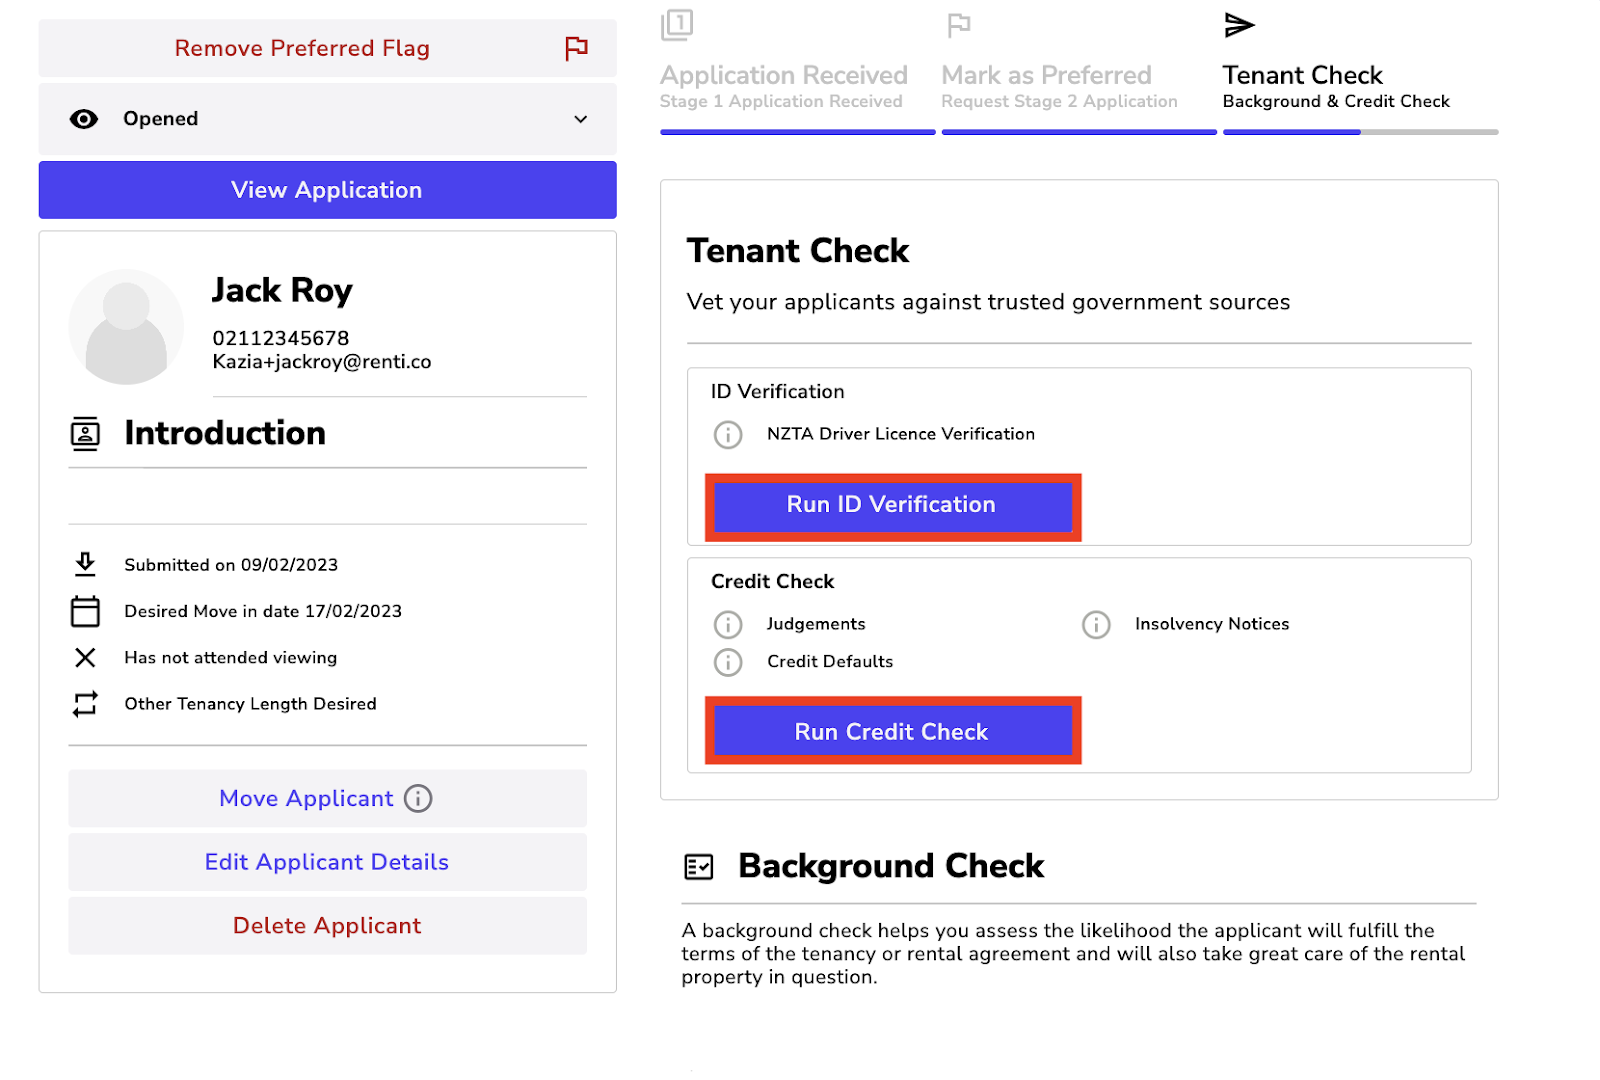
- To get started, click the ‘Run Tenant Check' button.
- You will be taken to a separate page where you will be able to run the checks and view background information.
- To run the checks click the ‘Run ID Verification' or ‘Run Credit Check' buttons.
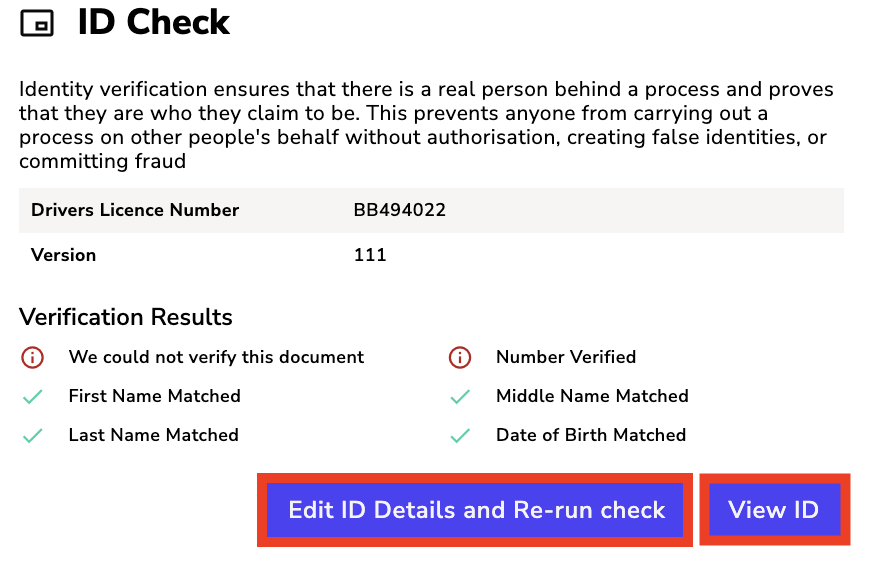
ID Check:
If the applicant has supplied an NZ driver's licence:
- This can be verified through Renti with our integration with NZTA to determine if it's a valid driver's licence with a valid full name and date of birth.
If the applicant has supplied another form of ID:
- The property manager will need to do their own verification to determine if it's a valid form of ID.
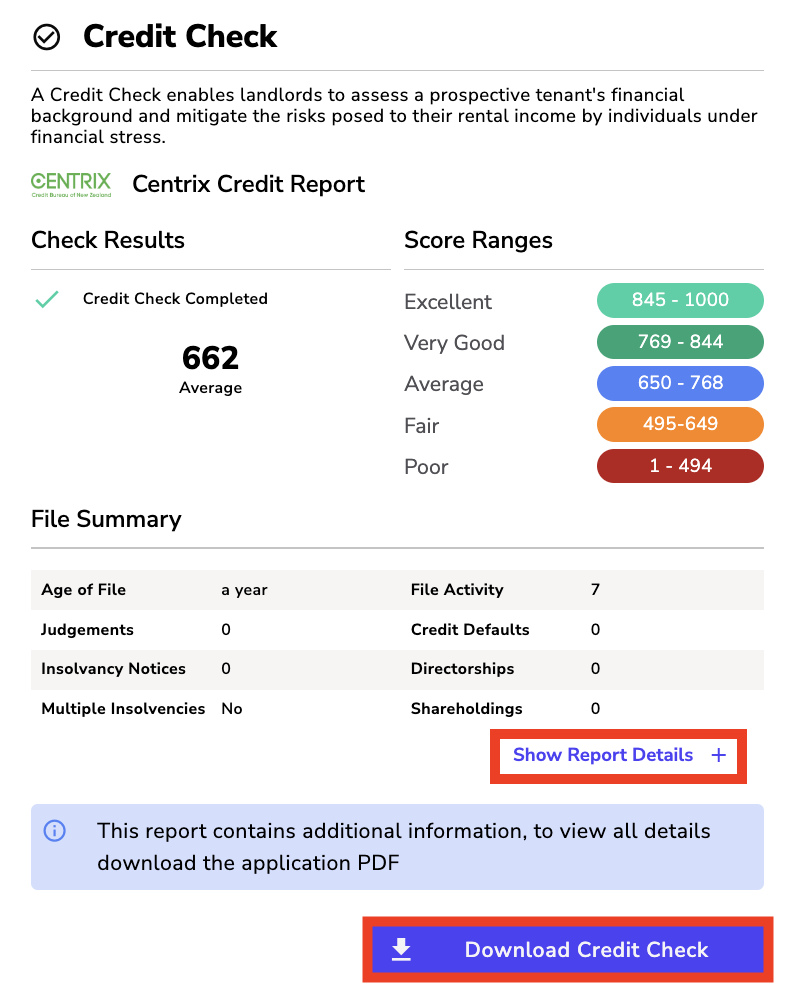
Credit Check:
- A summary of the credit check shows, to see consumer information click the ‘Show Report Details'.
- To view the full credit report click the ‘Download Credit Check' button.
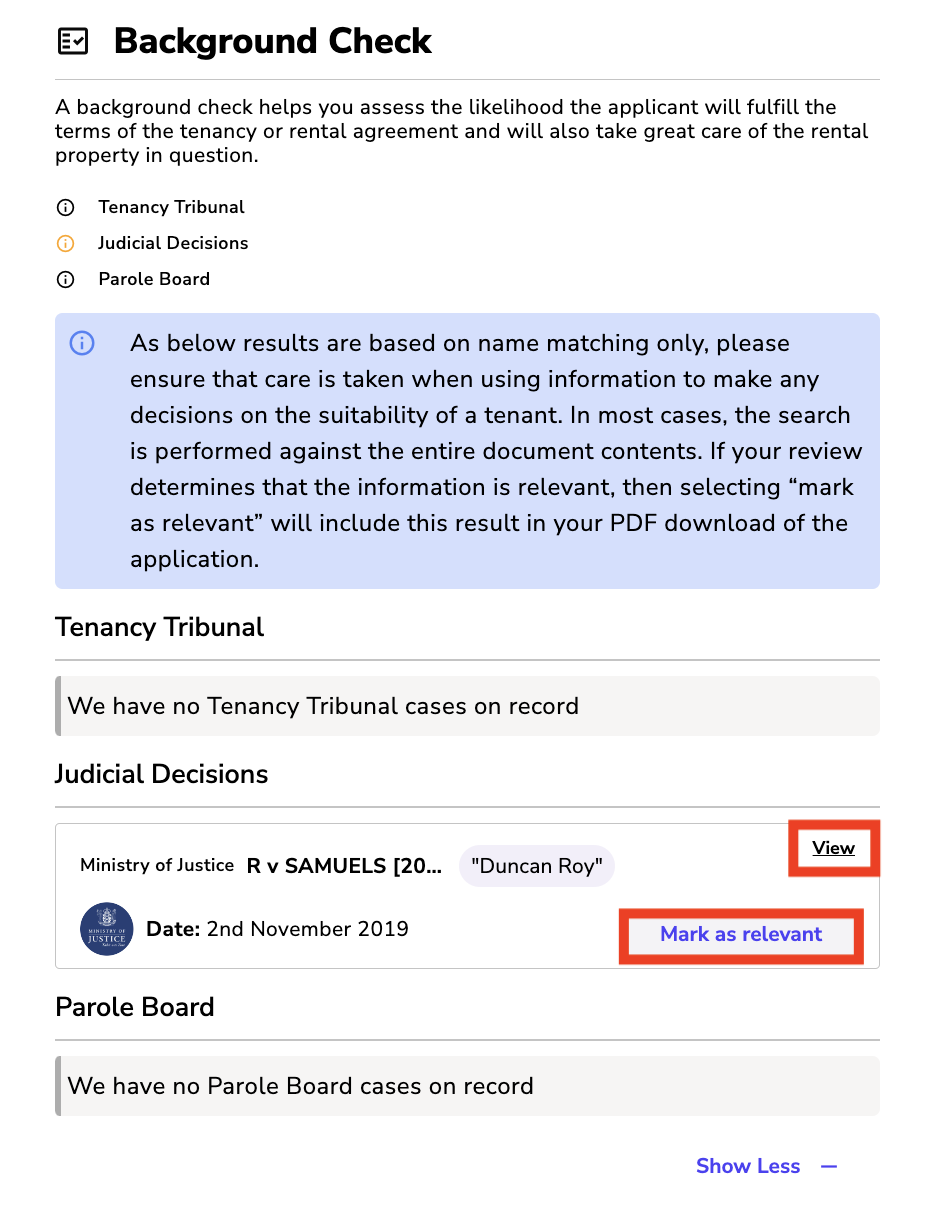
Background Check:
- Name matching is used to find the top results from the tenancy tribunal, judicial decision, and the parole board. Any results will appear under the specific heading.
- Click the 'View' button to see if the information is relevant to the applicant.
- If it is, click the 'Mark as relevant' button to include it in the PDF application document.
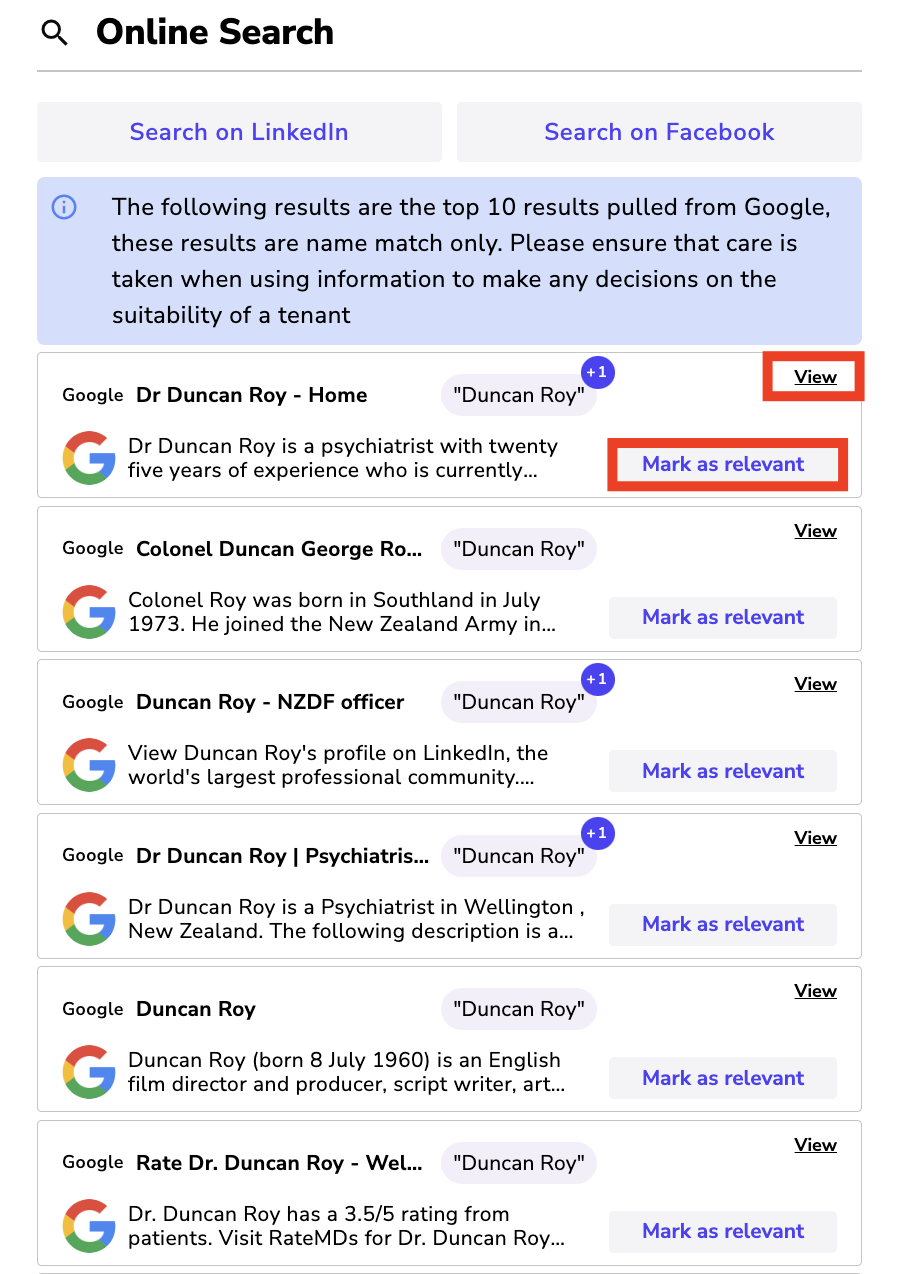
Online Search:
- Name matching is used to find the top results from Google.
- Click the 'View' button to see if the information is relevant to the applicant.
- If it is, click the 'Mark as relevant' button to include it in the PDF application document.
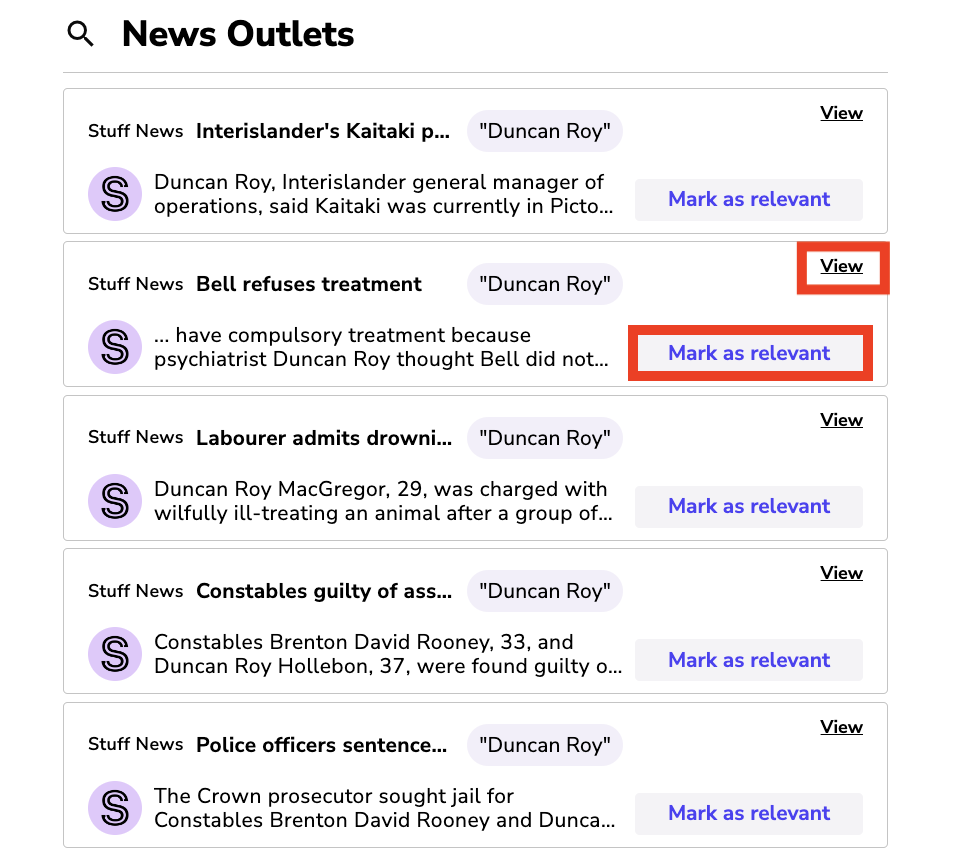
News Outlets:
- Using name matching the top results are pulled from a variety of news outlets.
- Click the ‘View' button to see the information and determine if it is relevant to the applicant.
- If it is you can click the ‘Mark as relevant' button to have it included on the PDF application document.
